Einleitung
Wenn die Pumpe läuft, aber der Wasserfluss gestört ist muss vielleicht dieses Ventil getauscht werden.
Was du brauchst
-
-
Stelle das Gerät auf den Kopf.
-
Die Bodenplatte ist mit vier 12 mm Kreuzschlitzschrauben #2 in den Ecken befestigt. Schraube sie heraus.
-
Hebe die Bodenplatte weg oder drehe das Gerät wieder um und lasse sie herausfallen.
At least on my unit, those screws weren't Phillips, but Torx Tamperproof T20! Shame on you, De'Longhi!
I also had the Tamperproof Torx on mine - I used a Dremel tool with a small round metal bit and just carefully plunged down on the little nub in the center that makes it tamperproof. Only need to grind it down a millimeter or so, as there isn't much torque on these screws and the torx bit needs just a little depth to grab on it good enough. If you have the tools handy it saves having to buy the tamperproof bits online.
-
-
-
Stelle die Maschine auf den Kopf, die Vorderseite zeigt zu dir.
-
Auf der Unterseite des Oberteils findest du zwei 52 mm Kreuzschlitz #2 Schrauben. Drehen sie heraus.
-
-
-
Stelle das Gerät wieder aufrecht.
-
Auf der Oberseite des Oberteils findest du zwei 52 mm Kreuzschlitz #2 Schrauben. Drehen sie heraus.
-
-
-
-
Setze zwei Plastiköffnungswerkzeuge unter den Knopf auf der Oberseite.
-
Hebele mit beiden Werkzeugen den Knopf hoch.
-
-
-
Setze ein Plastiköffnungswerkzeug in den Spalt an der hinteren Abdeckung, wenn du sie hochhebst.
-
Setze in gleicher Weise im Fach des Wassertanks das Werkzeug von innen ein.
-
-
-
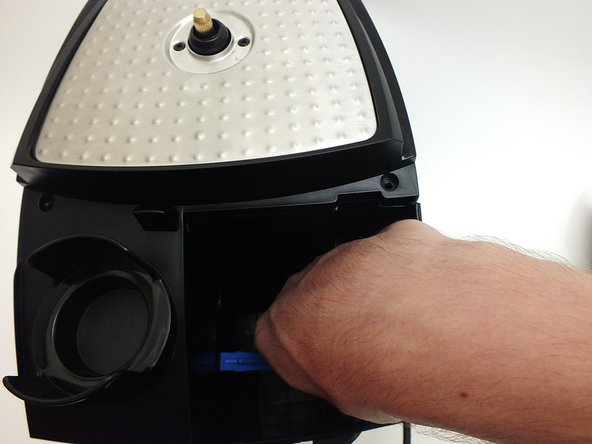
Jetzt kannst du den Deckel hochheben.
-
Greife mit einer Hand auf der Rückseite, mit der anderen vorne und hebe den Deckel hoch.
-
-
-
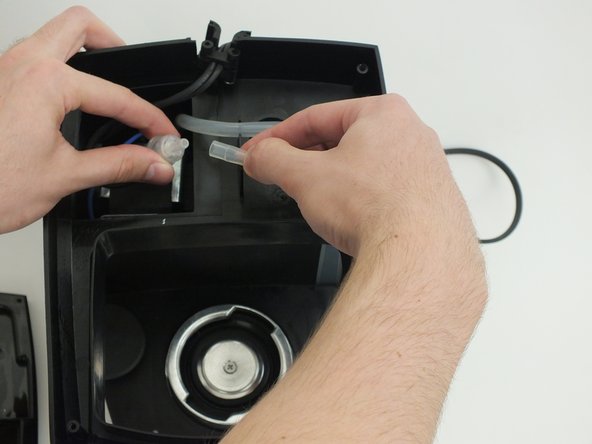
Stelle die Maschine auf den Kopf. Ziehe den Schlauch, der vom Wassertank kommt ab.
There are two tubes connected to the water reservoir hole. The one in the first pic is the one that goes to the water valve, which is the one that you pull through to the top. The one in the second pic is the short one from the bottom of the pump that can detached from the water hole and left in place, to be transferred later to the new pump. Detaching it from the from the filter as shown adds to the impression that this is the tube to the water valve to be pulled through to the top in the next step, which the user quickly finds is impossible, it’s too short.
-
-
-
Ziehe den Schlauch durch die Abteilung mit der Pumpe, so dass er oben frei wird.
-
Drehe das Ventil gegen den Uhrzeigersinn und ziehe es dabei vorsichtig ab.
-


Um dein Gerät wieder zusammen zu setzen folge den Schritten in umgekehrter Reihenfolge.
Um dein Gerät wieder zusammen zu setzen folge den Schritten in umgekehrter Reihenfolge.
Rückgängig: Ich habe diese Anleitung nicht absolviert.
5 weitere Nutzer:innen haben diese Anleitung absolviert.
Besonderer Dank geht an diese Übersetzer:innen:
100%
VauWeh hilft uns, die Welt in Ordnung zu bringen! Wie kann ich mithelfen?
Hier starten ›
Team

Cal Poly, Team 4-2, Maness Fall 2015 Mitglied von Cal Poly, Team 4-2, Maness Fall 2015
CPSU-MANESS-F15S4G2
4 Mitglieder
25 Anleitungen geschrieben
4 Kommentare
I done this earlier today without the guide after it started to leak after descaling the machine , so i fixed it by taking valve apart an putting back together it worked once before leaking again , im just concerned it will just go again if i replace the safety valve , im wondering if scale has moved an is blocking and causing valve to leak? any ideas?
Great description! Is the water valve ever used to control brew pressure?
Great guide!, carefull the water valve has inside, two small orings, don´t loss it. Muy buena guia, hice todo lo indicado y funciono perfectamente, mi máquina comenzo a gotear agua por dentro y gracias a este manual pude encontrar la falla, que es la válvula, tengo con la maquina mas de 7 años y hasta ahora fallo, la válvula por ser de plastico no se puede reparar, pero se consiguen las partes en ereplacementparts.com. Solo un comentario la valvula tiene 2 orings pequeños, así que tengan cuidado cuando la saquen no se les pierdan.
I update my comment, the spare part for the valve has arrived (ereplacementparts.com), I replaced it and everything is perfect, I can drink my espresso again.
Actualizo mi comentario, ya me llego el repuesto de la válvula (ereplacementparts.com), lo reemplace y todo perfecto, de nuevo puedo tomar mi expresso.
My model EC155, serial #43222 requires a Security Torx vs. a #2 Phillips to remove the 12mm screws at each corner of the bottom panel
Mike Hines - Antwort