Einleitung
If you need to replace the fan assembly in your Dell Alienware 15 R3, this guide will help you do so.
Before you start the repair, be sure to unplug the charger and power off the laptop.
Was du brauchst
-
-
Remove the 6 M2.5x13mm screws that are holding the back cover on.
-
Remove the 1 M2x3mm at the rear of the device that is holding the back cover on.
-
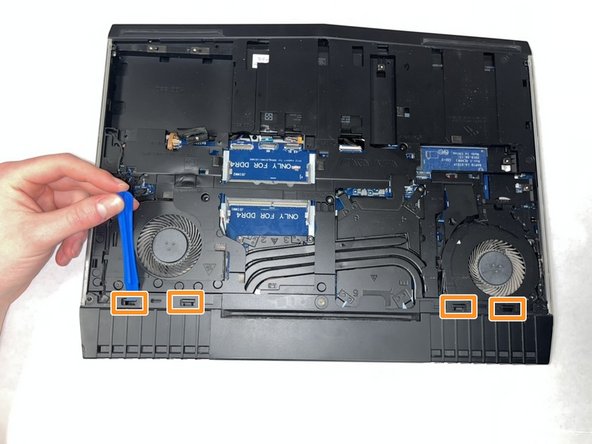
Gently pry on the sides of the back cover with the iFxit Opening Tool to release tabs.
-
Pull up and backwards to remove the back cover from the computer.
-
-
-
-
Unscrew the M2x3mm screw holding down the wireless card.
-
Lift and slide the wireless card from its slot.
-
-
-
Remove the two M2.5x6mm screws connecting the rear cover to the computer.
-
Gently pry the rear cover with the iFixit Opening Tool to release the tabs 2 tabs on each side.
-
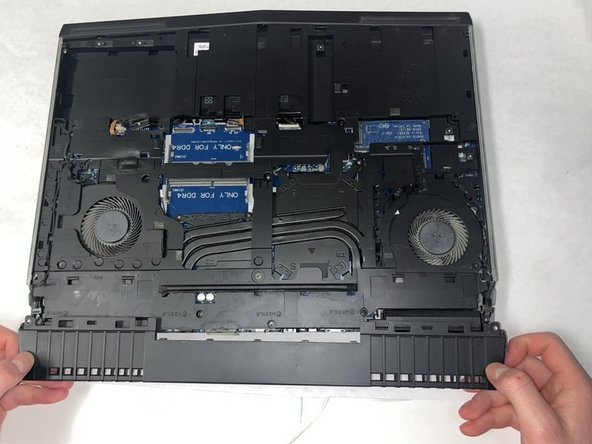
Slide the rear cover off of the computer.
-
-
-
Remove light cable between the hard drive port and the fan.
-
Lift the latches and remove the keyboard cable, keyboard backlight cable, and the macro keys cable.
-
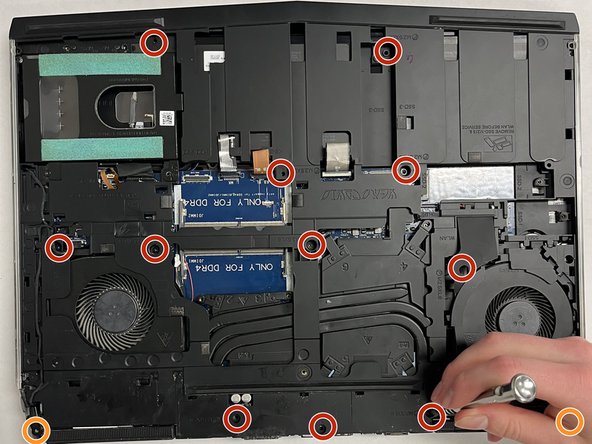
Remove the 11 M2.5x8mm screws that secure the computer base.
-
Remove the 2 M2x3mm screws.
-
-
-
In the sequential order that is indicated on the cooler assembly, remove the 7 M2x3mm screws securing the cooler assembly to the system board.
-
Disconnect the left and right fan cables from the system board.
-
Lift to remove the cooler assembly from the computer.
-


To reassemble your device, follow these instructions in reverse order.
To reassemble your device, follow these instructions in reverse order.
Team

IUPUI, Team 2-4, Harley Spring 2023 Mitglied von IUPUI, Team 2-4, Harley Spring 2023
IUPUI-HARLEY-S23S2G4
3 Mitglieder
3 Anleitungen geschrieben
2 Kommentare
WARNING: This guide is missing many, many steps. You will have to completely remove the motherboard to disconnect the fan power cables. You will also need to clean the CPU and GPU and apply new thermal paste.
Also had to remove any NVMe drives to get the full backplate off and the HDD just to remove the weight from the backplate before prying it off.