Diese Version enthält möglicherweise inkorrekte Änderungen. Wechsle zur letzten geprüften Version.
Was du brauchst
-
Dieser Schritt ist noch nicht übersetzt. Hilf mit, ihn zu übersetzen!
-
Disconnect the Mini-Card antenna cables from the Mini-Card(s).
-
-
Dieser Schritt ist noch nicht übersetzt. Hilf mit, ihn zu übersetzen!
-
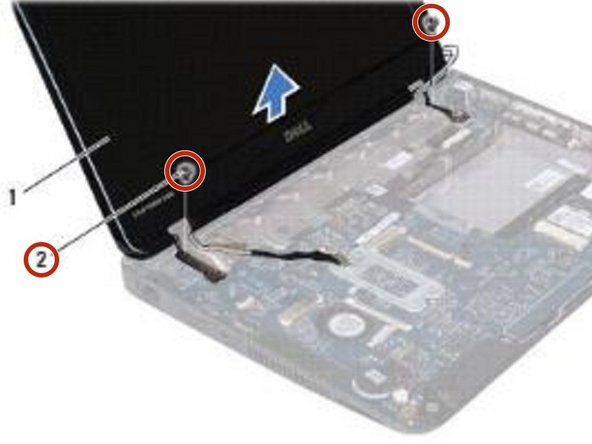
Remove the two screws (one on each side) that secure the display assembly to the computer base.
-
-
Dieser Schritt ist noch nicht übersetzt. Hilf mit, ihn zu übersetzen!
-
Lift and remove the display assembly off the computer base.
-
-
-
Dieser Schritt ist noch nicht übersetzt. Hilf mit, ihn zu übersetzen!
-
Place the NEW display assembly in position and replace the two screws (one on each side) that secure the display assembly to the computer base.
-
-
Dieser Schritt ist noch nicht übersetzt. Hilf mit, ihn zu übersetzen!
-
Connect the display cable to the system board connector.
-
-
Dieser Schritt ist noch nicht übersetzt. Hilf mit, ihn zu übersetzen!
-
Route the Mini-Card antenna cables through the routing guides on the computer base.
-
-
Dieser Schritt ist noch nicht übersetzt. Hilf mit, ihn zu übersetzen!
-
Connect the Mini-Card antenna cables to the Mini-Card(s).
-


Team

RampUP America, Inc. Mitglied von RampUP America, Inc.
Community
42 Mitglieder
1.985 Anleitungen geschrieben