Einleitung
If you're experiencing overheating issues with your Dell Inspiron 13 7378, a quick and effective solution is to replace the fan. In this fast-fix, we'll guide you through the process of safely and efficiently replacing the fan in your laptop, helping to restore optimal cooling performance and prevent potential damage to your device. Let's get started!
Was du brauchst
-
-
Set the laptop with its underside facing up for improved accessibility.
-
-
-
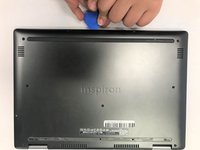
Using a Phillips #00 screwdriver, extract the nine 3 mm screws located on the back of the laptop.
-
-
-
-
Carefully pry open the back of the back of the laptop using opening picks.
-
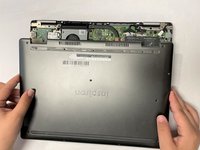
Carefully raise and detach the back cover from the laptop.
-
-
-
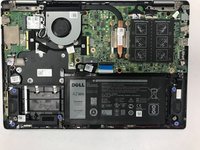
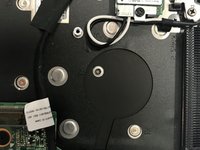
Remove the two 3 mm screws holding the fan in place using a Phillips screwdriver.
-
-
-
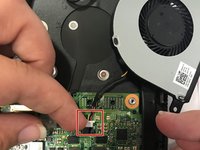
Disconnect the fan's connector from the motherboard.
-
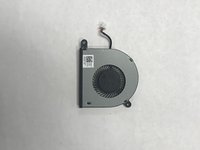
Remove the fan from the laptop.
-


Replace the back cover to complete the process.
Replace the back cover to complete the process.
Rückgängig: Ich habe diese Anleitung nicht absolviert.
2 weitere Personen haben diese Anleitung absolviert.
Team

Gateway, Team 1-3, Saknee Spring 2022 Mitglied von Gateway, Team 1-3, Saknee Spring 2022
GCC-SAKNEE-S22S1G3
5 Mitglieder
16 Anleitungen geschrieben