Einleitung
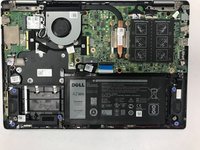
Many users of the Dell Inspiron 13 7378 complain about its slow processing speed. One way to increase processing speed is adding more RAM. This guide will show you exactly how to do that. The RAM compartment in this device has two slots. When you purchase your device, it comes with one slot full and one slot empty. Following this guide will allow you to either replace your existing stick, or add a second one.
Was du brauchst
-
-
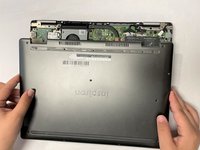
Set the laptop with its underside facing up for improved accessibility.
-
-
-
Using a Phillips #00 screwdriver, extract the nine 3 mm screws located on the back of the laptop.
-
-
-
-
Carefully pry open the back of the back of the laptop using opening picks.
-
Carefully raise and detach the back cover from the laptop.
-
-
-
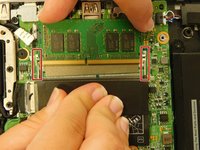
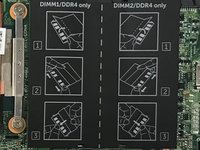
To remove a RAM stick, gently pull apart the metal tabs on either side of the stick.
-
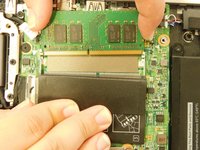
Carefully grasp the stick on its side and pull it out.
-
To reassemble your device, follow these instructions in reverse order.
To reassemble your device, follow these instructions in reverse order.
Rückgängig: Ich habe diese Anleitung nicht absolviert.
Eine weitere Person hat diese Anleitung absolviert.


