Einleitung
In this guide, we will be showing you how to remove and replace the Display Assembly.
Was du brauchst
-
-
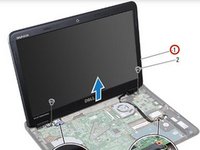
Remove the two screws that secure the display panel to the chassis.
-
-
-
Turn the computer over and open the display as far as possible.
-
-
-
Make a note of the routing of the Mini-Card antenna cables and the display cables. Remove the cables from the routing guides.
-
-
-
-
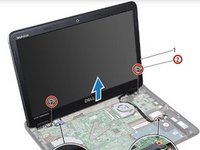
Remove the two screws (one on each side) that secure the display assembly to the computer base.
-
-
-
Make a note of the cable routing and disconnect the display cable and the wireless card antenna cables from the connectors on the Mini-Card.
-
-
-
Lift and remove the display assembly off the computer base.
-
-
-
Place the NEW display assembly in position and replace the two screws (one on each side) that secure the display assembly to the computer base.
-
-
-
Route the Mini-Card antenna cables and the display cable through the slot on the computer base.
-
-
-
Connect the display cable to the connector on the system board.
-


To reassemble your device, follow these instructions in reverse order.
To reassemble your device, follow these instructions in reverse order.

Team

RampUP America, Inc. Mitglied von RampUP America, Inc.
Community
43 Mitglieder
1.985 Anleitungen geschrieben