Einleitung
In this guide, we will be showing you how to remove and replace the Display Assembly.
Was du brauchst
-
-
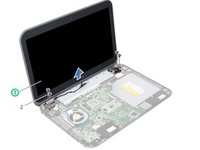
Remove the screws that secure the display assembly to the computer base.
-
-
-
Turn the computer over and open the display as far as possible.
-
-
-
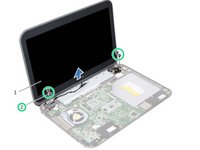
Disconnect the antenna cables from the connectors on the Mini-Card.
-
-
-
-
Remove the screws that secure the display assembly to the computer base.
-
-
-
Place the display assembly in position and replace the screws that secure the display assembly to the computer base.
-
-
-
Connect the antenna cables to the connectors on the Mini-Card.
-
-
-
Replace the screws that secure the display assembly to the computer base.
-


Team

RampUP America, Inc. Mitglied von RampUP America, Inc.
Community
43 Mitglieder
1.985 Anleitungen geschrieben