Einleitung
The heat sink is an essential piece of hardware in any computer. It is responsible for maintaining the proper operating temperature for the system. This allows for an increased life span and increased performance. In this guide, we will show you how to replace the heat sink in the Dell Inspiron 1526 laptop.
Was du brauchst
-
-
Slide the unlock button to the left to release the battery.
-
Slide the battery away from the laptop to remove.
-
-
-
Use a Phillips #0 screwdriver to remove the eight 3mm screws from the rear casing of the laptop.
-
-
-
-
Loosen the five captive Phillips #0 screws from the heat sink.
-
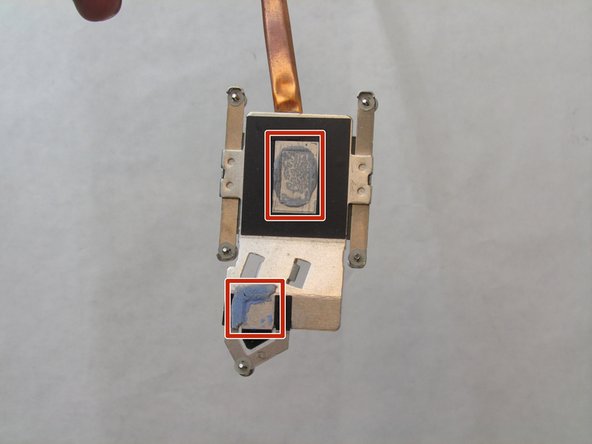
Lift the heat sink from the motherboard.
-


To reassemble your device, follow these instructions in reverse order.
To reassemble your device, follow these instructions in reverse order.
Team

Embry-Riddle Aeronautical University, Team S20-G3, Branham Fall 2019 Mitglied von Embry-Riddle Aeronautical University, Team S20-G3, Branham Fall 2019
ERAU-BRANHAM-F19S20G3
4 Mitglieder
5 Anleitungen geschrieben