Zum Hauptinhalt wechseln

Dell Inspiron 9100 Keyboard Replacement

Was du brauchst

  1. Dell Inspiron 9100 Keyboard Replacement, Battery: Schritt 1, Bild 1 von 3 Dell Inspiron 9100 Keyboard Replacement, Battery: Schritt 1, Bild 2 von 3 Dell Inspiron 9100 Keyboard Replacement, Battery: Schritt 1, Bild 3 von 3
    • Unplug the laptop from the power adapter and turn the power off.

    • Failure to unplug laptop before proceeding could result in risk of electric shock!

  2. Dell Inspiron 9100 Keyboard Replacement: Schritt 2, Bild 1 von 3 Dell Inspiron 9100 Keyboard Replacement: Schritt 2, Bild 2 von 3 Dell Inspiron 9100 Keyboard Replacement: Schritt 2, Bild 3 von 3
    • Slide the battery-lock tab and hold.

    • Flip the battery away from the chassis to remove it.

  3. Dell Inspiron 9100 Keyboard Replacement, Keyboard: Schritt 3, Bild 1 von 1
    • Turn the laptop around.

  4. Dell Inspiron 9100 Keyboard Replacement: Schritt 4, Bild 1 von 3 Dell Inspiron 9100 Keyboard Replacement: Schritt 4, Bild 2 von 3 Dell Inspiron 9100 Keyboard Replacement: Schritt 4, Bild 3 von 3
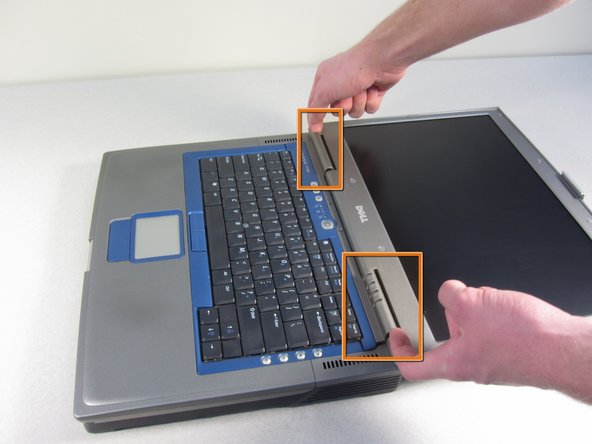
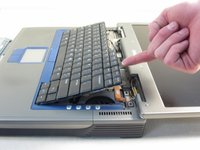
    • Use your fingers to gently pull up on the hinge covers. They will release with an audible snap.

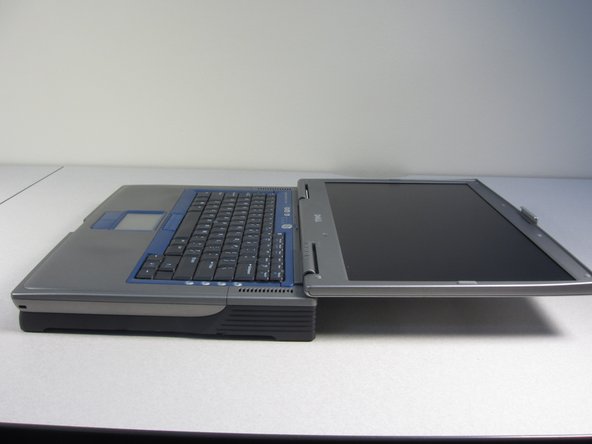
    • Fold the screen back to 180 degrees.

    • Using your index fingers, pull up the hinge cover.

  5. Dell Inspiron 9100 Keyboard Replacement: Schritt 5, Bild 1 von 3 Dell Inspiron 9100 Keyboard Replacement: Schritt 5, Bild 2 von 3 Dell Inspiron 9100 Keyboard Replacement: Schritt 5, Bild 3 von 3
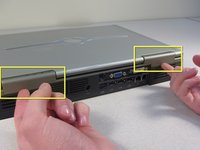
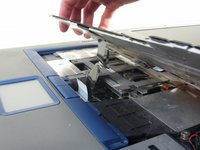
    • After the hinges pop, pull the hinge cover gently.

    • Pull the clear tab on the right side of the laptop up. This tab will disconnect the hinge cover from the laptop.

  6. Dell Inspiron 9100 Keyboard Replacement: Schritt 6, Bild 1 von 1
    • Remove the two 3mm screws on the top of the keyboard (nearest to the screen)

  7. Dell Inspiron 9100 Keyboard Replacement: Schritt 7, Bild 1 von 3 Dell Inspiron 9100 Keyboard Replacement: Schritt 7, Bild 2 von 3 Dell Inspiron 9100 Keyboard Replacement: Schritt 7, Bild 3 von 3
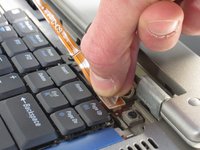
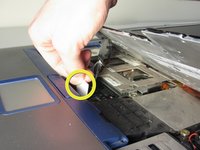
    • Tilt the keyboard away from the screen.

    • Pull up on the white tab underneath the keyboard to release the keyboard.

Abschluss

To reassemble your device, follow these instructions in reverse order.

Eine weitere Person hat diese Anleitung absolviert.

Ana

Mitglied seit: 01/11/11

111 Reputation

1 Anleitung geschrieben

Team

Cal Poly, Team 13-2, Forte Winter 2011 Mitglied von Cal Poly, Team 13-2, Forte Winter 2011

CPSU-FORTE-W11S13G2

5 Mitglieder

8 Anleitungen geschrieben

0 Kommentare

Kommentar hinzufügen

Seitenaufrufe:

Letzte 24 Stunden: 0

Letzte 7 Tage: 0

Letzte 30 Tage: 8

Insgesamt: 3,975