Zum Hauptinhalt wechseln

Dell Latitude 3190 Motherboard Replacement

Was du brauchst

  1. Dell Latitude 3190 Motherboard Replacement, Base Cover: Schritt 1, Bild 1 von 2 Dell Latitude 3190 Motherboard Replacement, Base Cover: Schritt 1, Bild 2 von 2
    • Use a Phillips #0 screwdriver to remove the seven 7 mm screws securing the back case.

  2. Dell Latitude 3190 Motherboard Replacement: Schritt 2, Bild 1 von 3 Dell Latitude 3190 Motherboard Replacement: Schritt 2, Bild 2 von 3 Dell Latitude 3190 Motherboard Replacement: Schritt 2, Bild 3 von 3
    • Using a plastic opening tool carefully separate the plastic base cover from the rest of the laptop.

    • Lift the bottom cover from the laptop.

  3. Dell Latitude 3190 Motherboard Replacement, Battery: Schritt 3, Bild 1 von 1
    • Locate the battery.

  4. Dell Latitude 3190 Motherboard Replacement: Schritt 4, Bild 1 von 3 Dell Latitude 3190 Motherboard Replacement: Schritt 4, Bild 2 von 3 Dell Latitude 3190 Motherboard Replacement: Schritt 4, Bild 3 von 3
    • Disconnect the battery cable located on the top of the battery.

    • Use the spudger and disconnect the battery cable.

    • Pull the cable out of the way.

  5. Dell Latitude 3190 Motherboard Replacement: Schritt 5, Bild 1 von 3 Dell Latitude 3190 Motherboard Replacement: Schritt 5, Bild 2 von 3 Dell Latitude 3190 Motherboard Replacement: Schritt 5, Bild 3 von 3
    • Use a Phillips #0 screwdriver to remove the three 3 mm screws from the battery.

  6. Dell Latitude 3190 Motherboard Replacement: Schritt 6, Bild 1 von 3 Dell Latitude 3190 Motherboard Replacement: Schritt 6, Bild 2 von 3 Dell Latitude 3190 Motherboard Replacement: Schritt 6, Bild 3 von 3
    • Pull the black battery tap upwards to remove the battery.

    • The battery adhesive is strong, do not be afraid to use force. You may need to use the spudger or opening tool as a wedge.

  7. Dell Latitude 3190 Motherboard Replacement, M.2 SSD: Schritt 7, Bild 1 von 3 Dell Latitude 3190 Motherboard Replacement, M.2 SSD: Schritt 7, Bild 2 von 3 Dell Latitude 3190 Motherboard Replacement, M.2 SSD: Schritt 7, Bild 3 von 3
    • Use a spudger to disconnect the battery cable from the motherboard located at the top of the battery.

  8. Dell Latitude 3190 Motherboard Replacement: Schritt 8, Bild 1 von 3 Dell Latitude 3190 Motherboard Replacement: Schritt 8, Bild 2 von 3 Dell Latitude 3190 Motherboard Replacement: Schritt 8, Bild 3 von 3
    • Locate the M.2 SSD after the battery is removed

    • Use the Phillips #0 screwdriver to remove the 3 mm screw from the SSD.

    • Pull the M.2 SSD from the board.

  9. Dell Latitude 3190 Motherboard Replacement, Motherboard: Schritt 9, Bild 1 von 3 Dell Latitude 3190 Motherboard Replacement, Motherboard: Schritt 9, Bild 2 von 3 Dell Latitude 3190 Motherboard Replacement, Motherboard: Schritt 9, Bild 3 von 3
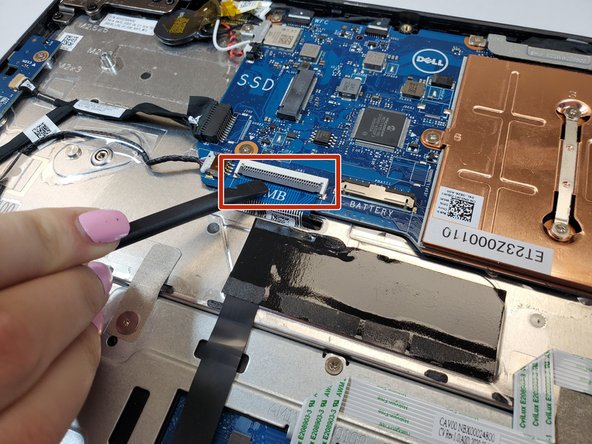
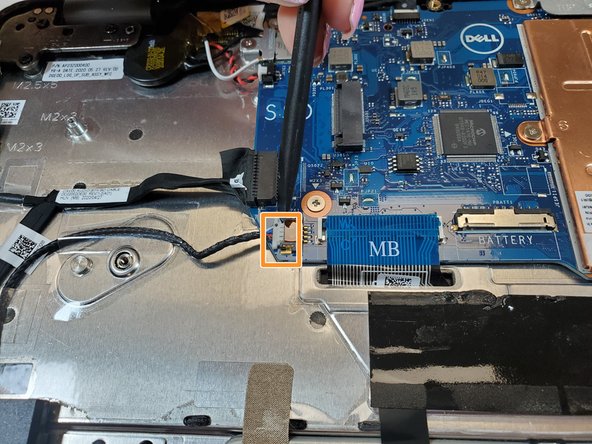
    • Remove the motherboard cable by pulling up on the black bar and carefully removing the blue ribbon cable.

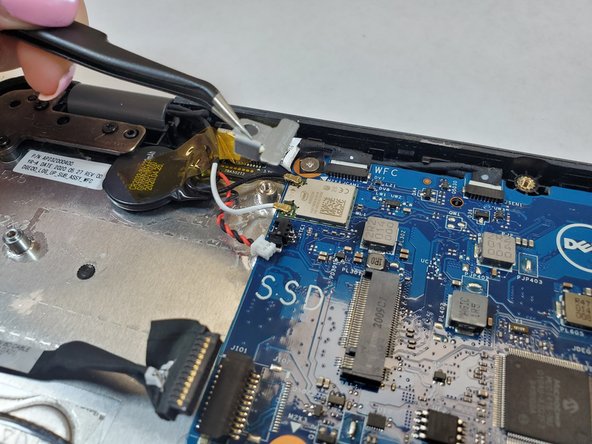
    • Disconnect the white speaker cable connector.

  10. Dell Latitude 3190 Motherboard Replacement: Schritt 10, Bild 1 von 2 Dell Latitude 3190 Motherboard Replacement: Schritt 10, Bild 2 von 2
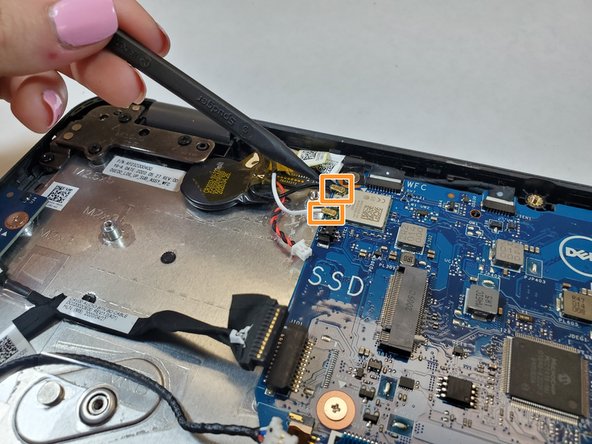
    • Using a spudger, disconnect the black power board and audio cable.

    • Disconnect the white coin cell battery cable.

  11. Dell Latitude 3190 Motherboard Replacement: Schritt 11, Bild 1 von 3 Dell Latitude 3190 Motherboard Replacement: Schritt 11, Bild 2 von 3 Dell Latitude 3190 Motherboard Replacement: Schritt 11, Bild 3 von 3
    • Use the Phillips #0 screwdriver to remove the 3 mm screw and lift the metal bracket that secures the WLAN card on the system board.

    • Disconnect the black and white WLAN cables.

  12. Dell Latitude 3190 Motherboard Replacement: Schritt 12, Bild 1 von 2 Dell Latitude 3190 Motherboard Replacement: Schritt 12, Bild 2 von 2
    • Remove the screw that secures the camera cable to the system board.

    • Disconnect camera cable.

    • Disconnect the black sensor cable.

  13. Dell Latitude 3190 Motherboard Replacement: Schritt 13, Bild 1 von 3 Dell Latitude 3190 Motherboard Replacement: Schritt 13, Bild 2 von 3 Dell Latitude 3190 Motherboard Replacement: Schritt 13, Bild 3 von 3
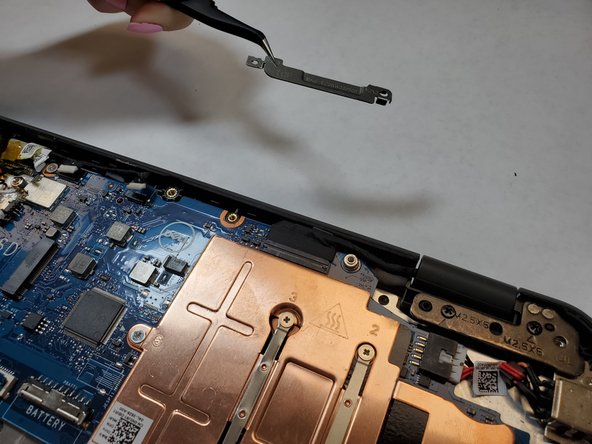
    • Use the Phillips #0 screwdriver to remove the two 3 mm screws from the metal bracket on the display cable.

    • Lift the metal bracket that secures the display cable on the computer.

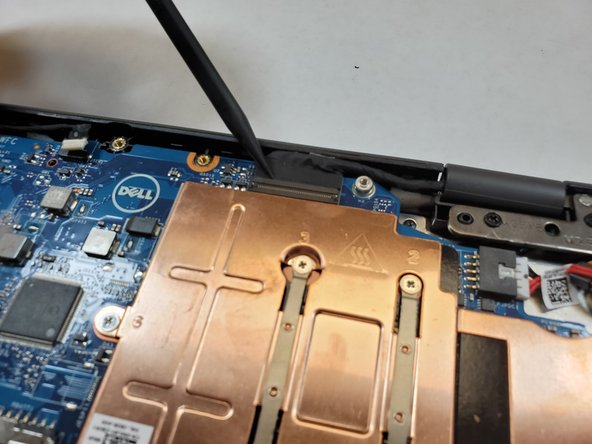
    • Disconnect the black display cable using a spudger or pull it out by hand.

  14. Dell Latitude 3190 Motherboard Replacement: Schritt 14, Bild 1 von 3 Dell Latitude 3190 Motherboard Replacement: Schritt 14, Bild 2 von 3 Dell Latitude 3190 Motherboard Replacement: Schritt 14, Bild 3 von 3
    • Disconnect the white power connector.

    • Use the spudger to lift up on black bar to release the trackpad ribbon cable.

    • Pull the blue tab release to the cable from the connector.

  15. Dell Latitude 3190 Motherboard Replacement: Schritt 15, Bild 1 von 3 Dell Latitude 3190 Motherboard Replacement: Schritt 15, Bild 2 von 3 Dell Latitude 3190 Motherboard Replacement: Schritt 15, Bild 3 von 3
    • Use a Phillips #0 tp remove the two 3 mm screws on the metal bracket that secures the board.

    • Remove the metal bracket.

  16. Dell Latitude 3190 Motherboard Replacement: Schritt 16, Bild 1 von 3 Dell Latitude 3190 Motherboard Replacement: Schritt 16, Bild 2 von 3 Dell Latitude 3190 Motherboard Replacement: Schritt 16, Bild 3 von 3
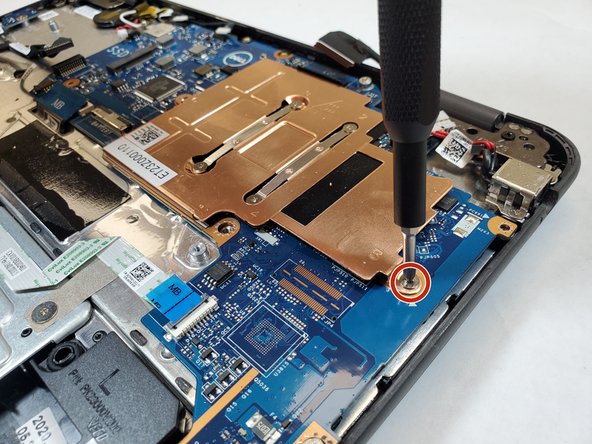
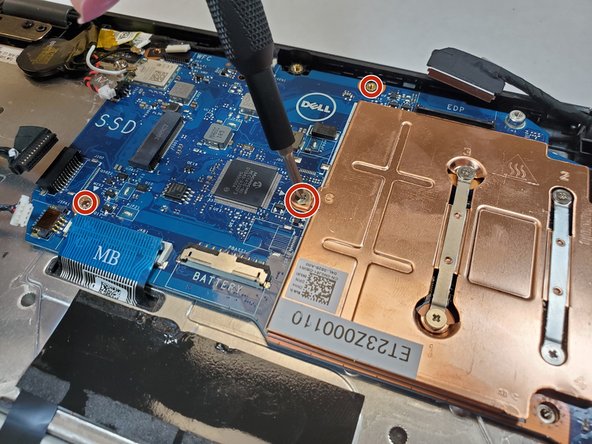
    • Use the Phillips #0 screwdriver to remove the five 3 mm screws that secure the motherboard.

  17. Dell Latitude 3190 Motherboard Replacement: Schritt 17, Bild 1 von 3 Dell Latitude 3190 Motherboard Replacement: Schritt 17, Bild 2 von 3 Dell Latitude 3190 Motherboard Replacement: Schritt 17, Bild 3 von 3
    • Carefully lift the motherboard up to remove it from the computer.

    • Make sure not to snag any of the other cables.

Abschluss

To reassemble your device, follow these instructions in reverse order.

Ein:e weitere:r Nutzer:in hat diese Anleitung absolviert.

Sean Gherkins

Mitglied seit: 12/26/17

292 Reputation

2 Anleitungen geschrieben

Team

Gateway, Team 1-5, Saknee Fall 2021 Mitglied von Gateway, Team 1-5, Saknee Fall 2021

GCC-SAKNEE-F21S1G5

3 Mitglieder

6 Anleitungen geschrieben

0 Kommentare

Kommentar hinzufügen

Seitenaufrufe:

Letzte 24 Stunden: 2

Letzte 7 Tage: 8

Letzte 30 Tage: 49

Insgesamt: 1,106