Diese Anleitung enthält neuere Änderungen. Wechsel zur neuesten unüberprüften Version.
Einleitung
Backup all important data files on the system.
Remember opening your laptop may void the warranty, so perform this at your own risk and our help.
Was du brauchst
-
-
Perform a complete system backup and shutdown the computer.
-
Unplug the charger and remove the battery.
-
Remove the battery by sliding the lock tab (outlined in red) and use the other hand to remove the battery.
-
-
-
Remove the hard drive
-
Locate and remove three phillips head screws. These screws measure 3.55mm in length and 2.93mm in width with a fine thread.
-
Remove the hard drive and set it aside trying not to touch anything but the grey plastic grip pad. Doing so may cause damage to your hard drive.
-
-
-
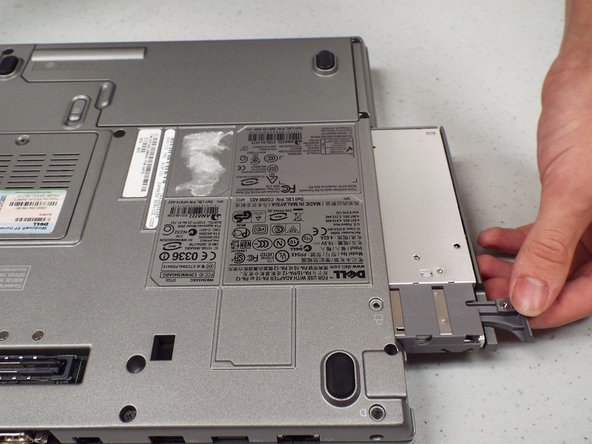
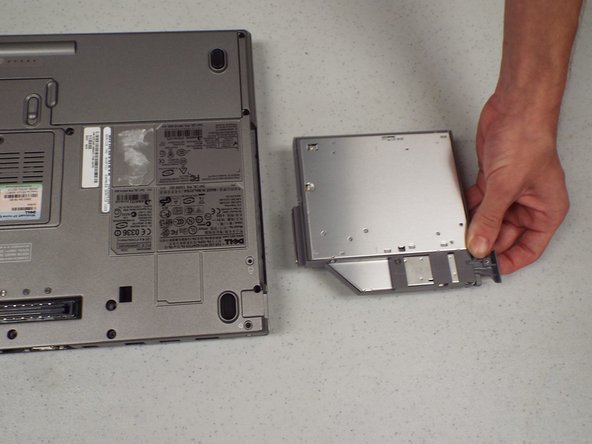
Remove the CD/DVD Drive by pushing on the button under the drive.
-
There may be a little resistance pulling it out.
-
-
-
-
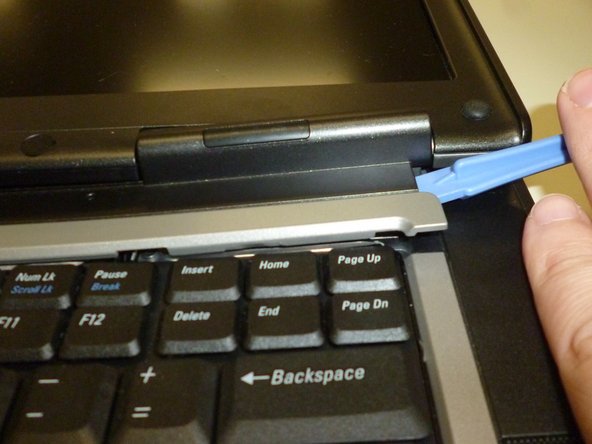
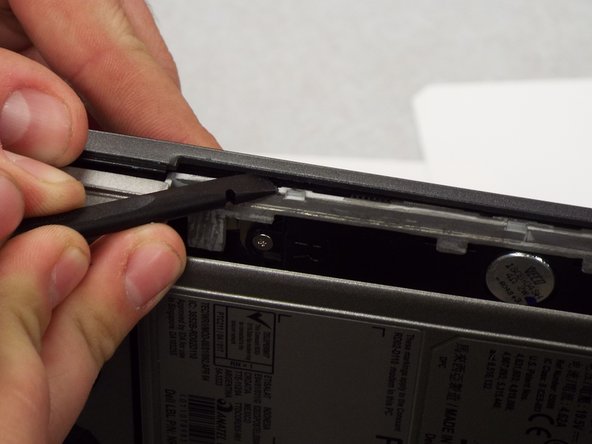
Flip the laptop face up making sure the screen is opened all the way and is flat as shown in the first picture.
-
Using a Plastic Pry tool carefully pry off the keyboard bezel keeping in mind wires are attached so do not pull too far or hard.
-
-
-
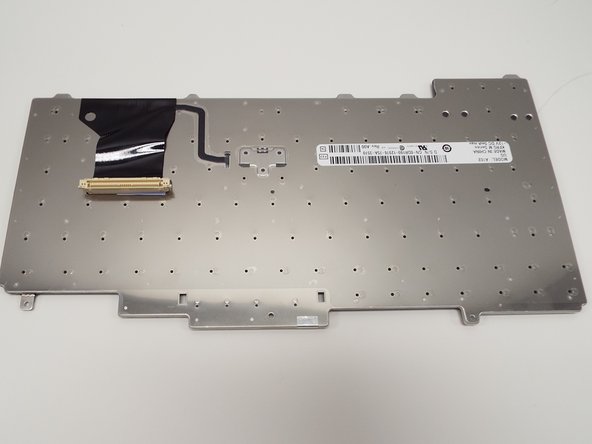
Now, remove the keyboard screws then the keyboard. There is a ribbon cable (wires) attached to bottom, be careful not to tear it.
-
Remove the ribbon from the laptop motherboard, this will allow you to set the keyboard aside.
-
-
-
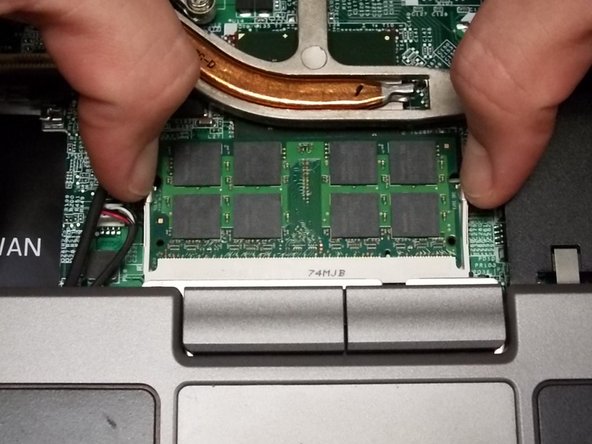
Remove the memory chip under the keyboard by pulling the two tabs away from each other as shown in second picture. (Yes there is one on the bottom as well)
-
-
-
Disconnect the wireless card from the bottom-corner.
-
Push the retaining tab and lift the card out.
-
Do this for the ethernet card which is in the same spot.
-
-
-
Remove the cable that connects the speaker (small rectangle) to the frame by pulling straight out. The cable is located to the left of DDR2 DIMM A.
-
Remove the cable that connects the track pad (large rectangle) to frame by pulling straight out. The cable is also located to the left of DDR2 DIMM A.
-
-
-
Remove 3 Screws that hold the upper case to the mother board.
-
Remove the upper casing from the bottom casing.
-
-
-
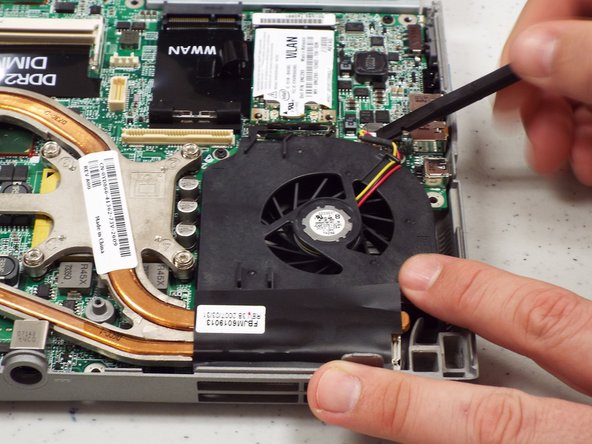
Remove 2 screws for fan removal – both 5.6 mm length x 2.31 mm width – remove the fan power cable.
-
Unscrew 6 spring loaded screws from Heat Sink. These are permanently attached to heat sink and will not come off.
-
-
-
There are 7 screws that need to be removed around edge of Motherboard. 4 of the screws are 3.73mm length x 1.90mm width
-
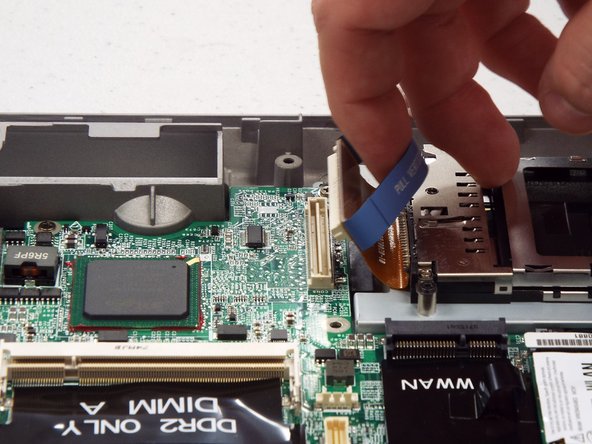
Remove the PCMCIA connector from the motherboard.
-
Turn the laptop on the side and remove 2 female hex screws from video card and 2 posts from serial port using socket driver (3/16 socket) All hex screws are 10.23mm x 2.66mm size
-


To reassemble your device, follow these instructions in reverse order.
To reassemble your device, follow these instructions in reverse order.
Rückgängig: Ich habe diese Anleitung nicht absolviert.
14 weitere Nutzer:innen haben diese Anleitung absolviert.

Team

Pasco Hernando, Team 1-2, Prince Fall 2014 Mitglied von Pasco Hernando, Team 1-2, Prince Fall 2014
PHSC-PRINCE-F14S1G2
10 Mitglieder
7 Anleitungen geschrieben
2 Kommentare
i used this to replace the thermal paste its really easy to follow simple steps