Einleitung
It's a good idea to replace your thermal paste from time to time. Especially true for the Core i7 models.
Was du brauchst
-
-
Start by removing the battery using the 2 latches (red rectangles)
-
All screws to be removed are marked with a D (green circles)
-
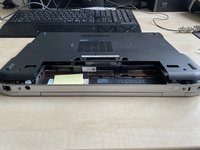
The hard disk or ssd has a shared screw with the d-cover (backcover). Also remove the screw below. (blue circle)
-
-
-
To remove the dvd drive just press on the button marked with a red rectangle.
-
It will then pop out and may be used to just pull out the drive. Easy as cake.
-
-
-
-
To finally open the device turn it by 180 degrees and pry open from the backside with a spudger.
-
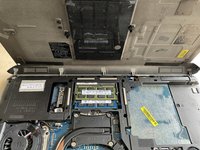
You will see that the d-cover is mounted to the other side.
-
Remove the cover and turn the device back like seen in image no 3.
-
-
-
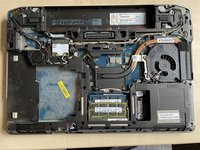
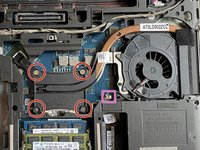
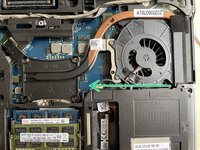
There are four screws with springs on them which have to be removed in the order embossed on the heatsink. (red circles)
-
Also make sure to unplug the fan very carefully. (pink rectangle)
-
Remove the heatsink by lifting it out to the left side as it is fixed on the right side.
-
-
-
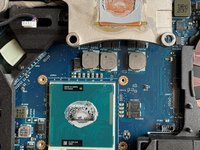
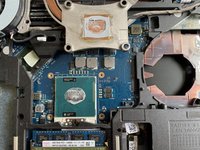
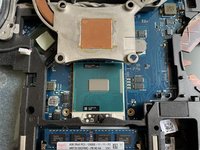
Both the cpu DIE and the copper part of the heatsink should be cleaned as the thermal paste tends to dry out over time.
-
Use a cotton swab with some rubbing alcohol.
-
-
-
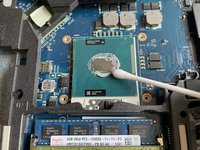
Use thermal paste of your liking and apply a thin layer (I almost used too much).
-
The thermal pad (red circle) should not be replaced with thermal paste. If it seems dried out you have to use one of the same size.
-
Reattach the heatsink very carefully and tighten the screws in the given order. Also don't forget to connect the fan.
-


To reassemble your device, follow these instructions in reverse order.
To reassemble your device, follow these instructions in reverse order.
Rückgängig: Ich habe diese Anleitung nicht absolviert.
5 weitere Personen haben diese Anleitung absolviert.
