Einleitung
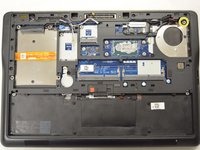
If the trackpad or mousepad of your Dell Latitude E7440 is damaged in any form, use this guide to replace the trackpad.
The trackpad is used to navigate the cursor on the monitor and also to select and open files or folders. A damaged or worn out trackpad can be a hindrance while using the laptop.
Before using this guide, clean the trackpad using a soft cloth so that it is free of debris.
Before beginning, make sure to power off your laptop completely and disconnect from any external power source.
Was du brauchst
-
-
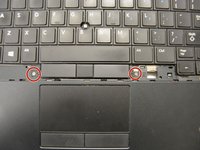
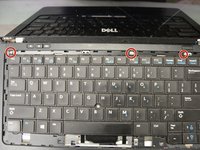
Remove two 3mm screws using the Phillips #0 screwdriver.
-
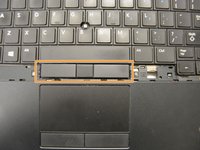
Slide access door down and remove it by slightly jerking it. Make sure no part of the door is sticking to the components.
-
-
-
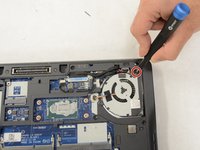
Remove two 5mm screws using the Phillips #0 screwdriver.
-
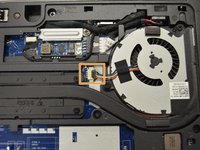
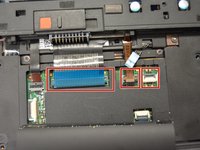
Unplug highlighted cable. Be careful not to snap it in half.
-
-
-
-
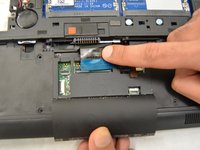
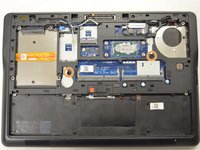
Remove cables on the bottom.
-
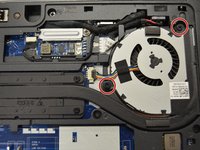
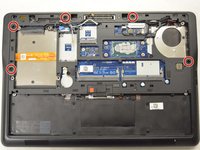
Remove two 5mm screws using the Phillips #0 screwdriver.
-
-
-
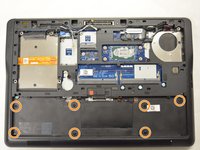
Remove the following screws using the Phillips #0 screwdriver.
-
Five 5mm screws.
-
Seven 3mm screws.
-
One 8mm screw.
-
-
-
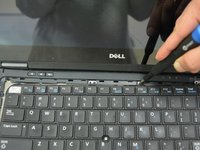
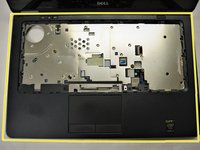
Remove the keyboard bezel. This might take some effort. Use some force in one direction only.
-
-
-
Remove the two 2.5mm mouse button screws using the Phillips #0 screwdriver.
-
Remove the mouse button.
-
-
-
Remove three 3mm screws using the Phillips #0 screwdriver.
-
Remove the keyboard by pulling it in one direction.
-
-
-
Disconnect the cables from the device.
-
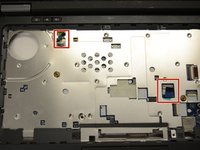
Remove a single 5mm screw using the Phillips #0 screwdriver.
-
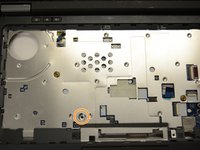
Remove the trackpad panel.
-


To reassemble your device, follow these instructions in reverse order.
To reassemble your device, follow these instructions in reverse order.
Rückgängig: Ich habe diese Anleitung nicht absolviert.
2 weitere Personen haben diese Anleitung absolviert.

Team

IUPUI, Team S1-G1, Stella Fall 2019 Mitglied von IUPUI, Team S1-G1, Stella Fall 2019
IUPUI-STELLA-F19S1G1
4 Mitglieder
3 Anleitungen geschrieben