Diese Version enthält möglicherweise inkorrekte Änderungen. Wechsle zur letzten geprüften Version.
Was du brauchst
-
Dieser Schritt ist noch nicht übersetzt. Hilf mit, ihn zu übersetzen!
-
With the base stand facing upwards, unscrew the 6mm Phillips #2 screw.
-
Pull the base stand straight up from the device.
-
-
Dieser Schritt ist noch nicht übersetzt. Hilf mit, ihn zu übersetzen!
-
Unscrew and remove the eight 4mm Phillips #0 screws (four on top, four on bottom) from the top and bottom of the device.
-
-
-
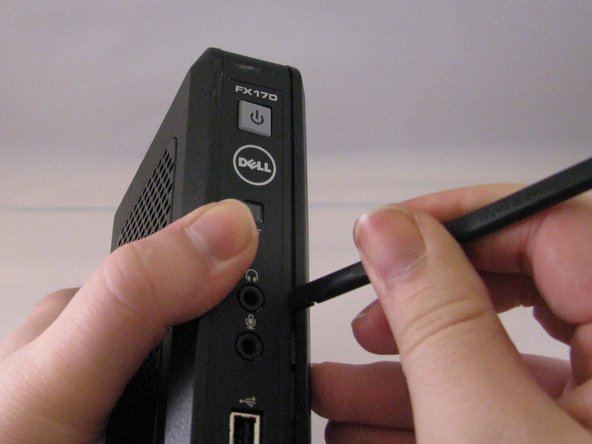
Dieser Schritt ist noch nicht übersetzt. Hilf mit, ihn zu übersetzen!
-
Run the flat side of the spudger along the entire line of the case starting from the back where the power plug and a small screw are located.
-
-
Dieser Schritt ist noch nicht übersetzt. Hilf mit, ihn zu übersetzen!
-
Once the clips have been released, gently disengage the cover from the rest of case by pulling in opposite directions.
-
-
Dieser Schritt ist noch nicht übersetzt. Hilf mit, ihn zu übersetzen!
-
Using the spudger, gently push on the underside of the memory board to loosen it. Gently grasp each side and pull up to release the memory board.
-
-
Dieser Schritt ist noch nicht übersetzt. Hilf mit, ihn zu übersetzen!
-
To remove the battery, pull up on the connector that is plugged into the motherboard.
-


Team

Eastern Washington University, Team 1-4, Carnegie Winter 2015 Mitglied von Eastern Washington University, Team 1-4, Carnegie Winter 2015
EWU-CARNEGIE-W15S1G4
3 Mitglieder
13 Anleitungen geschrieben