Was du brauchst
-
-
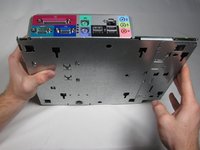
Lay the Dell Optiplex GX260 down on a clean flat surface with the rear towards you.
-
Push the oval shaped buttons located on the top and bottom of the PC simultaneously and lift the case straight up.
-
-
-
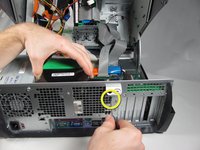
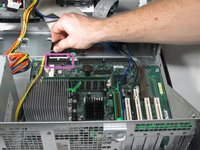
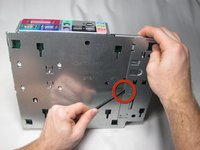
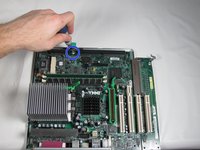
On the rear of the desktop, push the two circled black buttons straight in with a small pointed object while pulling up on the fan.
-
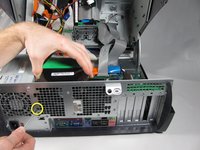
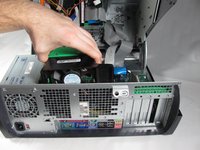
Once the fan is released, lift it straight up and out of the case.
-
-
-
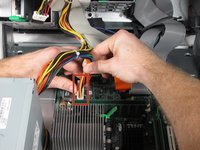
Disconnect the ATX power cable to the motherboard.
-
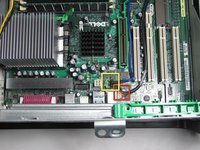
Disconnect the P4 12V(4x2) power cable from the motherboard.
-
-
-
-
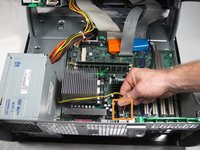
Disconnect the front panel ribbon cable by gently pulling it straight up.
-
Disconnect the hard drive ribbon cable by gently pulling the blue tab away from the motherboard.
-
Disconnect the optical drive ribbon cable by gently pulling the orange tab away from the motherboard.
-
-
-
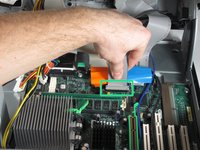
Disconnect the floppy drive drive ribbon cable by gently pulling the black tab away from the motherboard.
-
Disconnect the optical drive audio cable connector from the motherboard.
-
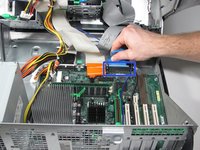
Disconnect the audio input/output cable from the motherboard.
-
-
-
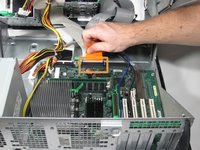
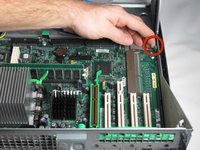
Lift the metal tab near the right corner of the motherboard.
-
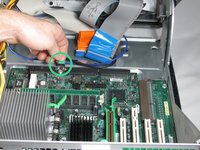
Pull the green tab toward the front of the PC to release the motherboard.
-
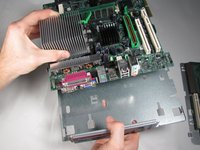
From the rear of the PC, push the ports in while lifting the motherboard up and flipping it away from you.
-
-
-
Stand the motherboard up as shown.
-
Insert the flat end of a spudger into the slot in the motherboard mounting plate and press the release tab while pushing the extension plate to the right with your thumbs until it comes off..
-
-
-
Remove the screw at the rear of the motherboard.
-
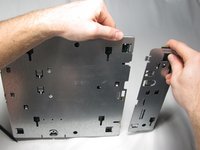
Grasp the heat sink with your left hand and the I/O port panel with your right hand and pull to separate motherboard from the metal base.
-
-
-
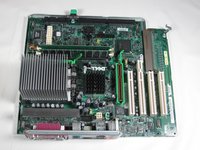
With the motherboard out of the tray, let your soldering gear warm up and get a desoldering braid.
-
-
-
Desoldering can damage motherboards, so first practice on a board you don't need. Use a 40-50W soldering iron with a chisel tip and 0.080" wide desoldering braid. Also helpful are rosin flux and 60/40 tin/lead solder, in case all the solder doesn't come out. Wiggle desoldered leads to verify they're free, and never pull on any that aren't.
-
-
-
Install the new capacitor in the holes left by the old one, then solder it into place.
-


To reassemble your device, follow these instructions in reverse order.
To reassemble your device, follow these instructions in reverse order.
Rückgängig: Ich habe diese Anleitung nicht absolviert.
3 weitere Personen haben diese Anleitung absolviert.
Team

Cal Poly, Team 4-48, Amido Fall 2010 Mitglied von Cal Poly, Team 4-48, Amido Fall 2010
CPSU-AMIDO-F10S4G48
4 Mitglieder
27 Anleitungen geschrieben