Zum Hauptinhalt wechseln

Dell Optiplex GX620 Power Supply Replacement

Was du brauchst

  1. Dell Optiplex GX620 Power Supply Replacement, How to unplug and discharge before repair: Schritt 1, Bild 1 von 2 Dell Optiplex GX620 Power Supply Replacement, How to unplug and discharge before repair: Schritt 1, Bild 2 von 2
    • Power down your PC and remove the power cord from the back.

  2. Dell Optiplex GX620 Power Supply Replacement: Schritt 2, Bild 1 von 2 Dell Optiplex GX620 Power Supply Replacement: Schritt 2, Bild 2 von 2
    • Press and hold the power button for about 10 seconds, then release.

    • This helps drain any remaining power stored in the capacitors, so that you can safely work on the internal components.

  3. Dell Optiplex GX620 Power Supply Replacement, Dell Optiplex GX620 Side Panel Disassembly: Schritt 3, Bild 1 von 1
    • With the computer standing upright, firmly pull on the tab at the back of the computer.

    • When the side panel pops free, gently pull the panel away from the computer.

    • If you have trouble freeing the side panel from the case, you may need to pull the tab a bit harder.

  4. Dell Optiplex GX620 Power Supply Replacement, Disconnect cables: Schritt 4, Bild 1 von 3 Dell Optiplex GX620 Power Supply Replacement, Disconnect cables: Schritt 4, Bild 2 von 3 Dell Optiplex GX620 Power Supply Replacement, Disconnect cables: Schritt 4, Bild 3 von 3
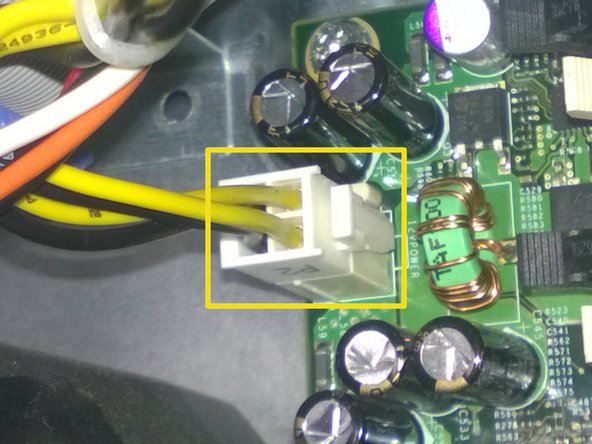
    • Gently disconnect the power cables from the motherboard and drives.

  5. Dell Optiplex GX620 Power Supply Replacement, Remove the screws: Schritt 5, Bild 1 von 1
    • Remove the four screws that attach the power supply on the back of the chassis.

    • Do not remove any screws that are not highlighted in red.

  6. Dell Optiplex GX620 Power Supply Replacement, Press the release button: Schritt 6, Bild 1 von 1
    • Press the blue release button. This is located on the floor of the computer chassis right in front of the power supply.

  7. Dell Optiplex GX620 Power Supply Replacement, Remove the power supply: Schritt 7, Bild 1 von 1
    • Remove the unconnected power supply by sliding it towards the front of the computer. Next, lift it up out of the chassis.

Abschluss

To reassemble your device, follow these instructions in reverse order.

10 weitere Nutzer:innen haben diese Anleitung absolviert.

Kristina

Mitglied seit: 09/03/14

198 Reputation

7 Anleitungen geschrieben

Team

Pasco Hernando, Team 5-1, Prince Fall 2014 Mitglied von Pasco Hernando, Team 5-1, Prince Fall 2014

PHSC-PRINCE-F14S5G1

10 Mitglieder

15 Anleitungen geschrieben

3 Kommentare

Thanks, I followed the instructions, the replacement of the power supply unit was more simple than I expected

George

geotech78 - Antwort

i replaced that but not repair this

Muhammad Qasim - Antwort

At post Madasanal TQ disk bijapur

sidaray - Antwort

Kommentar hinzufügen

Seitenaufrufe:

Letzte 24 Stunden: 0

Letzte 7 Tage: 10

Letzte 30 Tage: 28

Insgesamt: 6,981