Zum Hauptinhalt wechseln

Dell VRP100 Lens Replacement

Was du brauchst

  1. Dell VRP100 Lens Replacement, Cover Panel: Schritt 1, Bild 1 von 3 Dell VRP100 Lens Replacement, Cover Panel: Schritt 1, Bild 2 von 3 Dell VRP100 Lens Replacement, Cover Panel: Schritt 1, Bild 3 von 3
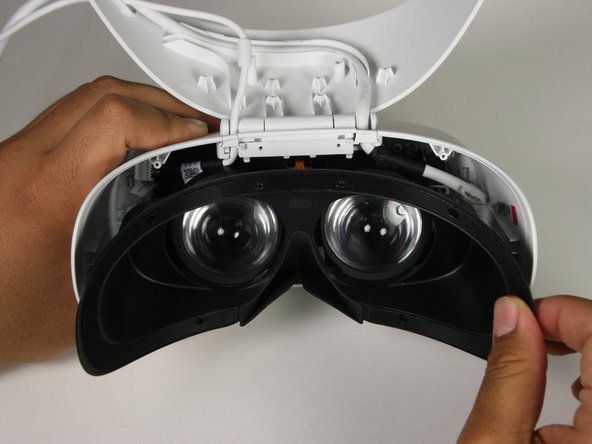
    • Remove the black foam padding by peeling away slowly.

    • Remove the front and back padding from the headset by peeling away slowly.

  2. Dell VRP100 Lens Replacement: Schritt 2, Bild 1 von 1
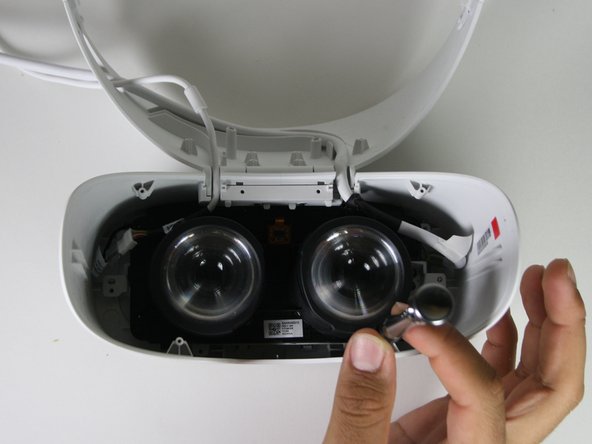
    • Remove the six 5.5mm PH000 screws from the cover by rotating counter-clockwise.

    • Cover panel may need to be pushed in before inserting screws.

  3. Dell VRP100 Lens Replacement: Schritt 3, Bild 1 von 3 Dell VRP100 Lens Replacement: Schritt 3, Bild 2 von 3 Dell VRP100 Lens Replacement: Schritt 3, Bild 3 von 3
    • Remove the cover using one of the plastic opening tools, and then carefully pull it from the casing.

  4. Dell VRP100 Lens Replacement: Schritt 4, Bild 1 von 3 Dell VRP100 Lens Replacement: Schritt 4, Bild 2 von 3 Dell VRP100 Lens Replacement: Schritt 4, Bild 3 von 3
    • Remove the six 5.5mm PH000 screws from the cover by rotating counter-clockwise.

    • Carefully remove the lens and motherboard assembly from the white casing.

  5. Dell VRP100 Lens Replacement, Lens: Schritt 5, Bild 1 von 2 Dell VRP100 Lens Replacement, Lens: Schritt 5, Bild 2 von 2
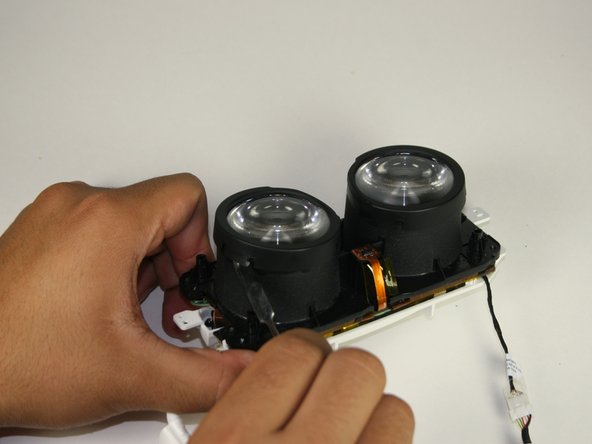
    • Deattach the black cover from the lens with a metal spudger.

    • This will “click” back into place during replacement.

  6. Dell VRP100 Lens Replacement: Schritt 6, Bild 1 von 3 Dell VRP100 Lens Replacement: Schritt 6, Bild 2 von 3 Dell VRP100 Lens Replacement: Schritt 6, Bild 3 von 3
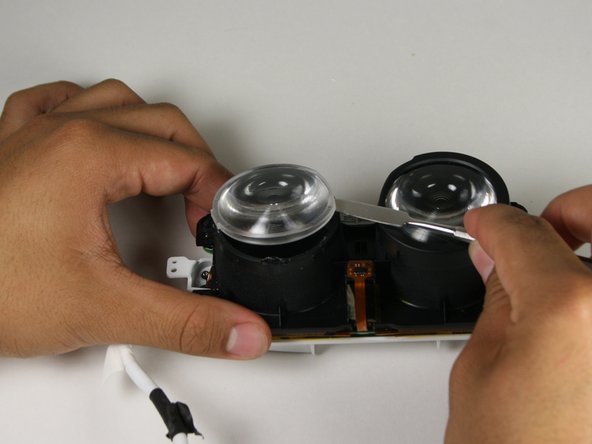
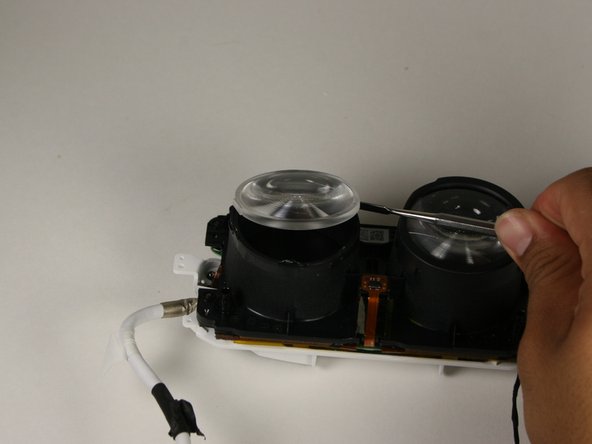
    • Gently insert the metal spudger between the lens and the lens casing.

    • Rotate the spudger around the exterior of the lens and lens housing, separating them.

    • The lens is held in place with an adhesive that will have to be applied during reassembly.

  7. Dell VRP100 Lens Replacement: Schritt 7, Bild 1 von 1
    • Holding the lens around the outside, gently lift it out of its housing.

Abschluss

To reassemble your device, follow these instructions in reverse order.

Ein:e weitere:r Nutzer:in hat diese Anleitung absolviert.

Chris Grabow

Mitglied seit: 10/08/18

285 Reputation

2 Anleitungen geschrieben

Team

Cal Poly, Team S17-G1, White Fall 2018 Mitglied von Cal Poly, Team S17-G1, White Fall 2018

CPSU-WHITE-F18S17G1

4 Mitglieder

12 Anleitungen geschrieben

0 Kommentare

Kommentar hinzufügen

Seitenaufrufe:

Letzte 24 Stunden: 1

Letzte 7 Tage: 2

Letzte 30 Tage: 2

Insgesamt: 776