Diese Version enthält möglicherweise inkorrekte Änderungen. Wechsle zur letzten geprüften Version.
Was du brauchst
-
Dieser Schritt ist noch nicht übersetzt. Hilf mit, ihn zu übersetzen!
-
Use the Plastic Opening Tools to pry off the tab located on the right side of the top face plate.
-
-
Dieser Schritt ist noch nicht übersetzt. Hilf mit, ihn zu übersetzen!
-
Lift the plate off the laptop from right to left.
-
Pull the plate out and remove it.
-
-
Dieser Schritt ist noch nicht übersetzt. Hilf mit, ihn zu übersetzen!
-
Remove the four 3mm Phillips #0 screws.
-
-
Dieser Schritt ist noch nicht übersetzt. Hilf mit, ihn zu übersetzen!
-
Grasp the laptop with both hands as shown.
-
Push the keyboard upwards with your thumbs to disconnect it.
-
-
-
Dieser Schritt ist noch nicht übersetzt. Hilf mit, ihn zu übersetzen!
-
Lift the keyboard from the laptop and remove it.
-
-
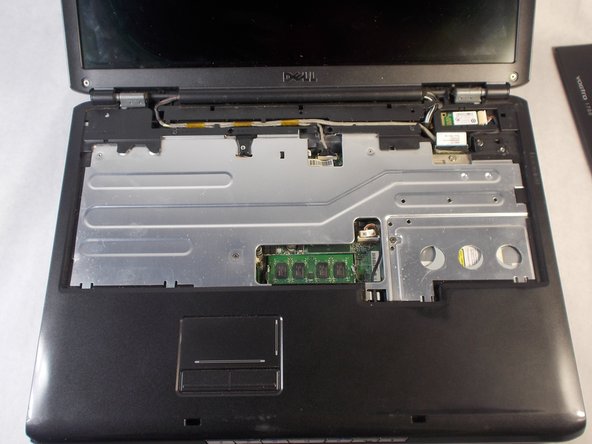
Dieser Schritt ist noch nicht übersetzt. Hilf mit, ihn zu übersetzen!
-
Dislodge the RAM from its slot.
-
Push the retaining clips outward with your fingers.
-
-
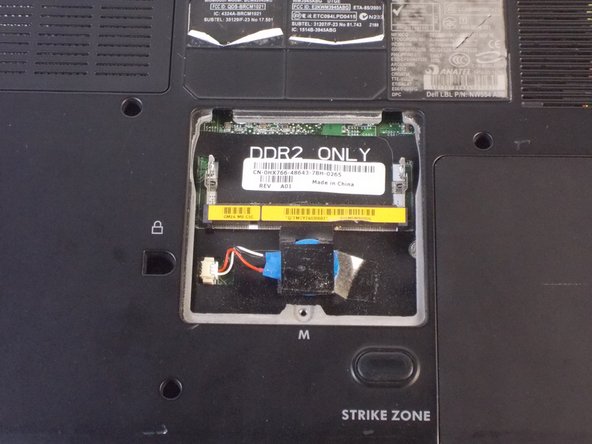
Dieser Schritt ist noch nicht übersetzt. Hilf mit, ihn zu übersetzen!
-
Flip the laptop so under side is facing upwards.
-
Remove the 4.5mm Phillips #1 screw from the RAM cover.
-
Lift off the cover.
-
-
Dieser Schritt ist noch nicht übersetzt. Hilf mit, ihn zu übersetzen!
-
Dislodge the RAM from its slot by pushing outwards on the retaining clips.
-
-
Dieser Schritt ist noch nicht übersetzt. Hilf mit, ihn zu übersetzen!
-
Lift the RAM chip up and out of the slot.
-


Rückgängig: Ich habe diese Anleitung nicht absolviert.
2 weitere Nutzer:innen haben diese Anleitung absolviert.
Team

UMass Dartmouth, Team S3-G1, Peak Spring 2018 Mitglied von UMass Dartmouth, Team S3-G1, Peak Spring 2018
UMASSD-PEAK-S18S3G1
3 Mitglieder
5 Anleitungen geschrieben