Diese Version enthält möglicherweise inkorrekte Änderungen. Wechsle zur letzten geprüften Version.
Was du brauchst
-
Dieser Schritt ist noch nicht übersetzt. Hilf mit, ihn zu übersetzen!
-
Locate the four 3.5 mm Phillips screws holding the silver back plate and the screen together. There are two screws on the top and two screws on the bottom.
-
Using the Phillips #00 Screwdriver, remove all four screws.
-
-
-
Dieser Schritt ist noch nicht übersetzt. Hilf mit, ihn zu übersetzen!
-
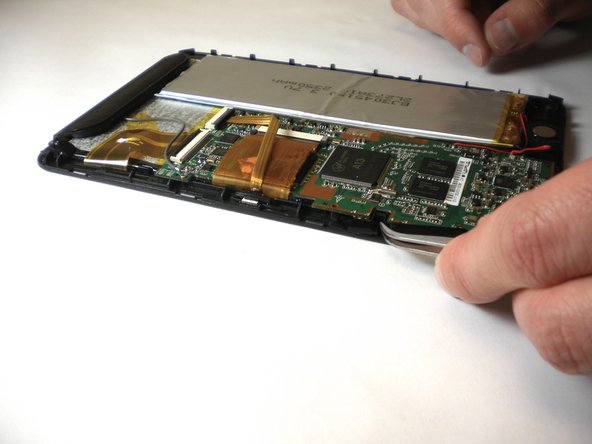
Flip your device so that the long side without the buttons faces you.
-
Insert the Plastic Opening Tool between the silver back plate and the screen about one inch from the corner of the device on either side.
-
Using the Plastic Opening Tool, pry open the screen until it unsnaps from the back plate.
-
Work your way down the edge of the device, unsnapping all locations where the screen meets the silver back plate.
-
Go around the corners with the Plastic Opening Tool and unsnap additional snap-in locations as necessary.
-
-
Dieser Schritt ist noch nicht übersetzt. Hilf mit, ihn zu übersetzen!
-
Using a pair of tweezers, poke the square plastic piece between each of the buttons that connect them together. Each button has a plastic piece between their gaps.
-
While poking the square piece in, simultaneously push it upward to release it.
-
After releasing the first one, use the pair of tweezers, and do the same with the second one. This should free all buttons from the device.
-
Once the buttons are free, use the set of tweezers to grab the buttons and pull them out.
-


Team

USF Tampa, Team 11-6, Blackwell Winter 2015 Mitglied von USF Tampa, Team 11-6, Blackwell Winter 2015
USFT-BLACKWELL-W15S11G6
2 Mitglieder
5 Anleitungen geschrieben