Einleitung
The logic board is an essential part of an electronic device. Removing the board is a significant step while accessing or removing some components of the device. This guide shows you how to accomplish this task.
Was du brauchst
-
-
Remove four 5 mm Phillips #00 screws from each corner of the tablet.
-
-
-
Place the iFixit opening tool in the notches between the cases and pull the covers apart.
-
-
-
Repeat step two until 3/4 of the rear cover is unlatched.
-
Proceed to remove the rear cover by gently pulling it apart by hand.
-
-
-
-
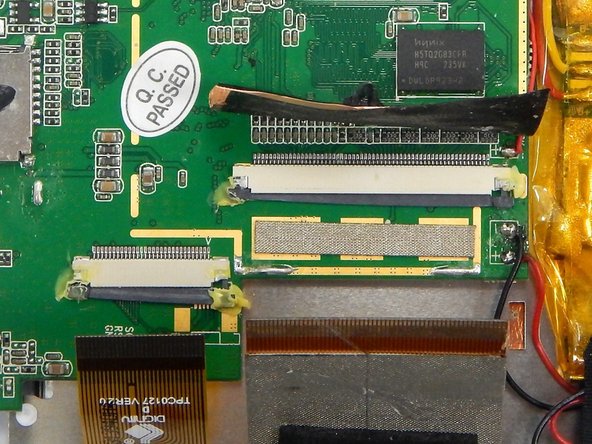
Peel the copper tape covering the ribbon connector with a set of tweezers.
-
-
-
Locate the two gray pins on the ribbon connector.
-
Grab the first pin with tweezers and gently pull it towards the ribbon. Repeat the step.
-
Gently pull the ribbon cable out of the connection port.
-
-
-
Locate the ribbon connector two.
-
Locate the pins of ribbon connector two. Repeat step two for unlocking the pins.
-
Gently pull the ribbon out of the connection port.
-
-
-
Remove the two Phillips #00 screws from the motherboard.
-
-
-
Gently lift up the motherboard and reorient it in a more efficient manner in order to locate the desired components.
-


To reassemble your device, follow these instructions in reverse order.
To reassemble your device, follow these instructions in reverse order.
Team

Michigan Tech, Team 1-2, Lauer Spring 2015 Mitglied von Michigan Tech, Team 1-2, Lauer Spring 2015
MTU-LAUER-S15S1G2
2 Mitglieder
10 Anleitungen geschrieben