Zum Hauptinhalt wechseln

Disassembling Ericsson CF 388 Phone Casing

Was du brauchst

  1. Disassembling Ericsson CF 388 Phone Casing, Disassembling Ericsson CF 388 Battery: Schritt 1, Bild 1 von 3 Disassembling Ericsson CF 388 Phone Casing, Disassembling Ericsson CF 388 Battery: Schritt 1, Bild 2 von 3 Disassembling Ericsson CF 388 Phone Casing, Disassembling Ericsson CF 388 Battery: Schritt 1, Bild 3 von 3
    • To remove the battery from the casing, grab the front panel and back panel with opposite hands (as shown). The back panel is the same as the battery.

    • With your index finger, push in the button on the bottom of the battery to release it.

    • Pull the battery away from the phone.

  2. Disassembling Ericsson CF 388 Phone Casing, Phone Casing: Schritt 2, Bild 1 von 3 Disassembling Ericsson CF 388 Phone Casing, Phone Casing: Schritt 2, Bild 2 von 3 Disassembling Ericsson CF 388 Phone Casing, Phone Casing: Schritt 2, Bild 3 von 3
    • After removing the battery, the front phone casing becomes accessible.

    • Locate the two star-shaped T6 screws on the bottom end of the rear of the phone, underneath the battery, as indicated by the red circles.

    • Remove these two screws using the Torx T6 Screwdriver.

  3. Disassembling Ericsson CF 388 Phone Casing: Schritt 3, Bild 1 von 3 Disassembling Ericsson CF 388 Phone Casing: Schritt 3, Bild 2 von 3 Disassembling Ericsson CF 388 Phone Casing: Schritt 3, Bild 3 von 3
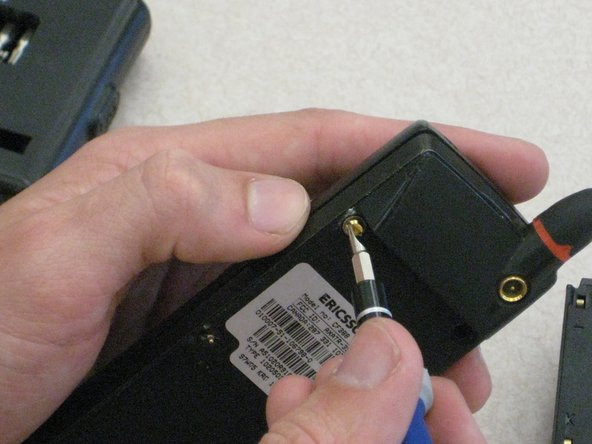
    • Locate the top two U-shaped screws on the back of the phone, as shown by the red circles.

    • Remove these two screws with a SP 2.6 screw driver.

    • Note: Remove gray plastic grommets with screws.

  4. Disassembling Ericsson CF 388 Phone Casing: Schritt 4, Bild 1 von 2 Disassembling Ericsson CF 388 Phone Casing: Schritt 4, Bild 2 von 2
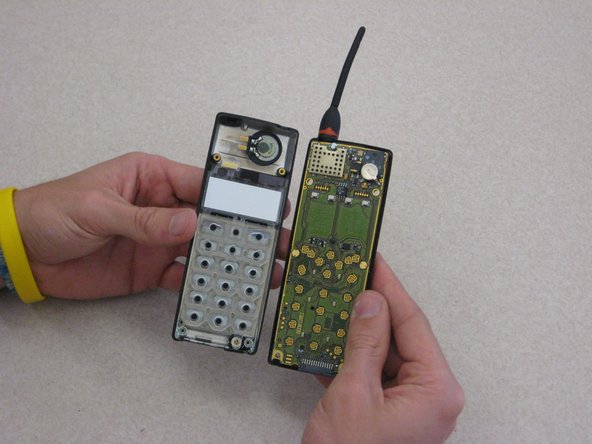
    • Grab opposite panels of the phone casing and carefully open and pull apart the phone, as shown in the image.

    • Note: Be careful not to damage the circuit board and components as you as open the casing.

Abschluss

To reassemble your device, follow these instructions in reverse order.

2 weitere Nutzer:innen haben diese Anleitung absolviert.

Team

Clemson, Team 1-1, Benson Spring 2012 Mitglied von Clemson, Team 1-1, Benson Spring 2012

CLEM-BENSON-S12S1G1

3 Mitglieder

21 Anleitungen geschrieben

0 Kommentare

Kommentar hinzufügen

Seitenaufrufe:

Letzte 24 Stunden: 0

Letzte 7 Tage: 7

Letzte 30 Tage: 15

Insgesamt: 1,144