Diese Version enthält möglicherweise inkorrekte Änderungen. Wechsle zur letzten geprüften Version.
Was du brauchst
-
Dieser Schritt ist noch nicht übersetzt. Hilf mit, ihn zu übersetzen!
-
First be sure to turn the power switch to the off position.
-
Do this by turning the leftmost knob counter-clockwise as until the line points to "off."
-
-
Dieser Schritt ist noch nicht übersetzt. Hilf mit, ihn zu übersetzen!
-
Now remove the battery.
-
On the back of the device locate the battery cover.
-
Remove it by pushing down on the clip.
-
Then pull the piece of fabric until the battery comes out.
-
-
-
Dieser Schritt ist noch nicht übersetzt. Hilf mit, ihn zu übersetzen!
-
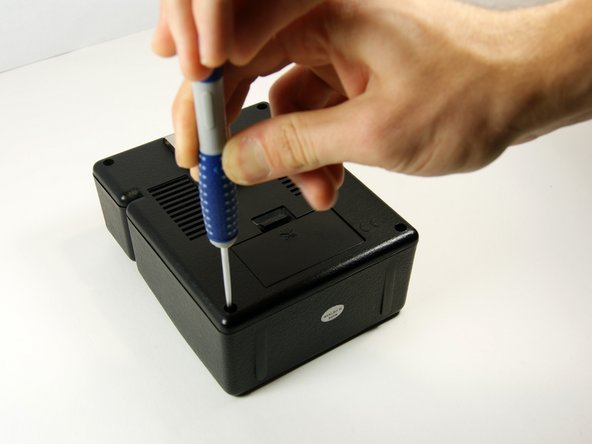
Use the long, skinny phillips head screwdriver to remove the 4 7/16" screws on the back of the device in the four corners.
-
-
Dieser Schritt ist noch nicht übersetzt. Hilf mit, ihn zu übersetzen!
-
Now pull the back panel off and place it down as shown. Pull the panel straight up so you do not lose the screws.
-


Rückgängig: Ich habe diese Anleitung nicht absolviert.
Ein:e weitere:r Nutzer:in hat diese Anleitung absolviert.
Team

University of Maryland, Team 1-1, Shastany Fall 2013 Mitglied von University of Maryland, Team 1-1, Shastany Fall 2013
UMD-SHASTANY-F13S1G1
3 Mitglieder
5 Anleitungen geschrieben