Diese Version enthält möglicherweise inkorrekte Änderungen. Wechsle zur letzten geprüften Version.
Was du brauchst
-
Dieser Schritt ist noch nicht übersetzt. Hilf mit, ihn zu übersetzen!
-
Place the monitor face down on a clean, flat surface.
-
-
Dieser Schritt ist noch nicht übersetzt. Hilf mit, ihn zu übersetzen!
-
Firmly remove the back panel of the stand by pulling it up and away from the monitor.
-
-
-
Dieser Schritt ist noch nicht übersetzt. Hilf mit, ihn zu übersetzen!
-
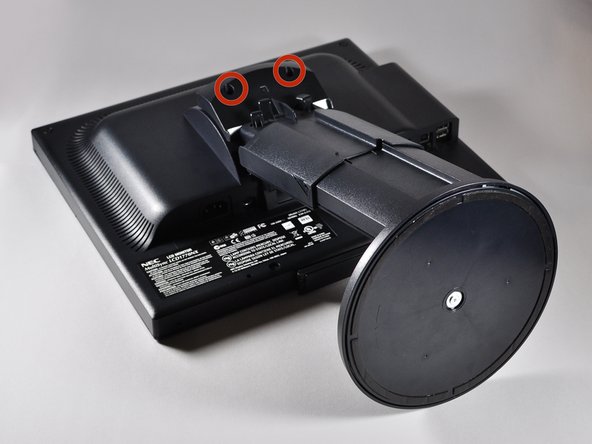
Unscrew the two 6mm Phillips PH2 screws to detach the stand enclosure from the stand.
-
-
Dieser Schritt ist noch nicht übersetzt. Hilf mit, ihn zu übersetzen!
-
Firmly grasp the stand enclosure with your hand and slide it to base of stand.
-
-
Dieser Schritt ist noch nicht übersetzt. Hilf mit, ihn zu übersetzen!
-
Unscrew the two 14.5mm Phillips PH2 screws holding the stand to the monitor.
-
-
Dieser Schritt ist noch nicht übersetzt. Hilf mit, ihn zu übersetzen!
-
Lift the the stand straight up to remove it.
-


Team

Cal Poly, Team 11-36, Amido Fall 2013 Mitglied von Cal Poly, Team 11-36, Amido Fall 2013
CPSU-AMIDO-F13S11G36
5 Mitglieder
7 Anleitungen geschrieben