Diese Version enthält möglicherweise inkorrekte Änderungen. Wechsle zur letzten geprüften Version.
Was du brauchst
-
Dieser Schritt ist noch nicht übersetzt. Hilf mit, ihn zu übersetzen!
-
Push open the latch and remove the battery.
-
-
Dieser Schritt ist noch nicht übersetzt. Hilf mit, ihn zu übersetzen!
-
Twist off the antenna.
-
Pop off the transparent cylinder.
-
-
Dieser Schritt ist noch nicht übersetzt. Hilf mit, ihn zu übersetzen!
-
Remove the five screws as shown.
-
-
Dieser Schritt ist noch nicht übersetzt. Hilf mit, ihn zu übersetzen!
-
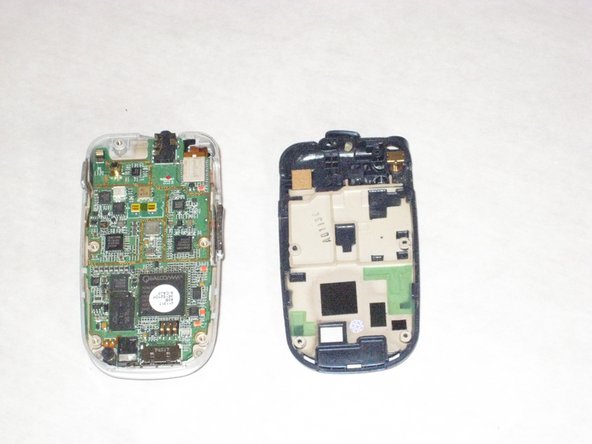
Carefully pry the back plate off.
-
-
-
Dieser Schritt ist noch nicht übersetzt. Hilf mit, ihn zu übersetzen!
-
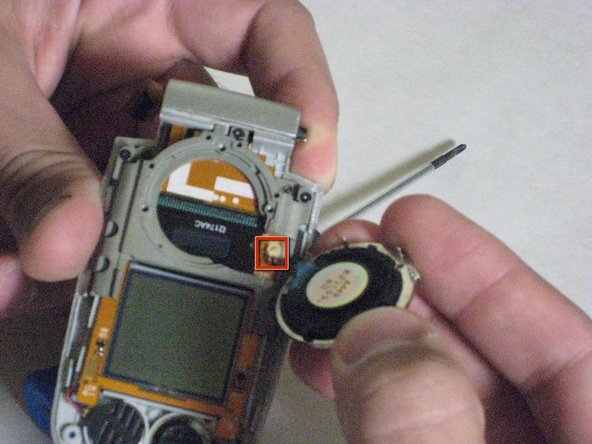
Carefully detach golden screen connector.
-
-
Dieser Schritt ist noch nicht übersetzt. Hilf mit, ihn zu übersetzen!
-
Pop out the logic board with spudger.
-
-
Dieser Schritt ist noch nicht übersetzt. Hilf mit, ihn zu übersetzen!
-
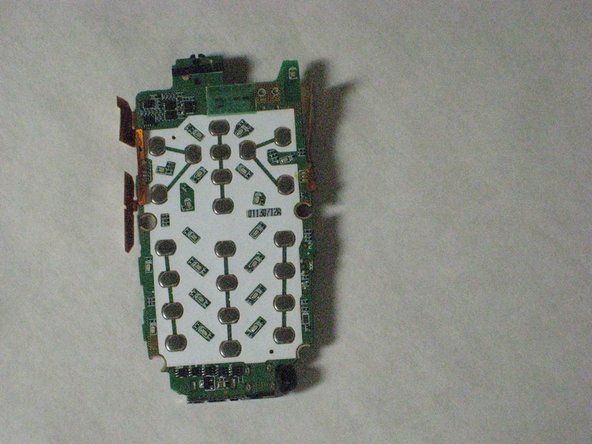
Place the logic board on a clean tray.
-
-
Dieser Schritt ist noch nicht übersetzt. Hilf mit, ihn zu übersetzen!
-
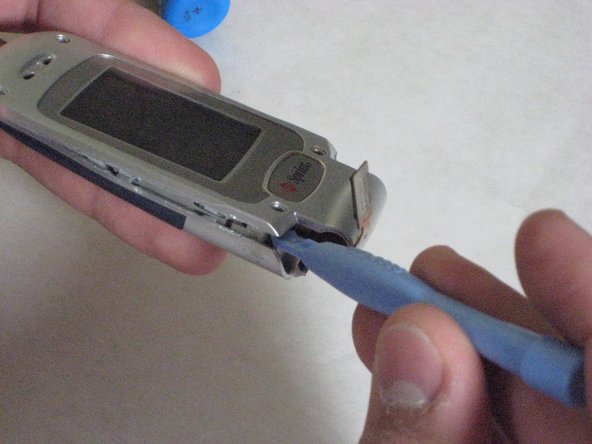
Remove the hinge on the phone.
-
Put pressure on the spring with the screwdriver to unhinge phone.
-
Make sure to pull the gold wire through, don't let it rip.
-
-
Dieser Schritt ist noch nicht übersetzt. Hilf mit, ihn zu übersetzen!
-
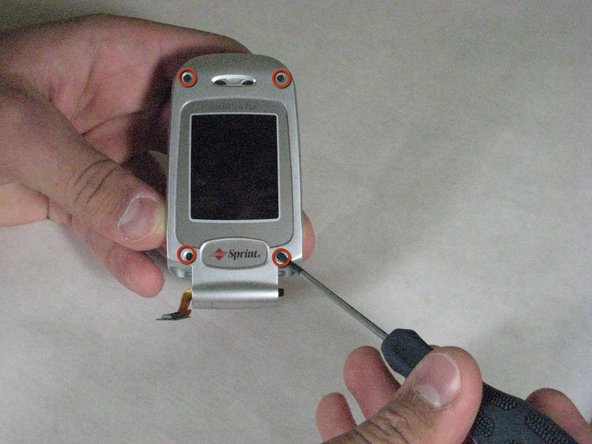
Remove the four screws as shown
-
Use the spudger to pry it open, excessive force may be necessary.
-
-
Dieser Schritt ist noch nicht übersetzt. Hilf mit, ihn zu übersetzen!
-
Remove the three screws that hold the big speaker
-


Team

Cal Poly, Team 10-43, Garner Spring 2010 Mitglied von Cal Poly, Team 10-43, Garner Spring 2010
CPSU-GARNER-S10S10G43
5 Mitglieder
12 Anleitungen geschrieben