Diese Version enthält möglicherweise inkorrekte Änderungen. Wechsle zur letzten geprüften Version.
Was du brauchst
-
Dieser Schritt ist noch nicht übersetzt. Hilf mit, ihn zu übersetzen!
-
Flip the device to the backside, and locate the metal tab at the center of the back cover.
-
-
Dieser Schritt ist noch nicht übersetzt. Hilf mit, ihn zu übersetzen!
-
Lift the metal tab up, and rotate it counterclockwise. This will unlock the back case cover.
-
-
Dieser Schritt ist noch nicht übersetzt. Hilf mit, ihn zu übersetzen!
-
Lift the battery plate off to either insert or remove 2 AA batteries.
-
-
-
Dieser Schritt ist noch nicht übersetzt. Hilf mit, ihn zu übersetzen!
-
With the wedge side of a spudger (or a small, flat head screwdriver), remove the black rubber case support from the device body.
-
-
Dieser Schritt ist noch nicht übersetzt. Hilf mit, ihn zu übersetzen!
-
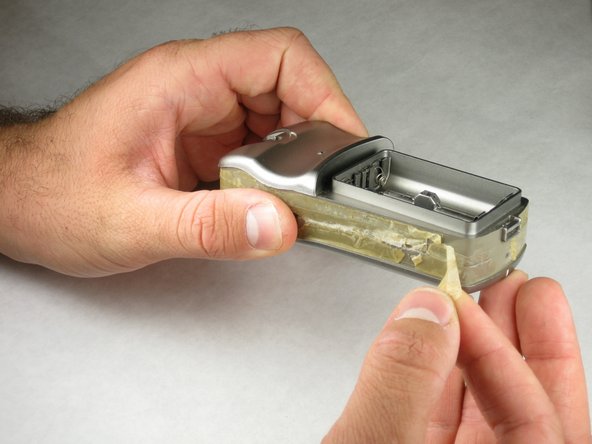
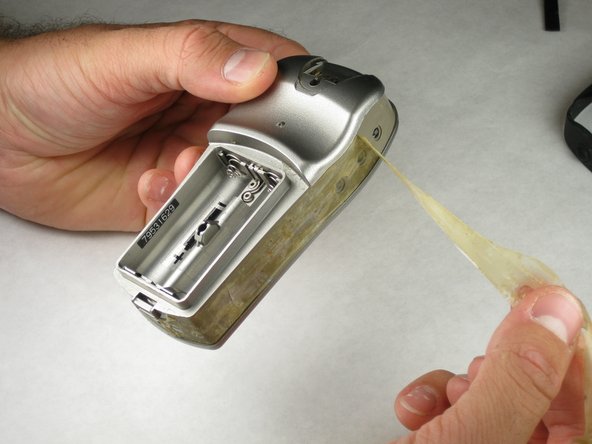
With the pick side of a spudger (or tweezers), peel the sticky tape from the device.
-
-
Dieser Schritt ist noch nicht übersetzt. Hilf mit, ihn zu übersetzen!
-
Split the front and rear panels by inserting a small pointed tool (such as a pen point or a screwdriver tip SL1.5) in the 5 plastic tabs along the sides of the device.
-
-
Dieser Schritt ist noch nicht übersetzt. Hilf mit, ihn zu übersetzen!
-
With tweezers (or your fingernails), carefully disconnect the wires between the PC input and the motherboard.
-


Rückgängig: Ich habe diese Anleitung nicht absolviert.
7 weitere Nutzer:innen haben diese Anleitung absolviert.
Team

Cal Poly, Team 21-30, Regan Fall 2010 Mitglied von Cal Poly, Team 21-30, Regan Fall 2010
CPSU-REGAN-F10S21G30
3 Mitglieder
5 Anleitungen geschrieben