Einleitung
If you are having issues with your Bose SoundDock XT and want to save money and repair the device yourself, you have come to the right place. These instructions will help you disassemble the SoundDock XT.
Was du brauchst
-
-
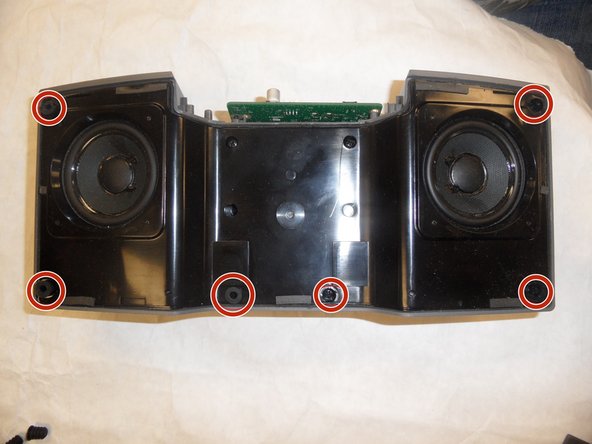
Remove six 10 mm length screws from the bottom panel of the SoundDock.XT using a #1 Phillips screwdriver.
-
-
-
Remove the Front Panel, use a #2 Phillips screwdriver to remove the two 6.5 mm length front panel screws located under the bottom cover (highlighted in red circles in the photo).
-
-
-
-
Next, use a plastic opening tool to slide under the edge of the front cover. Start edge located at the top of the left or right speaker and work your way around the speaker. Remove the front cover.
-
-
-
Use a wide nose tweezer to remove six rubber grommets from the front of the SoundDock XT.
-
-
-
Use a #2 screwdriver to remove the six 8.5 mm length screws from the speaker cover.
-
-
-
Using a metal spudger, slide between the outer case and the front speaker cover. Work your way around the cover and remove the speaker cover. You now have access to the speakers.
-


To reassemble your device, follow these instructions in reverse order.
To reassemble your device, follow these instructions in reverse order.
Rückgängig: Ich habe diese Anleitung nicht absolviert.
2 weitere Nutzer:innen haben diese Anleitung absolviert.

Team

IUPUI, Team 1-4, Hagerty Fall 2015 Mitglied von IUPUI, Team 1-4, Hagerty Fall 2015
IUPUI-HAGERTY-F15S1G4
5 Mitglieder
3 Anleitungen geschrieben