Einleitung
This guide is for the replacement of compontents like: the memory, hard drive, and heat sink.
I replace the thermal paste between the CPU and heat sink or "fan cooler". It includes the cleaning of the internal components of the laptop. This prevents overheating.
Was du brauchst
Angehängtes Dokument
-
-
Place the laptop facing down with the battery upwards in your work area.
-
Remove the battery sliding the safety latch to the left.
-
-
-
Remove the 3, #00 Phillips screws located below the battery.
-
Loosen the #00 Phillips screw from the RAM compartment and remove the cover.
-
Loosen the retainers.
-
Remove the RAM modules.
-
-
-
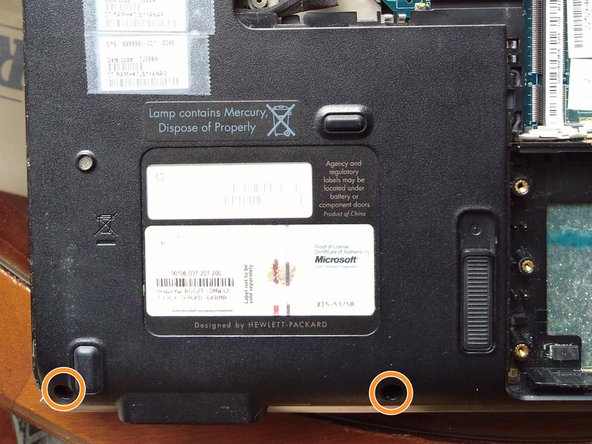
Remove the 2, #00 Phillips screws that secure the Hard Drive and the Wi-Fi card cover.
-
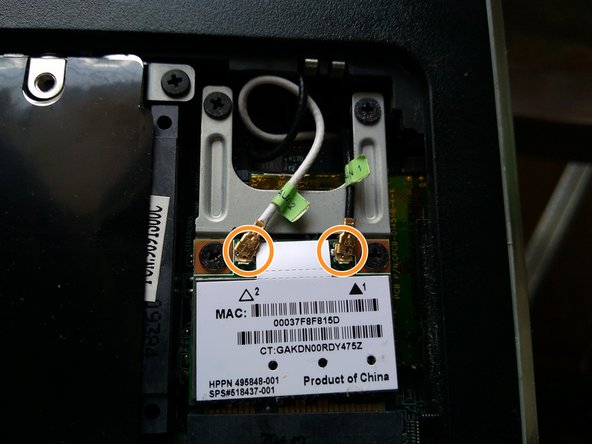
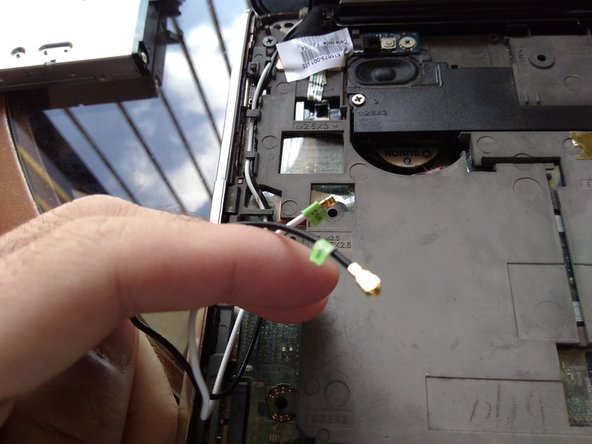
Remove the cover and unplug the 2 plugs that connect the antenna to the Wi-Fi card.
-
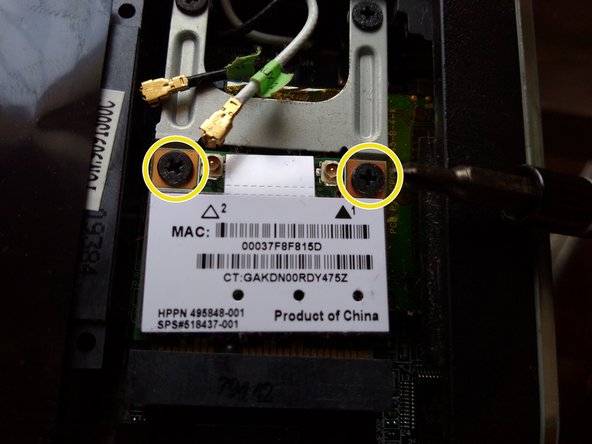
Remove the 2 screws and take the Wi-Fi card apart.
-
-
-
Unscrew the 3, #2 Phillips screws.
-
Now, use the plastic protector to pull the hard drive to the left.
-
Tilt the hard drive raising its right side.
-
Remove the hard drive.
-
-
-
Remove the WWAN card screw.
-
Push upwards the DVD unit safety latch.
-
The DVD unit should slide out. Remove it.
-
-
-
Remove the 3 upper left corner screws.
-
Now, remove the 2 lower left corner screws.
-
-
-
Remove the 3 upper right corner screws.
-
Remove the 4 lower right corner screws.
-
-
-
Turn the laptop and open it.
-
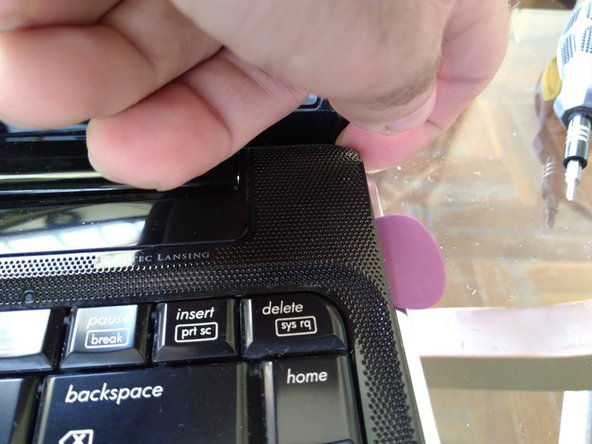
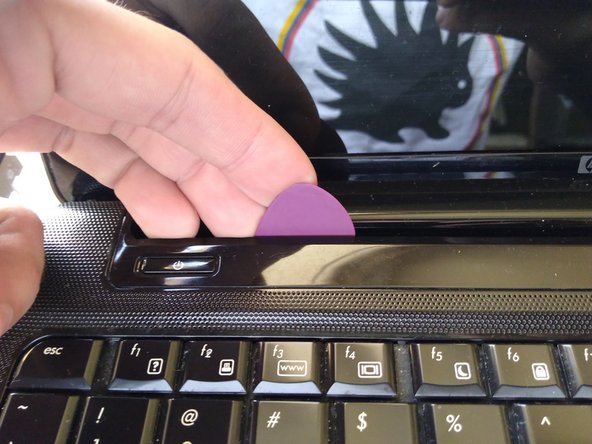
Use plastic picks to partially separate the plastic surrounding the keyboard.
-
-
-
-
Take the keyboard partially out of its place, first from the top, then from the bottom of the keyboard.
-
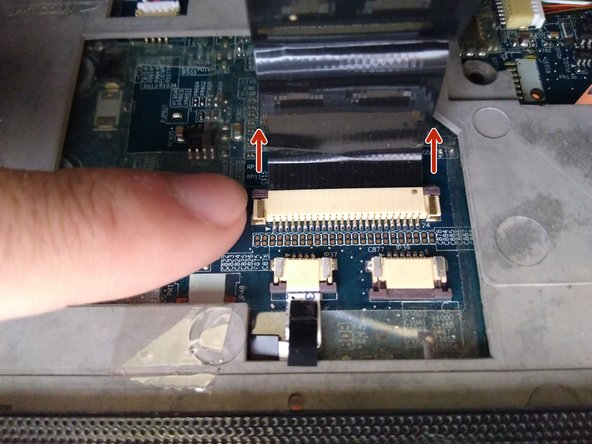
Push both sides of the keyboard to free the ribbon cable retainers.
-
-
-
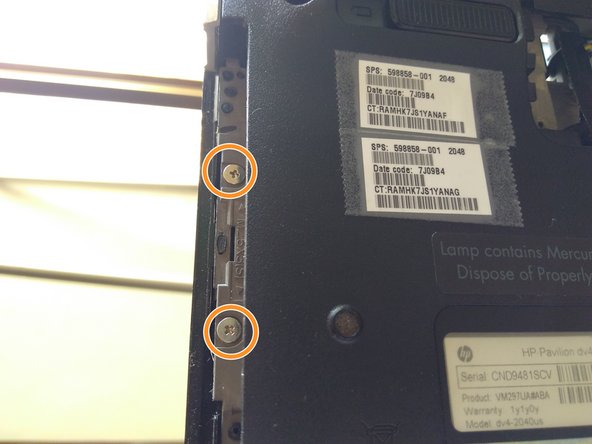
Remove the 2 screws under the keyboard, located in the lower left corner.
-
Remove the 2 screws that were covered by the DVD unit.
-
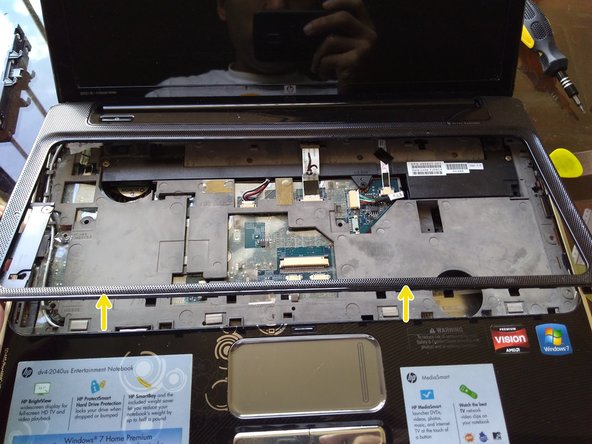
Remove the keyboard plastic cover completely.
-
-
-
Before tearing the plastic surrounding the keyboard, remove the ribbon cable holding it in place.
-
-
-
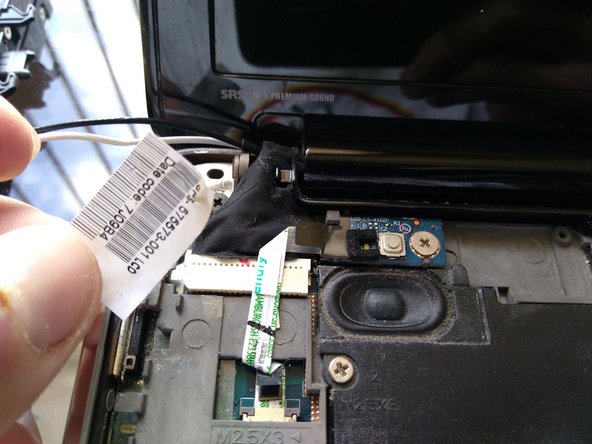
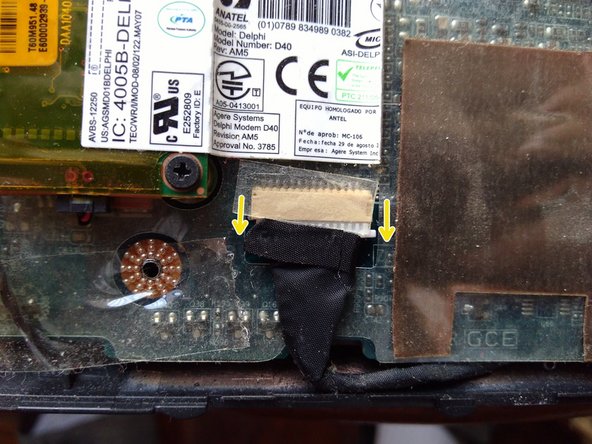
Push both ends of the screen cable using a tool until it's disconnected.
-
Do the same with the ribbon cable located in the far right side of the screen.
-
-
-
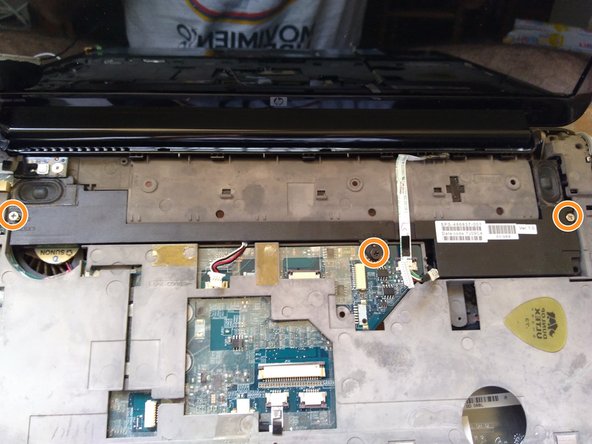
Unplug the speakers power cable.
-
Remove the 3 screws that secure the speakers.
-
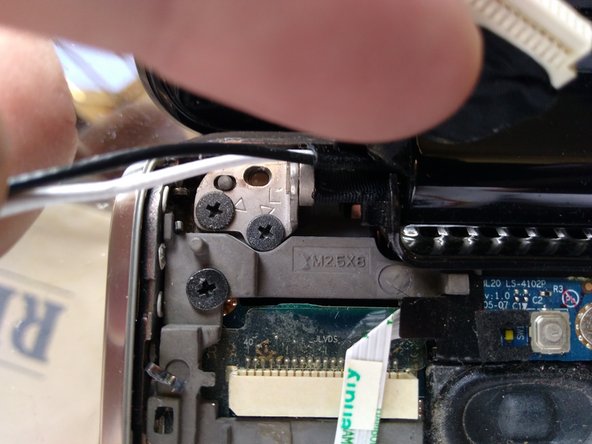
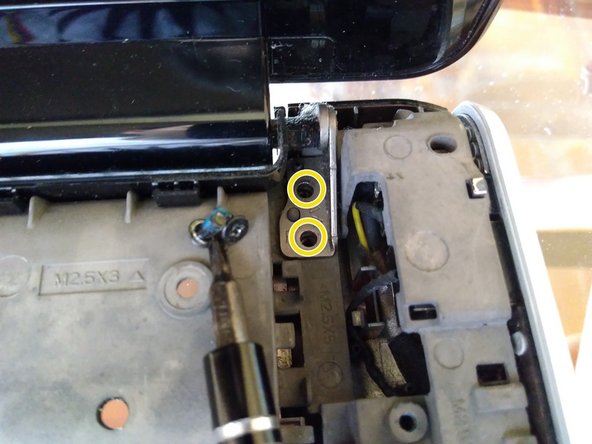
Remove the speakers and the 2 screws that hold the right side of the screen in place.
-
-
-
Remove the screen.
-
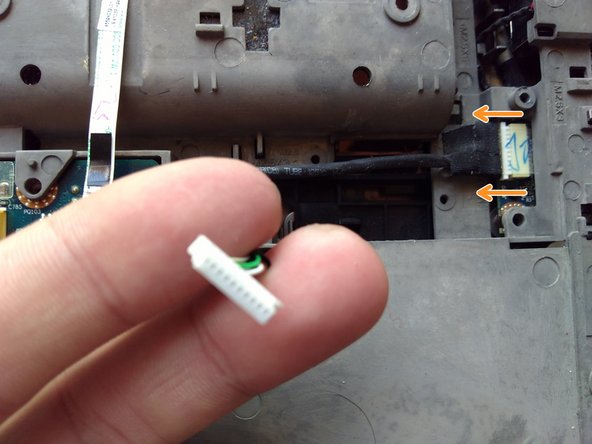
Remove the ribbon cable that connects to the on/off button.
-
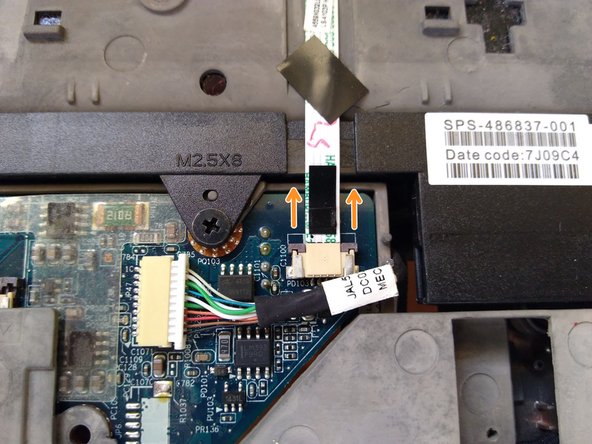
Remove the ribbon cable that connects the touchpad.
-
-
-
Remove the 3 screws under the screen bezel.
-
Remove the cable completely.
-
Use a plastic pick to remove the plastic that wraps the side of the laptop.
-
-
-
Remove the lateral card.
-
Remove the tape and the power cable from the fan cooler.
-
Put away the cable.
-
-
-
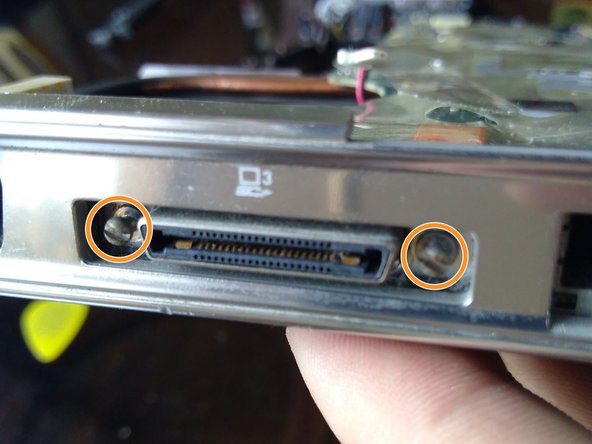
Remove the screw that holds the motherboard in place.
-
Now remove the 2 lateral screws, use a flat head screwdriver.
-
Remove the cable located in lower right corner of the laptop.
-
-
-
Put the clock battery out of the way.
-
With a flat head screwdriver, remove the power cable located at the upper left side of the motherboard.
-
Remove the motherboard from it's place and turn it over.
-
-
-
Using your hand or a pair of pliers, remove the lint.
-
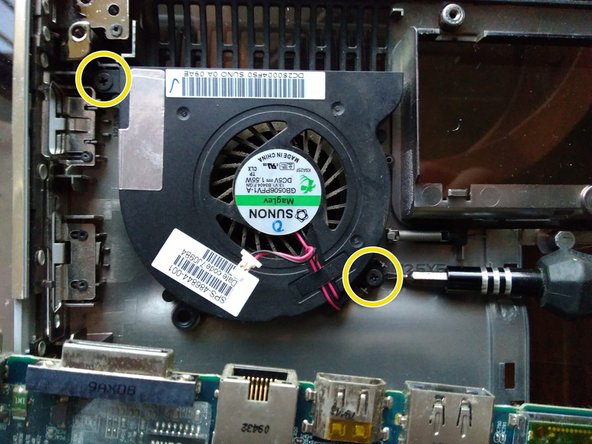
Use a screwdriver to lock the fan and prevent it to move while you are cleaning it.
-
Remove the 2 screws that hold the fan to the chassis of the laptop.
-
-
-
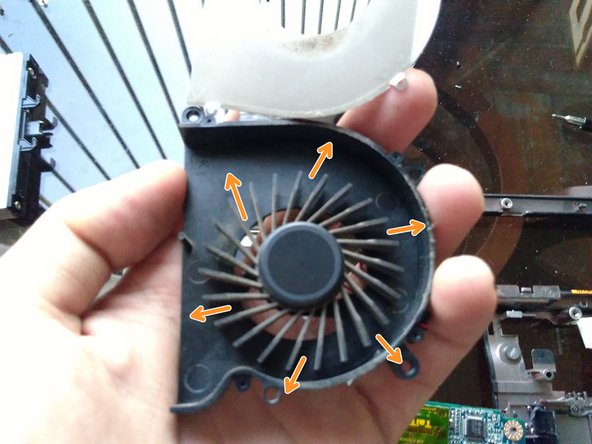
Using a #000 Phillips screwdriver, remove the 4 screws that close the fan housing.
-
With a small brush or a toothbrush, remove the dust. BE CAREFUL: the fan blades are VERY fragile, do not apply too much force with your fingers.
-
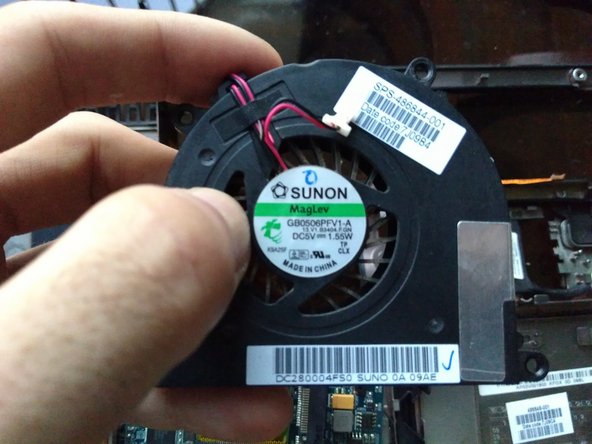
Close and screw the cooling fan housing. You can see the fan requires 5 volts, 1.55 watts and a 2 pin cable in order to work.
-
-
-
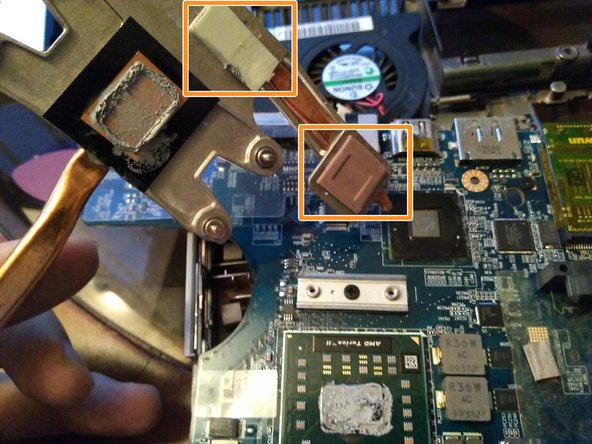
Loosen the 4 screws that hold the heat sink in place.
-
Remove the heat sink. DO NOT remove the thermal pads.
-
-
-
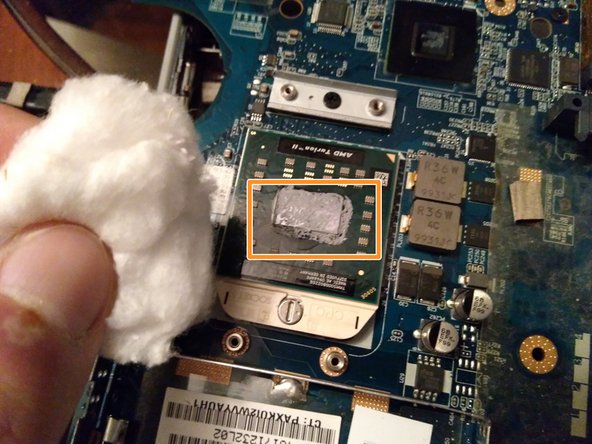
Use 70% or higher isopropyl alcohol and cotton or absorbent paper to damp.
-
With the damp cotton or paper, remove the old thermal paste from the CPU and wait to completely dry for 10 minutes.
-
Remove the thermal paste from the heat sink as well.
-
-
-
Place a small amount of new thermal paste on the metallic part of the CPU.
-
Use your finger to evenly spread the exposed metal on the processor.
-


To reassemble your device, follow the instructions from the last to first step.
To reassemble your device, follow the instructions from the last to first step.
Rückgängig: Ich habe diese Anleitung nicht absolviert.
2 weitere Personen haben diese Anleitung absolviert.
Besonderer Dank geht an diese Übersetzer:innen:
100%


Diese Übersetzer:innen helfen uns, die Welt zu reparieren! Wie kann ich mithelfen?
Hier starten ›
