Zum Hauptinhalt wechseln
Gemeinsam reparieren - Jetzt registrieren

Drawer Roller Bracket Replacement

Was du brauchst

    1. Drawer Roller Bracket Replacement, Drawer Roller Bracket Replacement: Schritt 1, Bild 1 von 2 Drawer Roller Bracket Replacement, Drawer Roller Bracket Replacement: Schritt 1, Bild 2 von 2
      • Clear out drawer of any contents. This will make the drawer easier to handle, with no mess or clutter.

      • To remove, pull the drawer completely open.

      • Lift the drawer straight up.

      Frag FixBot

      Kommentar hinzufügen

    2. Drawer Roller Bracket Replacement: Schritt 2, Bild 1 von 1
      • Remove the brackets on the drawer.

      • Some may have rivets, some may have screws. If there are screws a simple screwdriver will do the trick. If there are rivets use a drill the size of the head of the rivet and proceed to drill the head of the rivet.

      • When removing rivets with a drill, wear eye protection and be cautious.

      Frag FixBot

      Kommentar hinzufügen

    3. Drawer Roller Bracket Replacement: Schritt 3, Bild 1 von 2 Drawer Roller Bracket Replacement: Schritt 3, Bild 2 von 2
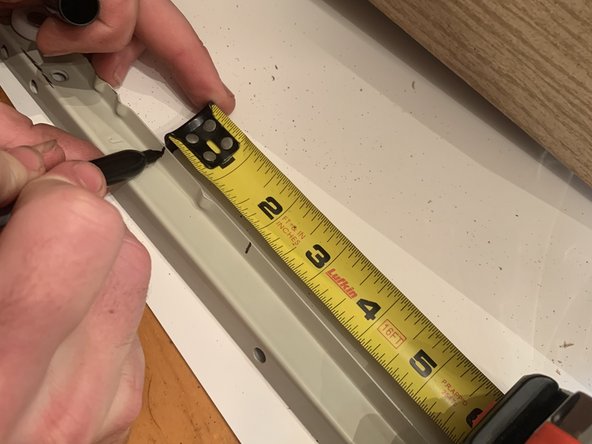
      • Measure the length of the internal track to the recessed part in the rear of the track.

      • This recess will hold the drawer completely closed when the wheel on the bracket reaches it.

      • Then measure the amount of bracket that needs to be removed. In our case, 2 inches will need to be removed.

      Frag FixBot

      Kommentar hinzufügen

    4. Drawer Roller Bracket Replacement: Schritt 4, Bild 1 von 2 Drawer Roller Bracket Replacement: Schritt 4, Bild 2 von 2
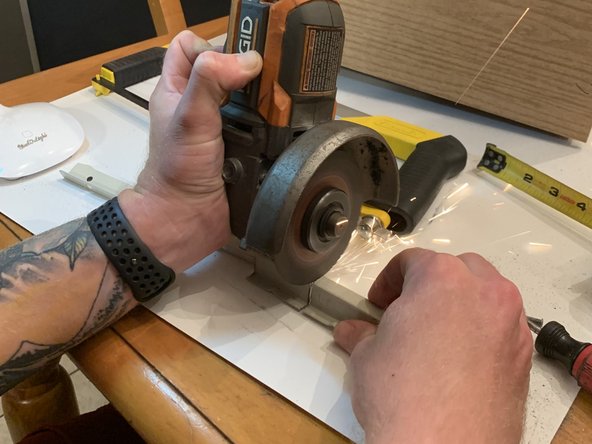
      • Remove the excess bracket. Make sure to remove parts of the bracket that do not contain holes. These holes are used for fasteners.

      • To cut a section, make sure you make perfectly vertical cuts for the remaining pieces to line up. To assure a straight line to cut, use a sharpie marker to mark a straight line.

      • Use a reciprocating power saw or a grinder with cutting wheel. I used a grinder because I found it to be easier.

      • Maintain eye protection, and gloves if necessary.

      Frag FixBot

      Kommentar hinzufügen

    5. Drawer Roller Bracket Replacement: Schritt 5, Bild 1 von 1
      • Apply JB Kwikweld to the remaining pieces of bracket. Mix equal parts of the mixture.

      • Discard the removed piece from last step.

      • When applying JB weld, use a small amount, I used a toothpick as an applicator.

      • Set time was roughly 6 minutes for the weld mixture to set.

      • Before adding weight to the drawer, allow the weld to fully cure. This will take 4-6 hours.

      Frag FixBot

      Kommentar hinzufügen

    6. Drawer Roller Bracket Replacement: Schritt 6, Bild 1 von 2 Drawer Roller Bracket Replacement: Schritt 6, Bild 2 von 2
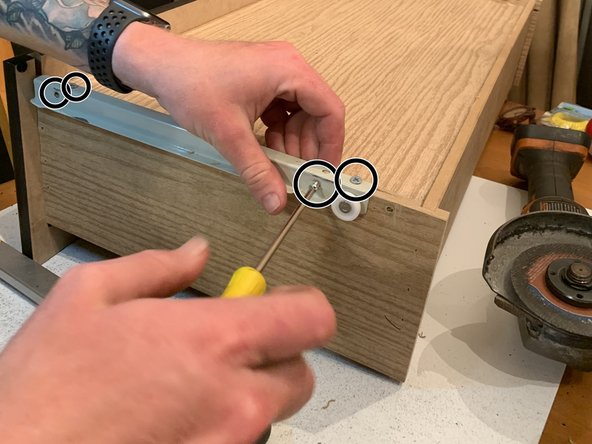
      • Use a drill with a drill bit to make necessary holes for screws to sit and fasten the bracket. Use a drill bit slightly larger than shaft of screws, but smaller than the head of the screws.

      • I used a 3/32 drill bit.

      • Install new fastener screws to the bracket.

      • My build required 12 #6x1/2inch Philips screws. I used three screws on each end of the brackets and six screws on each end of the bracket.

      • The more screws used, the stronger the bracket is secured. (Two on the bottom of the bracket, and one on the inside of the track.)

      • If possible, use preexisting holes, and screws.

      • Sometimes screws protrude too far, you may have to grind the head of the screw slightly so it protrudes less.

      Frag FixBot

      Kommentar hinzufügen

    7. Drawer Roller Bracket Replacement: Schritt 7, Bild 1 von 1
      • Make sure the bracket is fastened securely, make any necessary adjustments.

      • You may need to grind down some of the JB Weld if too much was applied. Simply used a file or grinder.

      Frag FixBot

      Kommentar hinzufügen

    8. Drawer Roller Bracket Replacement: Schritt 8, Bild 1 von 1
      • Insert wheels on both sides of the drawer bracket into the opening behind the wheel on the track located in the furniture.

      • Close the drawer and make sure it opens and closes functionally.

      Frag FixBot

      Kommentar hinzufügen

Abschluss

To reassemble your device, follow these instructions in reverse order.

Rückgängig: Ich habe diese Anleitung nicht absolviert.

Eine weitere Person hat diese Anleitung absolviert.

Team

USF Sarasota-Manatee, Team S1-G1, Stewart Spring 2020 Mitglied von USF Sarasota-Manatee, Team S1-G1, Stewart Spring 2020

USFSM-STEWART-S20S1G1

23 Mitglieder

99 Anleitungen geschrieben

0 Kommentare zur Anleitung

Kommentar hinzufügen

Seitenaufrufe:

Letzte 24 Stunden: 3

Letzte 7 Tage: 10

Letzte 30 Tage: 42

Insgesamt: 1,635