Einleitung
Hier ist ein DualShock 4-Controller, der bei beiden analogen Joysticks driftete. Ein Austausch der Joysticks löste das Problem.
Die Joysticks sind mit der Steuerplatine verlötet. du benötigst eine Lötstation, um diese Reparatur durchzuführen.
Was du brauchst
-
-
Entferne die vier 6,0 mm PH00 Schrauben, die die hintere Abdeckung am Controller befestigen.
-
-
-
Beginne am linken Handgriff:
-
Quetsche den linken Handgriff um einen Spalt zu erzeugen.
-
Zwänge ein Öffnungswerkzeug in die Öffnung und schiebe es in Richtung Joystick.
-
Drücke das Werkzeug nach unten bis der Deckel abspringt.
-
Wiederhole das Ganze für den rechten Handgriff.
-
-
-
Zwänge das Öffnungswerkzeug in den Spalt zwischen den Gehäusehälften und drücke ihn nach unten um das Gehäuse in der Nähe folgender Knöpfe zu öffnen:
-
Teilen Knopf
-
Optionen Knopf
-
Nimm die Plastikdeckel auseinander, achte darauf, dass immer noch Flachbandkabel daran hängen.
-
Zwei Federn an den Auslösern.
-
ein graue Verlängerung für den Reset Knopf.
-
-
-
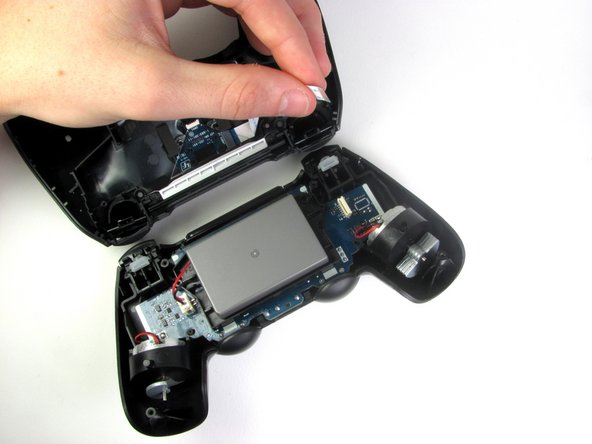
Löse das Flachbandkabel an der Hauptplatine, welches die beiden Hälften des Controllers verbindet, indem du es mit deinen Fingern gerade herausziehst.
-
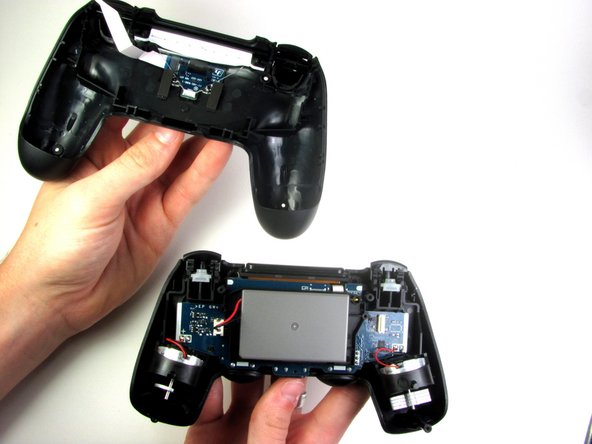
Nachdem du die beiden Teile getrennt hast, lege das Oberteil zur Seite.
-
-
-
-
Löse den Akkustecker vorsichtig mit einer stumpfen gewinkelten Pinzette, indem du diese an den Seiten des Steckers ansetzt.
-
Wenn der Stecker von der Hauptplatine gelöst ist kannst du den Akku herausheben.
-
-
-
Entferne die einzelne 6,0 mm Kreuzschlitzschraube die sich unter dem Batteriehalter befindet mit einem Schraubendreher #00.
-
-
-
Löse das Flachbandkabel vomTouchpad zur Hauptplatine mit einer stumpfen Pinzette. Das Kabel ist an der Platine mit einem Verbinder angeschlossen, den man zum Lösen bzw. Befestigen klappen muss. Beim Wiederzusammenbau musst du den Plastikeinsatz vorsichtig von der Platine abziehen und der Klappverschluss muss offen sein.
-
-
-
Hebe vorsichtig die Haupteinheit vom vorderen Gehäuseteil weg.
-
Die Vibrationsmotoren sind nur lose am Gehäuse befestigt. Du erleichterst das Trennen, wenn du an den beiden Enden unterstützst.
-
-
-
Wenn du den Controller ganz zerlegt hast siehst du folgende drei Teile vor dir:
-
Die Haupteinheit
-
Vorderes Gehäuseteil
-
Hinteres Gehäuseteil
-
-
-
Diese Lötstellen müssen entlötet werden. Da die Platine mit der Unterseite nach oben liegt vertauschen sich links und rechts. Wir haben eine schöne Lötanleitung.
-
Entlöte die Stellen mit Entlötlitze und Flussmittel.
-
Das dauert vielleicht ein Bisschen. Es hilft, wenn du während des Entlötens etwas am Joystick wackelst.
I'm new to solder/desoldering but i've been unable to get the solder to really melt or come loose enough to remove during this step. i have a solder remover/sucker but alas no luck.
any recommendations?
You need heat, solder wick (skip the solder sucker, those never work for me;-) and lots of flux. Place flux on your wick and tin the tip of your soldering iron with solder as well.
-
-
-
Wenn viele Lötstellen frei sind kannst du den alten Joystick entfernen.
-
Achte darauf, dass sämtliche Löcher frei von Lötzinn sind. Du kannst sie gut mit medizinischen Nadeln oder kleinen Bohrern öffnen.
-
Setze den neuen Joystick in die Platine ein. Achte auf korrekten Sitz und dass die Kontakte sauber in die Löcher passen.
-
-
-
Prüfe lieber zweimal, ob alles gut sitzt.
-
Verlöte alle Lötstellen.
-
Auf dem Foto ist die erfolgreiche Reparatur zu sehen. Jetzt muss nur noch alles mit Isopropylalkohol gereinigt werden.
-


Um dein Gerät wieder zusammenzusetzen, folge den Schritten in umgekehrter Reihenfolge.
Um dein Gerät wieder zusammenzusetzen, folge den Schritten in umgekehrter Reihenfolge.
Rückgängig: Ich habe diese Anleitung nicht absolviert.
33 weitere Nutzer:innen haben diese Anleitung absolviert.
Besonderer Dank geht an diese Übersetzer:innen:
100%


Diese Übersetzer:innen helfen uns, die Welt zu reparieren! Wie kann ich mithelfen?
Hier starten ›

Team

14 Kommentare
I just tried to remove both joystick and replaced them but unfortunately only one joystick works and that one that works it's stuck on and only moves in one direction.
I've not been able to actually get the solder out, would love any suggestions or tips.
send me a couple of pictures on what your repair looks like thus far. Send them to my email. Click on my username and my email address is on my profile. Let's see what you got so far.
This is a very difficult repair, what this guy didn't mention is you need a very expensive solder station with an electric solder sucker. The solder needs removing and it's nearly impossible without damaging the tracking.
You definitely need some soldering experience but the repairability is not that difficult. The soldering points are big enough for any cheap ($40) soldering iron can get too. As for removing them, it helps to use flux and also a soldering wick to absorb all the old solder. It is not easy but not the most difficult repair. P.S you do not need the expensive soldering stating with hot air etcetera. This works perfectly as it get hot beyond the required point to melt the solder
I've been repairing ps4 controllers along time and this isn't an easy fix. You need an electric solder sucker, to get all the solder out the holes with danagimv the tracking is near on impossible with a good solder
@dave2003 “what this guy didn't mention is you need a very expensive solder station with an electric solder sucker “, nope! All I used what a run-of-the-mill soldering iron and some soldering wick and flux. This is a straight forward repair that does not require any special tools!
Can someone suggest a good soldering gun and soldering metal ?
mine is for very thin wires.
What is the best soldering gun yet affordable that I can use to solder this in place ?
mine only works for thin wires.
Pro tip: If the button works properly and you only need to fix 1 axis, you only need to remove the 3 pins that holds the potentiometer. You can snap off the potmeter from the metal casing of the stick and replace that part only if you have a compatible one but you need to be carefull, as there are multiple size of analog sticks with different potmeters on the sides and sometimes the shaft doesn’t match. But if you have multiple spares analog stick you can try to find a matching one.
I took the ps4 controller apart, and the video I was watching said to pop off the green things that are around the analog stick with white things inside them, they have tiny pieces on top and bottom, i’m missing that little peice, does that matter
Link to purchase part takes you to N64 joystick part. Doesn't appear to be correct?
thank you🙏🏽