Zum Hauptinhalt wechseln

Dynex DX-WBRDVD1 WiFi Antenna Replacement

Was du brauchst

  1. Dynex DX-WBRDVD1 WiFi Antenna Replacement, Top Cover: Schritt 1, Bild 1 von 2 Dynex DX-WBRDVD1 WiFi Antenna Replacement, Top Cover: Schritt 1, Bild 2 von 2
    • Remove the four 5mm Phillips #1 screws that connect the black outer shell to the silver back of the device.

  2. Dynex DX-WBRDVD1 WiFi Antenna Replacement: Schritt 2, Bild 1 von 1
    • Remove the two 5mm screws on the left and right side panels.

    • There is one screw on each side that secures the cover to the body of the device.

  3. Dynex DX-WBRDVD1 WiFi Antenna Replacement: Schritt 3, Bild 1 von 1
    • Lift the black cover to a 45 degree angle from the rear of the device and pull the cover away entirely.

    • Check that the power cord is not preventing the device from opening or closing.

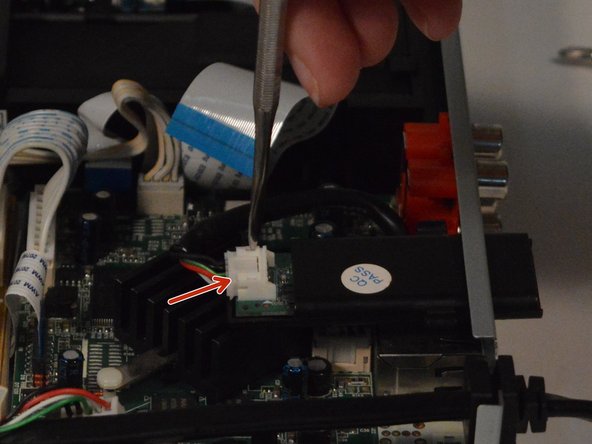
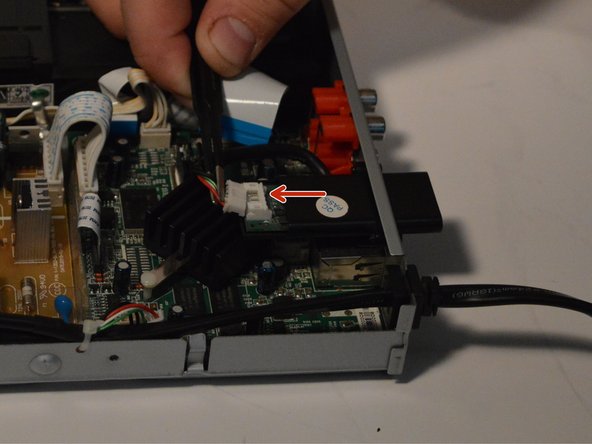
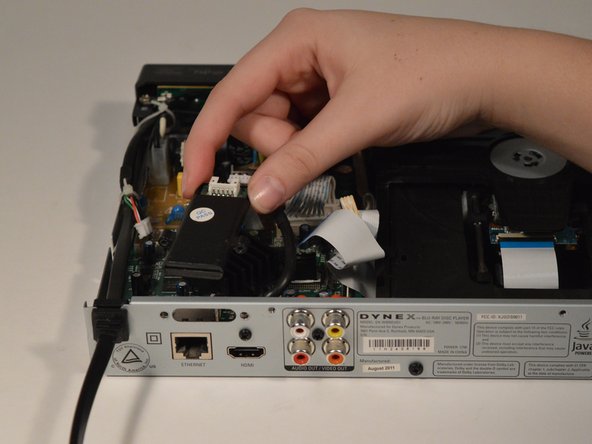
  4. Dynex DX-WBRDVD1 WiFi Antenna Replacement, WiFi Antenna: Schritt 4, Bild 1 von 3 Dynex DX-WBRDVD1 WiFi Antenna Replacement, WiFi Antenna: Schritt 4, Bild 2 von 3 Dynex DX-WBRDVD1 WiFi Antenna Replacement, WiFi Antenna: Schritt 4, Bild 3 von 3
    • Use the metal spudger to remove the white clip from the antenna by prying the clip away from the antenna.

    • Use a pointed tool and press down on the indents on both sides of the clip to loosen.

  5. Dynex DX-WBRDVD1 WiFi Antenna Replacement: Schritt 5, Bild 1 von 1
    • Remove the two 7mm screws from both sides of the antenna.

  6. Dynex DX-WBRDVD1 WiFi Antenna Replacement: Schritt 6, Bild 1 von 2 Dynex DX-WBRDVD1 WiFi Antenna Replacement: Schritt 6, Bild 2 von 2
    • Slide the antenna inwards and gently remove.

Abschluss

To reassemble your device, follow these instructions in reverse order.

3 weitere Nutzer:innen haben diese Anleitung absolviert.

0 Kommentare

Kommentar hinzufügen

Seitenaufrufe:

Letzte 24 Stunden: 0

Letzte 7 Tage: 5

Letzte 30 Tage: 6

Insgesamt: 265