Diese Version enthält möglicherweise inkorrekte Änderungen. Wechsle zur letzten geprüften Version.
Was du brauchst
-
-
Lege den Staubsauger so auf die Oberseite, dass die Bürstenleiste zu dir zeigt.
-
-
-
Drehe die drei Plastik-"Schrauben" um 90 Grad nach links.
-
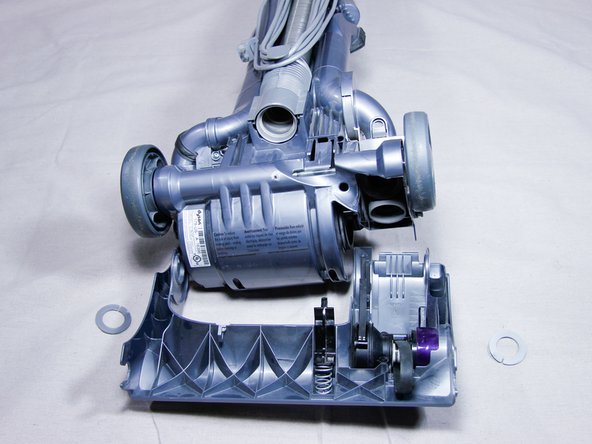
Halte die Bodenplatte an beiden Seiten fest und kippe sie nach unten vom Staubsauger weg.
-
Entferne die Bodenplatte vom Staubsauger.
-
-
-
Drehe die quadratischen Laschen an der Bürstenleiste so, dass sie nach außen zeigen.
-
Heble den Riemen mit einem Schraubendreher von der Bürstenleiste hoch.
-
Halte den Riemen hoch und ziehe die Bürstenleiste zum Entfernen nach links.
-
-
Dieser Schritt ist noch nicht übersetzt. Hilf mit, ihn zu übersetzen!
-
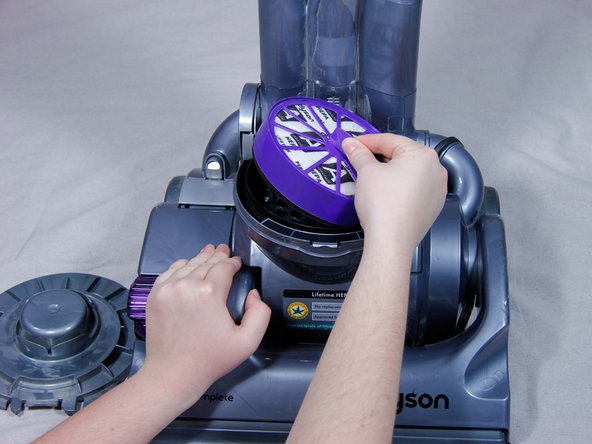
Place vacuum upright, with the canister facing you.
-
Remove the canister, setting the canister aside.
-
-
Dieser Schritt ist noch nicht übersetzt. Hilf mit, ihn zu übersetzen!
-
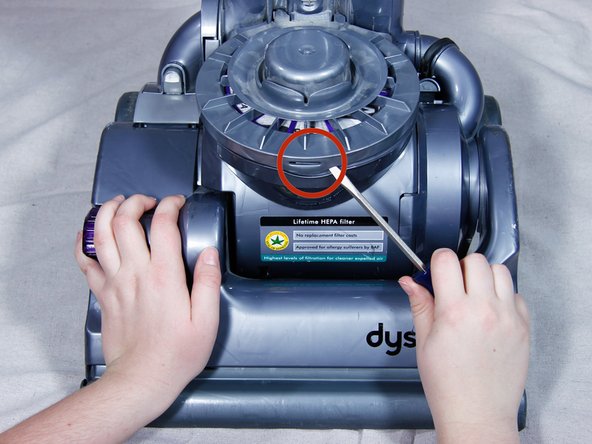
Insert flathead screwdriver under each latch and pry up gently.
-
Open the cover, remove the exhaust filter, and set the filter to the side
-
-
Dieser Schritt ist noch nicht übersetzt. Hilf mit, ihn zu übersetzen!
-
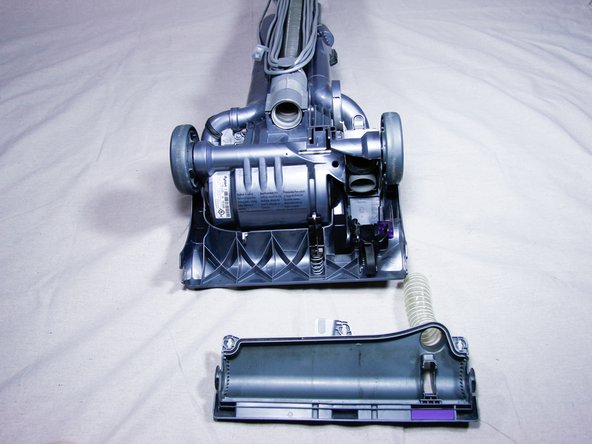
Place vacuum face down.
-
Remove the u-bend pipe that connects the canister to the telescopic wand.
-
-
Dieser Schritt ist noch nicht übersetzt. Hilf mit, ihn zu übersetzen!
-
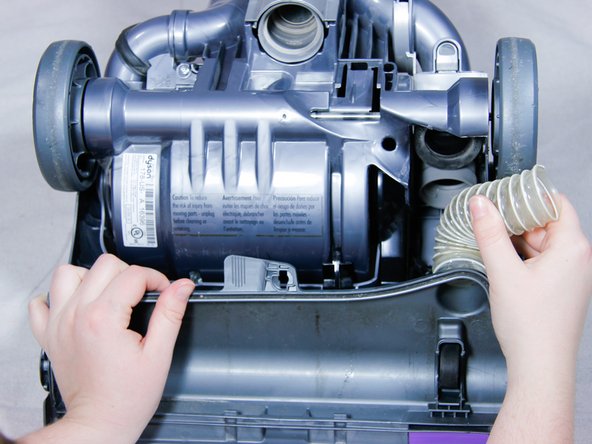
Pull the clear hose out of the gasket on the right side of the vacuum under the axle.
-
Pull the hose straight back towards you.
-
-
-
Dieser Schritt ist noch nicht übersetzt. Hilf mit, ihn zu übersetzen!
-
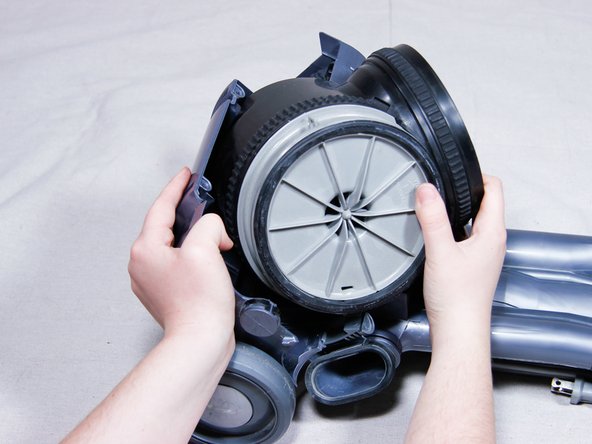
Remove brush-bar housing by prying the housing out of the clips that hold it.
-
Pull brush-bar housing toward you while keeping vacuum stationary.
-
-
Dieser Schritt ist noch nicht übersetzt. Hilf mit, ihn zu übersetzen!
-
Remove the three T15 torx screws that secure the cover to the brush clutch belt.
-
-
Dieser Schritt ist noch nicht übersetzt. Hilf mit, ihn zu übersetzen!
-
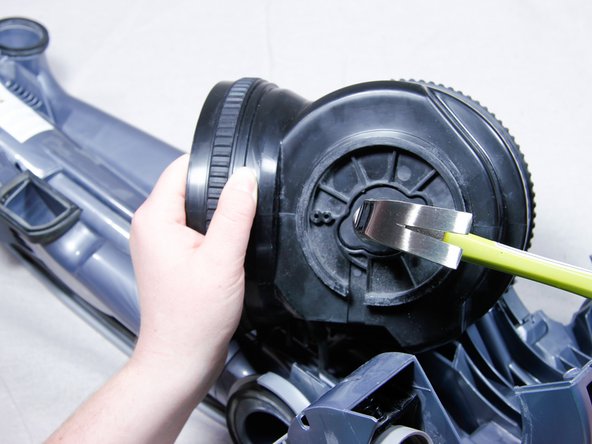
Pull the cover of the brush clutch belt out towards you.
-
Pull belt to the right to remove the belt from the brush clutch axle.
-
-
Dieser Schritt ist noch nicht übersetzt. Hilf mit, ihn zu übersetzen!
-
Insert a flat-head screwdriver into the two locking rings to remove the rings, which are located above the wheels on both sides.
-
These rings secure the bottom assembly of the vacuum to the rest of the unit.
-
-
Dieser Schritt ist noch nicht übersetzt. Hilf mit, ihn zu übersetzen!
-
Remove the four T15 torx screws that secure the motor housing to the vacuum.
-
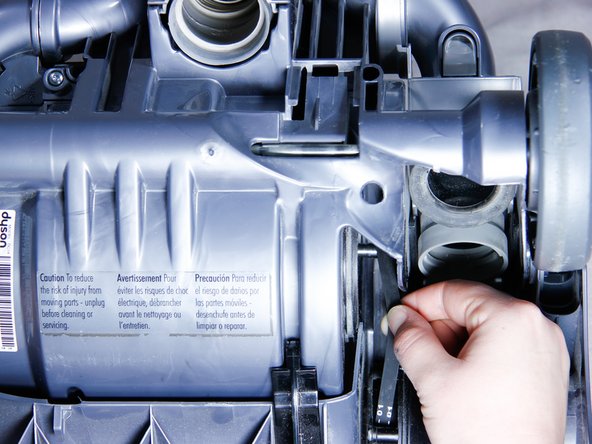
Remove the elbow-bend pipe on the right-side of the vacuum.
-
Press the two release latches on either side of the elbow-bend pipe. Pull it out and away from the vacuum.
-
-
Dieser Schritt ist noch nicht übersetzt. Hilf mit, ihn zu übersetzen!
-
Place the vacuum right-side up and leave it standing up.
-
Remove the right side cover by pushing the release latch down while lifting the cover towards you.
-
-
Dieser Schritt ist noch nicht übersetzt. Hilf mit, ihn zu übersetzen!
-
Set vacuum the on its back.
-
Pull away the plastic cover of the motor housing.
-
-
Dieser Schritt ist noch nicht übersetzt. Hilf mit, ihn zu übersetzen!
-
Insert flat head screwdriver between gray motor housing and black motor.
-
Pry motor cover housing away.
-
-
Dieser Schritt ist noch nicht übersetzt. Hilf mit, ihn zu übersetzen!
-
Release the motor assembly from its housing by strongly hitting the brush clutch axle with a hammer.
-
-
Dieser Schritt ist noch nicht übersetzt. Hilf mit, ihn zu übersetzen!
-
Remove motor from housing slowly.
-
-
Dieser Schritt ist noch nicht übersetzt. Hilf mit, ihn zu übersetzen!
-
Remove the power terminals from both sides of the motor.
-
Remove the motor from the housing completely.
-
-
Dieser Schritt ist noch nicht übersetzt. Hilf mit, ihn zu übersetzen!
-
Remove the two rubber grommets from your old motor, then transfer them to your new motor.
-


Rückgängig: Ich habe diese Anleitung nicht absolviert.
22 weitere Nutzer:innen haben diese Anleitung absolviert.
Team

Cal Poly, Team 3-22, Amido Fall 2012 Mitglied von Cal Poly, Team 3-22, Amido Fall 2012
CPSU-AMIDO-F12S3G22
4 Mitglieder
8 Anleitungen geschrieben
12 Kommentare
Rather than use a screwdriver for belt removal & risk injury or machine damage, why not use the proper belt tool ?. It saves time & possible injury and is available for not much more than the cost of a decent quality flat head screwdriver.
Motor works beater bar does not turn
What if its not the motor
Great guide! A useful tip for getting the motor (or specifically the rubber cover) into the motor case: smear some washing up liquid or liquid soap around the inside of the motor case, and the rubber will slip in a lot easier. Keep an eye nf the rotational position of the motor (so that it fits the hole at the axle end correctly), and make sure you don't trap the 2 power wires.
Great tutorial, replacement motor cost £12, Dyson now back up and working. Only issue I had was that when replacing the motor housing in the Hoover, make sure it fits into the bottom groove or else the screw hole on the brush clutch cover won't line up. You'll know it's not in the groove if you're having trouble with the screw. Just go back and under the four screws, lift out the motor housing and seat it in again, that'll sort it out.