Einleitung
If The blue light on your monitor is turning on, but the display isn't then here is a guide on how to replace it. The only tool you will need is a #1 Philips head screwdriver.
Was du brauchst
-
-
Take your monitor and face in down so that the back is facing up. There will be four screws on each corner of the monitors back cover. Unscrew each one and set them to the side. Remove four 1.2 mm Phillips #1 screws.
-
-
-
Carefully lift the back along with the screen then flip it around slowly so the back is placed down on the table.
-
Lift your screen above the motherboard and set it down.
-
-
-
-
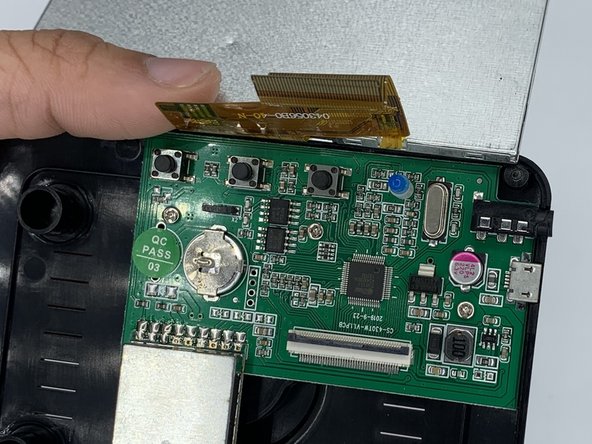
Once the screws are out, you can then remove the yellow strip connecting the screen to the motherboard.
-
There is a black tab that you can carefully flip up with your fingernail or a flathead screwdriver. Once it's flipped up you can easily slide the yellow ribbon out.
-
-
-
Once your yellow ribbon is removed from the motherboard you can take out your screen.
-
To reinstall a new screen all you need to do is retrace these steps.
-


To reassemble your device, follow these instructions in reverse order.
To reassemble your device, follow these instructions in reverse order.
Team

University of North Texas, Team 3-1, Saru Jimmy Spring 2023 Mitglied von University of North Texas, Team 3-1, Saru Jimmy Spring 2023
UNT-SARU JIMMY-S23S3G1
4 Mitglieder
5 Anleitungen geschrieben