Zum Hauptinhalt wechseln

Edco KL14 Carburetor Replacement

Was du brauchst

  1. Edco KL14  Carburetor Replacement, Disengage the Spark Plug: Schritt 1, Bild 1 von 2 Edco KL14  Carburetor Replacement, Disengage the Spark Plug: Schritt 1, Bild 2 von 2
    • Before you begin, ensure that the machine is powered down and cool to the touch.

    • Disconnect the spark plug to prevent the engine from accidentally starting up during service:

    • Grab the plastic spark plug cap at the end of the spark plug wire.

    • Firmly pull to disconnect the spark plug cap from the spark plug.

  2. Edco KL14  Carburetor Replacement, Place Wheel Chocks: Schritt 2, Bild 1 von 3 Edco KL14  Carburetor Replacement, Place Wheel Chocks: Schritt 2, Bild 2 von 3 Edco KL14  Carburetor Replacement, Place Wheel Chocks: Schritt 2, Bild 3 von 3
    • To prevent the concrete saw from rolling during service, place wheel chocks in front of and behind a rear wheel.

  3. Edco KL14  Carburetor Replacement, Remove the Air Filter Cover: Schritt 3, Bild 1 von 3 Edco KL14  Carburetor Replacement, Remove the Air Filter Cover: Schritt 3, Bild 2 von 3 Edco KL14  Carburetor Replacement, Remove the Air Filter Cover: Schritt 3, Bild 3 von 3
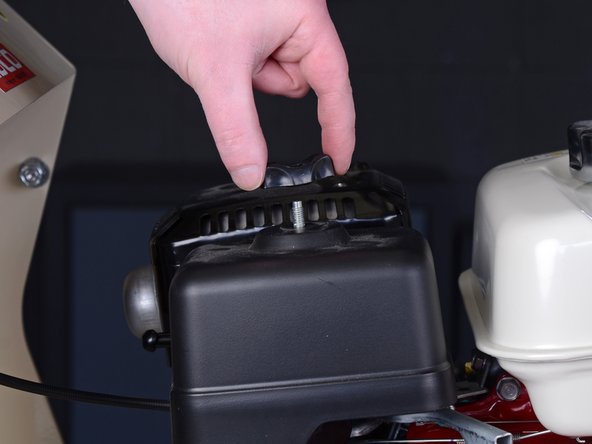
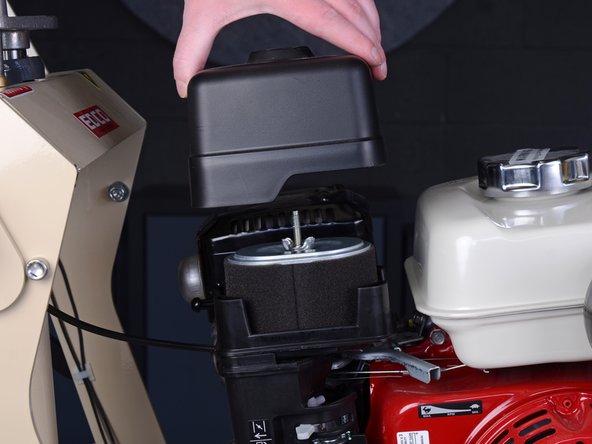
    • Use your fingers to unscrew and remove the wing nut securing the air filter cover.

  4. Edco KL14  Carburetor Replacement: Schritt 4, Bild 1 von 2 Edco KL14  Carburetor Replacement: Schritt 4, Bild 2 von 2
    • Lift the air filter cover straight up to remove it.

  5. Edco KL14  Carburetor Replacement, Remove the Air Filter: Schritt 5, Bild 1 von 3 Edco KL14  Carburetor Replacement, Remove the Air Filter: Schritt 5, Bild 2 von 3 Edco KL14  Carburetor Replacement, Remove the Air Filter: Schritt 5, Bild 3 von 3
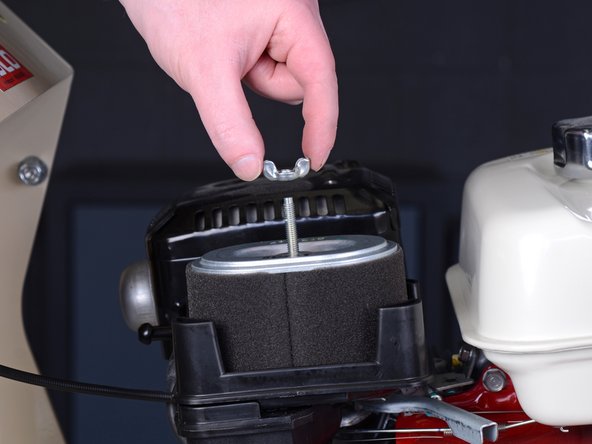
    • Use your fingers to unscrew and remove the wing nut securing the air filter.

  6. Edco KL14  Carburetor Replacement: Schritt 6, Bild 1 von 2 Edco KL14  Carburetor Replacement: Schritt 6, Bild 2 von 2
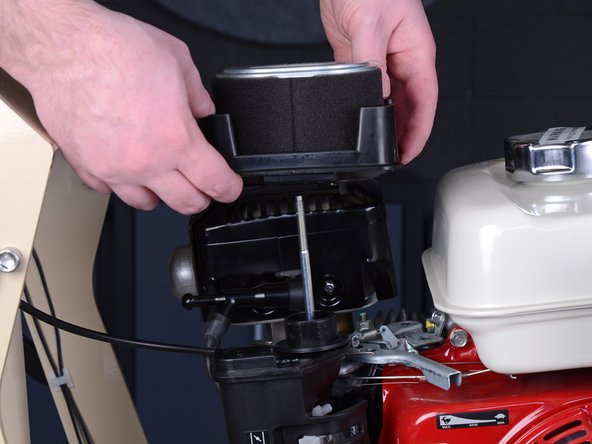
    • Grab the black plastic air filter platform and lift it straight up with the air filter to remove both components.

  7. Edco KL14  Carburetor Replacement, Remove the Air Filter Elbow: Schritt 7, Bild 1 von 1
    • Use a 10 mm wrench to remove the two nuts securing the air filter elbow to the carburetor's threaded rods.

  8. Edco KL14  Carburetor Replacement: Schritt 8, Bild 1 von 1
    • Use a 10 mm wrench to remove the bolt securing the air filter elbow to the concrete saw.

  9. Edco KL14  Carburetor Replacement: Schritt 9, Bild 1 von 3 Edco KL14  Carburetor Replacement: Schritt 9, Bild 2 von 3 Edco KL14  Carburetor Replacement: Schritt 9, Bild 3 von 3
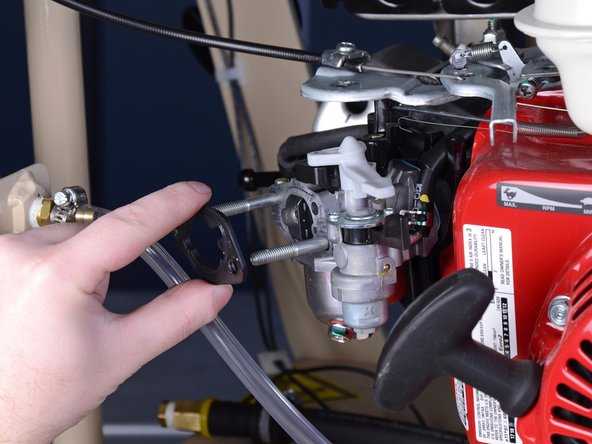
    • Pull the air filter elbow straight off of the carburetor's threaded rods.

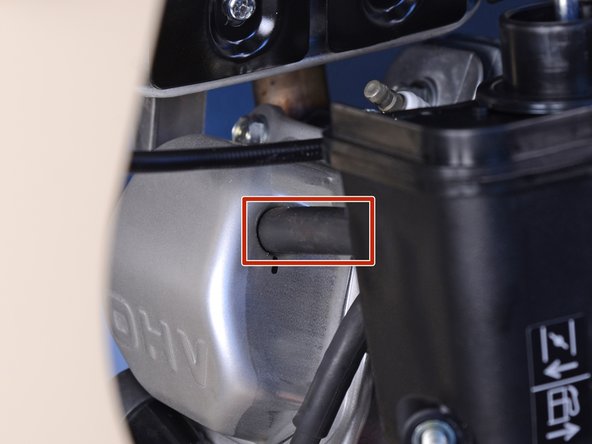
    • The breather tube on the rear side of the air filter elbow should come out with the elbow. If you have difficulty removing the elbow because of the breather tube, use your fingers to loosen its press-fit connection to the engine's valve cover.

  10. Edco KL14  Carburetor Replacement, Remove the Carburetor Spacer: Schritt 10, Bild 1 von 2 Edco KL14  Carburetor Replacement, Remove the Carburetor Spacer: Schritt 10, Bild 2 von 2
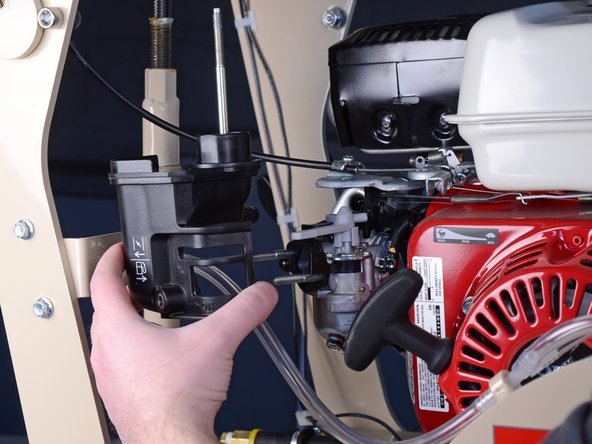
    • Pull the carburetor spacer straight off, making sure it clears the threaded rods.

  11. Edco KL14  Carburetor Replacement, Remove the Choke Lever: Schritt 11, Bild 1 von 2 Edco KL14  Carburetor Replacement, Remove the Choke Lever: Schritt 11, Bild 2 von 2
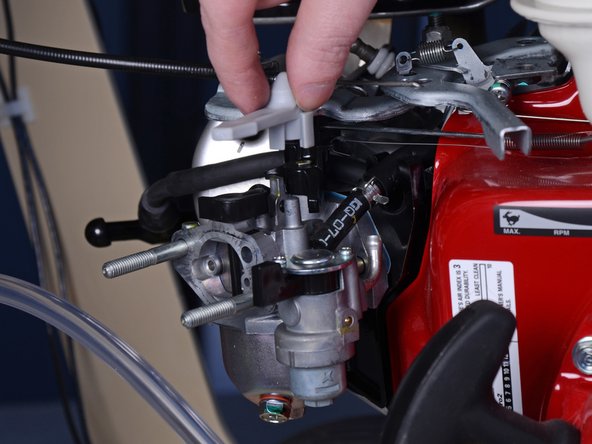
    • Pull the choke lever straight up to remove it from the carburetor.

  12. Edco KL14  Carburetor Replacement, Remove the Fuel Supply Hose: Schritt 12, Bild 1 von 3 Edco KL14  Carburetor Replacement, Remove the Fuel Supply Hose: Schritt 12, Bild 2 von 3 Edco KL14  Carburetor Replacement, Remove the Fuel Supply Hose: Schritt 12, Bild 3 von 3
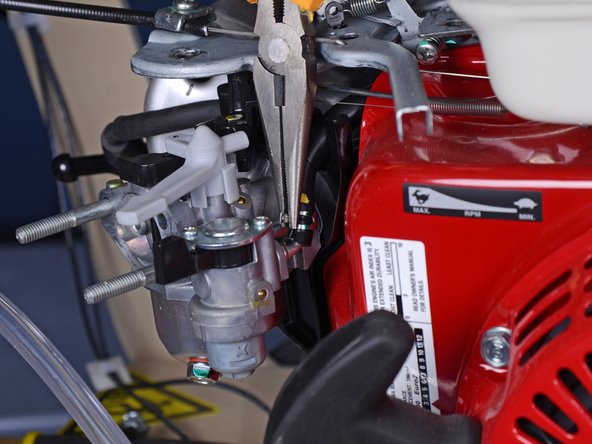
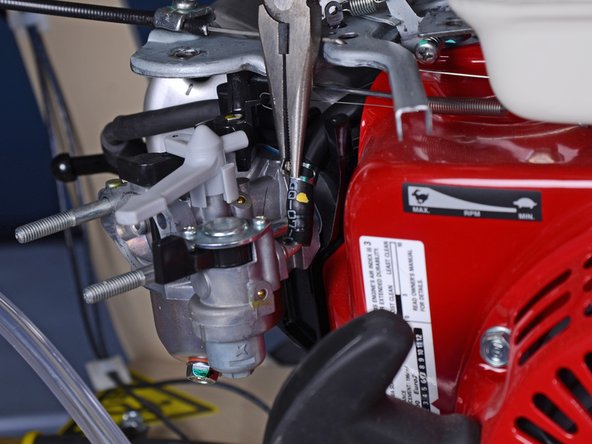
    • Use a pair of needle nose pliers to squeeze and loosen the spring hose clamp on the fuel supply hose.

    • Move the clamp up 2-3 cm so it's not clamping down onto the end of the tube.

  13. Edco KL14  Carburetor Replacement: Schritt 13, Bild 1 von 2 Edco KL14  Carburetor Replacement: Schritt 13, Bild 2 von 2
    • If you didn't completely drain the fuel tank beforehand, have a gasoline-safe container ready to catch the gasoline as it drains out of the hose.

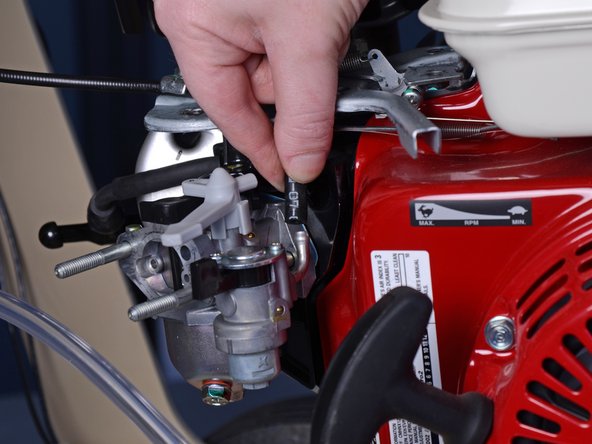
    • Grab onto the end of the fuel supply hose and pull it straight up to disconnect it from the carburetor.

  14. Edco KL14  Carburetor Replacement, Remove the Throttle Return Spring and Governor Rod: Schritt 14, Bild 1 von 2 Edco KL14  Carburetor Replacement, Remove the Throttle Return Spring and Governor Rod: Schritt 14, Bild 2 von 2
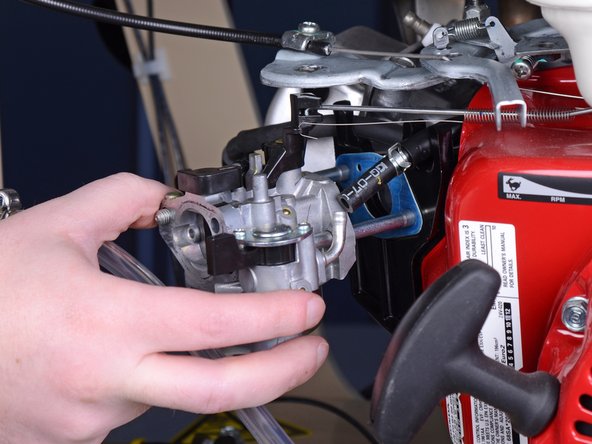
    • Pull the carburetor halfway out, but do not completely remove it yet.

  15. Edco KL14  Carburetor Replacement: Schritt 15, Bild 1 von 2 Edco KL14  Carburetor Replacement: Schritt 15, Bild 2 von 2
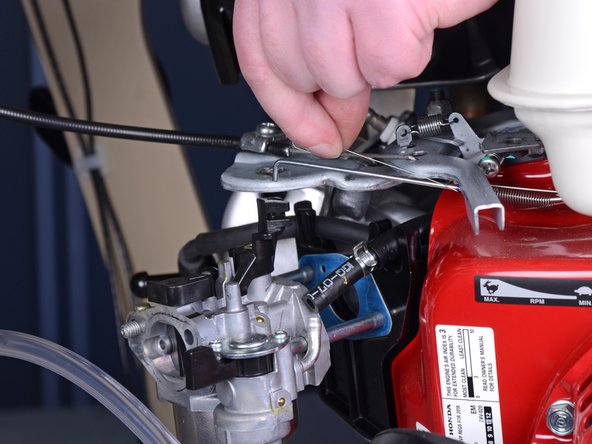
    • Grab the throttle return spring and lift it up to remove it from the carburetor.

    • The governor rod is connected to the throttle return spring, so it should lift up and off with the spring. If not, lift it straight up to remove it from the carburetor.

  16. Edco KL14  Carburetor Replacement, Remove the Carburetor: Schritt 16, Bild 1 von 2 Edco KL14  Carburetor Replacement, Remove the Carburetor: Schritt 16, Bild 2 von 2
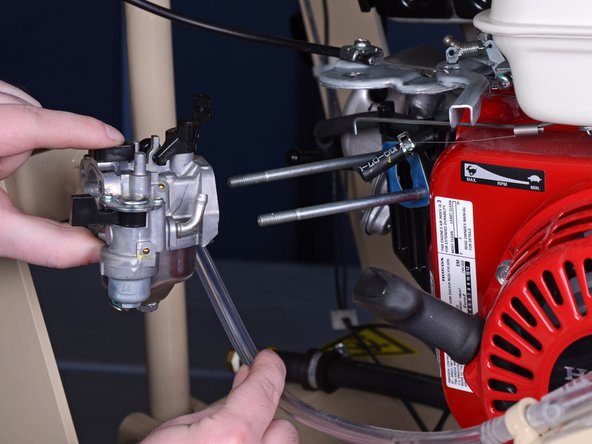
    • Pull the carburetor straight off of the threaded rods to remove it.

    • Use your other hand to pull the water supply hose out of the way as you remove the carburetor.

Abschluss

To reassemble your device, follow these instructions in reverse order.

Ein:e weitere:r Nutzer:in hat diese Anleitung absolviert.

Craig Lloyd

Mitglied seit: 02/10/16

35.348 Reputation

82 Anleitungen geschrieben

0 Kommentare

Kommentar hinzufügen

Seitenaufrufe:

Letzte 24 Stunden: 1

Letzte 7 Tage: 2

Letzte 30 Tage: 22

Insgesamt: 558