Einleitung
The LED Chip is responsible for the rear camera flash and flashlight functions. This is a guide to replacing the chip with a new one, if the current one in your device is malfunctioning.
NOTE: You may omit step six of this guide, removing the battery.
Was du brauchst
-
-
Power down your device.
-
Place the small suction cup on a corner of the screen and lightly pull up to expose a seam between the screen and case.
-
-
-
Insert the plastic opening tool into the seam near the corner of the device.
-
Slowly slide the tool around the perimeter of the device, gradually prying up the screen.
-
-
-
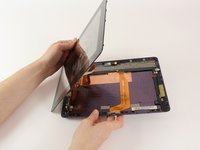
When the screen is free of all spring clips and adhesive, slowly open the device like a clam shell with the hinge being the left hand side of the device.
-
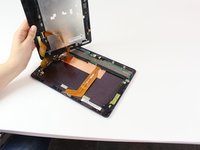
Safely place the device back on the table by laying the screen face down.
-
-
-
-
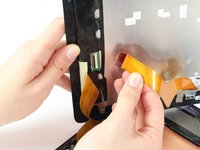
Disconnect the ribbon cable by placing a plastic opening tool under the black plastic tab that is on the opposite side of the port as the ribbon cable.
-
Pry upward until the black tab moves 90 degrees, and gently pull the ribbon cable out of the port.
-
-
-
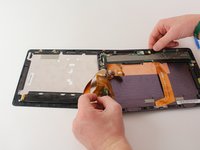
Place a plastic opening tool under the white plastic tab on one of the ribbon cable ports.
-
Pry upward until the black tab moves 90 degrees, and gently pull the ribbon cable out of the port.
-
Repeat the previous process to remove the other ribbon cable.
-
-
-
Remove the battery (secured by six screws and a white wire connector) by following the removal portion of this battery replacement guide.
-
-
In diesem Schritt verwendetes Werkzeug:Tweezers$4.99
-
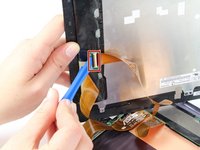
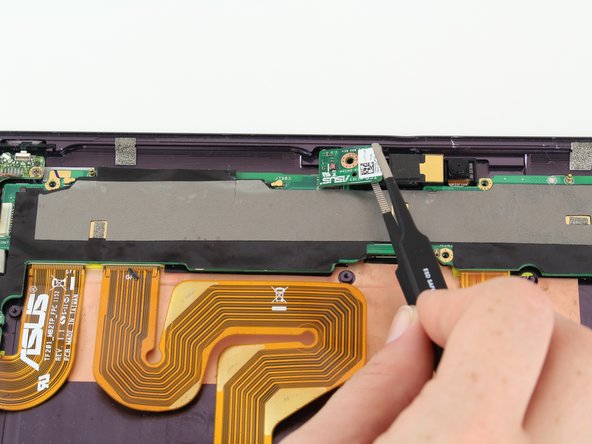
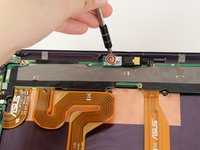
With a Phillips #00 screwdriver, remove the one 3.8 mm screw in the LED chip. The LED chip is a small green chip (about 1 square centimeter) located at the top center of the device.
-
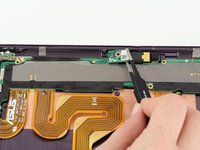
Gently remove the chip with a pair of precision tweezers by grabbing the chip from one side, being careful not to pinch on a black piece of hardware on the chip.
-


To reassemble your device, follow these instructions in reverse order.
To reassemble your device, follow these instructions in reverse order.
Team

Cal Poly, Team 10-1, Livingston Fall 2016 Mitglied von Cal Poly, Team 10-1, Livingston Fall 2016
CPSU-LIVINGSTON-F16S10G1
2 Mitglieder
12 Anleitungen geschrieben