Einleitung
Following our troubleshooting guide, you have diagnosed that you have a defective battery.
Was du brauchst
-
-
First, be sure to power off the device.
-
Carefully pry open the device. Note the plastic tabs in the image that hold the device together.
-
-
-
-
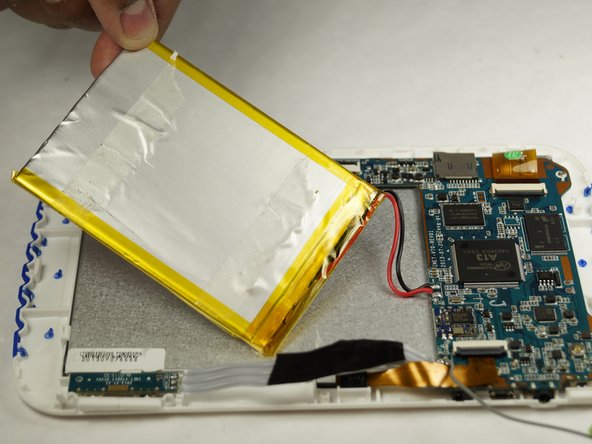
Carefully pry off the battery from the display screen. This will be slight difficult since the battery is held onto the back of the display by adhesive.
-
-
-
Locate the red and black wire that runs from the battery and to the motherboard. Note the location of the wires, and carefully remove the soldered wires.
-
-
-
Attach the new battery to the same location as the old battery via adhesive.
-
Then, carefully solder the red wire to the '+' symbol on the motherboard and the black wire to the '-' symbol.
-
-
-
Once the solder has cooled, snap the front and back bezels together. Be sure to charge the new battery.
-


To reassemble your device, follow these instructions in reverse order.
To reassemble your device, follow these instructions in reverse order.
Team

USF Tampa, Team 6-3, Brown Winter 2015 Mitglied von USF Tampa, Team 6-3, Brown Winter 2015
USFT-BROWN-W15S6G3
3 Mitglieder
10 Anleitungen geschrieben