Zum Hauptinhalt wechseln

Enabot EBO SE Battery Replacement

Was du brauchst

  1. Enabot EBO SE Battery Replacement, Wheel Assembly: Schritt 1, Bild 1 von 1
    • Gently turn the robot upside down.

    • Place the robot on a stable surface to prevent it from rolling or falling.

  2. Enabot EBO SE Battery Replacement: Schritt 2, Bild 1 von 3 Enabot EBO SE Battery Replacement: Schritt 2, Bild 2 von 3 Enabot EBO SE Battery Replacement: Schritt 2, Bild 3 von 3
    • Use a flathead 2.5 mm screwdriver to remove the 5.7 mm screw from the wheels.

    • A tool should have been provided in the box for this purpose.

  3. Enabot EBO SE Battery Replacement: Schritt 3, Bild 1 von 2 Enabot EBO SE Battery Replacement: Schritt 3, Bild 2 von 2
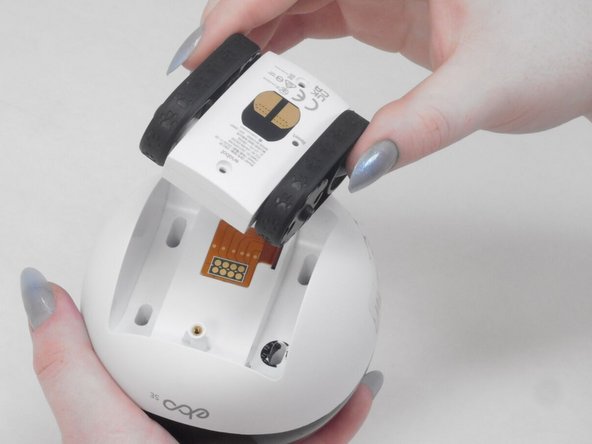
    • Pull the wheel assembly towards you so it comes straight off without resistance.

    • If there is resistance, make sure to apply gentle force when pulling as it can get damaged with too much force.

  4. Enabot EBO SE Battery Replacement, Lower Housing: Schritt 4, Bild 1 von 2 Enabot EBO SE Battery Replacement, Lower Housing: Schritt 4, Bild 2 von 2
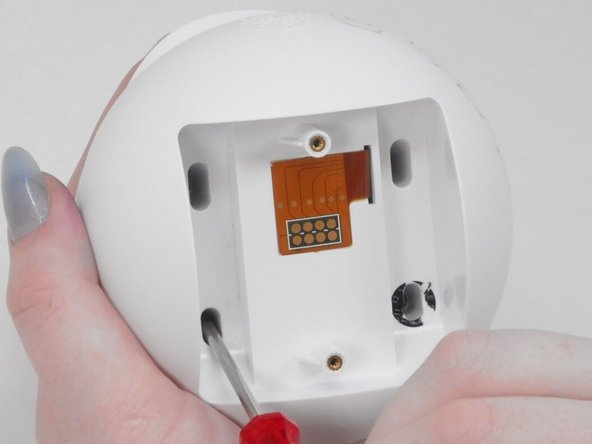
    • Use a Torx screwdriver to remove the four 9 mm screws from the assembly.

  5. Enabot EBO SE Battery Replacement: Schritt 5, Bild 1 von 3 Enabot EBO SE Battery Replacement: Schritt 5, Bild 2 von 3 Enabot EBO SE Battery Replacement: Schritt 5, Bild 3 von 3
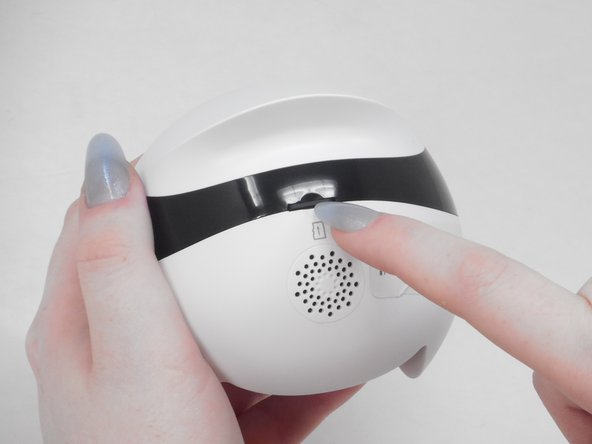
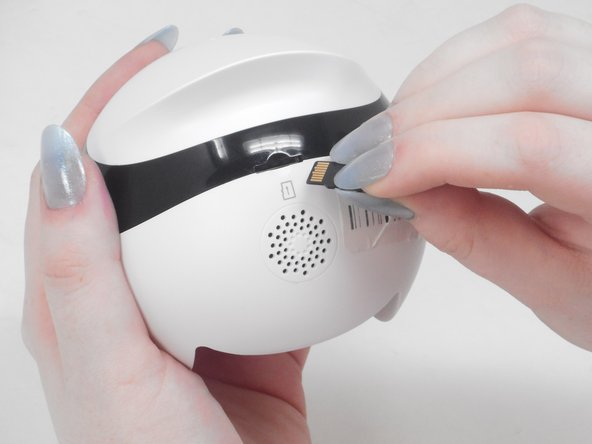
    • Use your fingernail to carefully press down and eject the Micro SD Card from the back of the Enabot.

    • Keep the Micro SD Card in a safe spot for later.

  6. Enabot EBO SE Battery Replacement: Schritt 6, Bild 1 von 2 Enabot EBO SE Battery Replacement: Schritt 6, Bild 2 von 2
    • Place the iFixit opening tool inside the Micro SD slot.

    • Very carefully apply pressure to the top of the slot and pry open the casing to separate the upper and lower housing.

  7. Enabot EBO SE Battery Replacement: Schritt 7, Bild 1 von 3 Enabot EBO SE Battery Replacement: Schritt 7, Bild 2 von 3 Enabot EBO SE Battery Replacement: Schritt 7, Bild 3 von 3
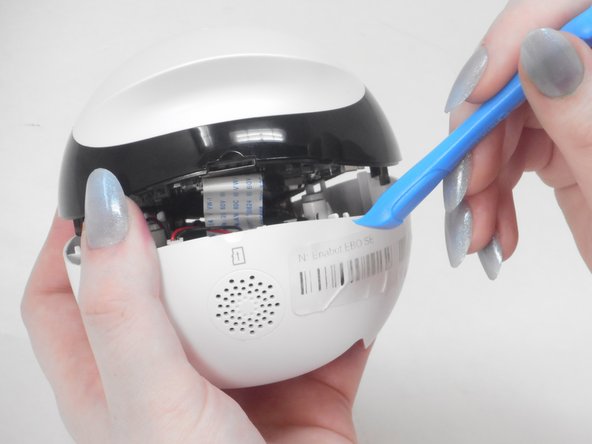
    • Using the iFixit opening tool or your fingernail, place it underneath the gray tab on the lower housing.

    • Lift the tab up and pull out the ribbon cable to disconnect it from the lower housing.

  8. Enabot EBO SE Battery Replacement: Schritt 8, Bild 1 von 3 Enabot EBO SE Battery Replacement: Schritt 8, Bild 2 von 3 Enabot EBO SE Battery Replacement: Schritt 8, Bild 3 von 3
    • There are two black and red wire connectors attached to the upper and lower housing.

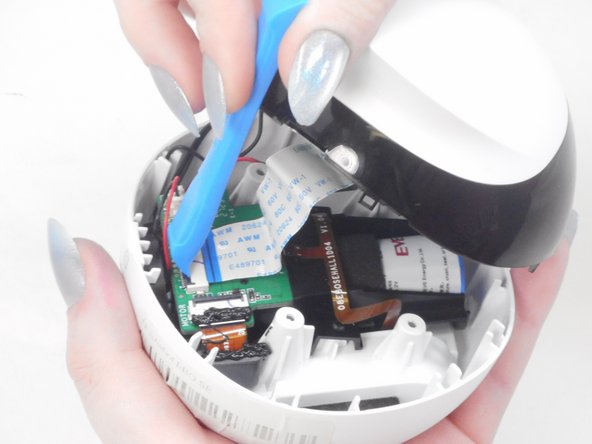
    • Gently use your finger nails to lift up and disconnect both wires to fully separate the upper and lower housings.

  9. Enabot EBO SE Battery Replacement, Battery: Schritt 9, Bild 1 von 3 Enabot EBO SE Battery Replacement, Battery: Schritt 9, Bild 2 von 3 Enabot EBO SE Battery Replacement, Battery: Schritt 9, Bild 3 von 3
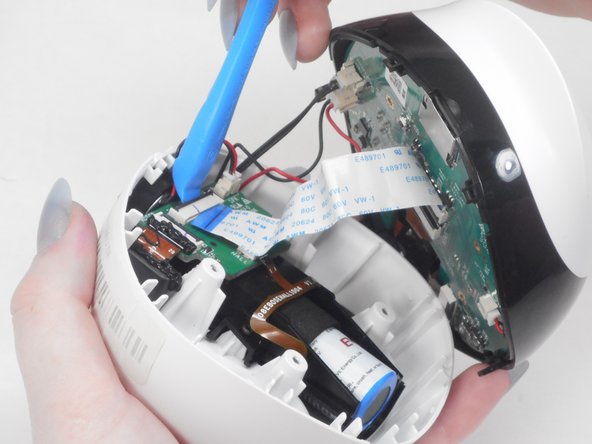
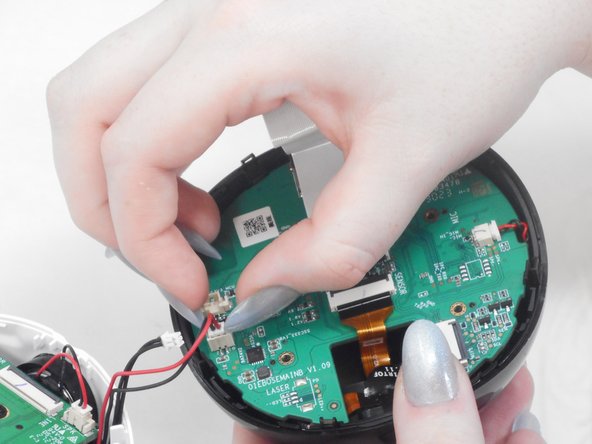
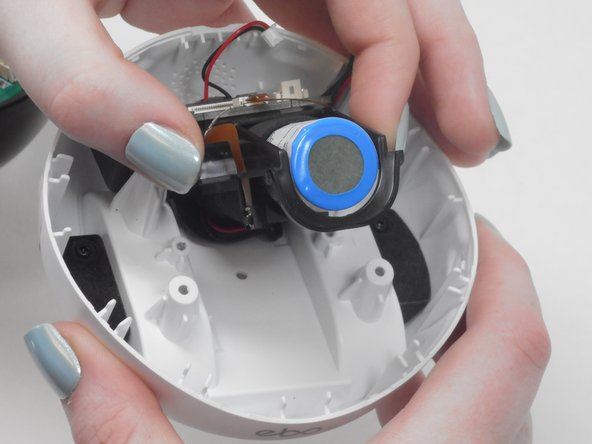
    • Use the iFixit opening tool or your fingernail to disconnect the cable by placing the edge underneath the gray tab.

    • Flip the tab up and pull the ribbon cable out.

    • Disconnect the red and blue wires from the daughterboard by using your finger nails to pull up on the connector to disconnect.

  10. Enabot EBO SE Battery Replacement: Schritt 10, Bild 1 von 3 Enabot EBO SE Battery Replacement: Schritt 10, Bild 2 von 3 Enabot EBO SE Battery Replacement: Schritt 10, Bild 3 von 3
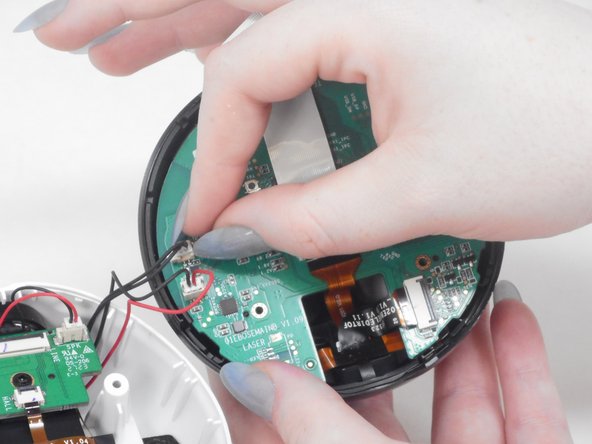
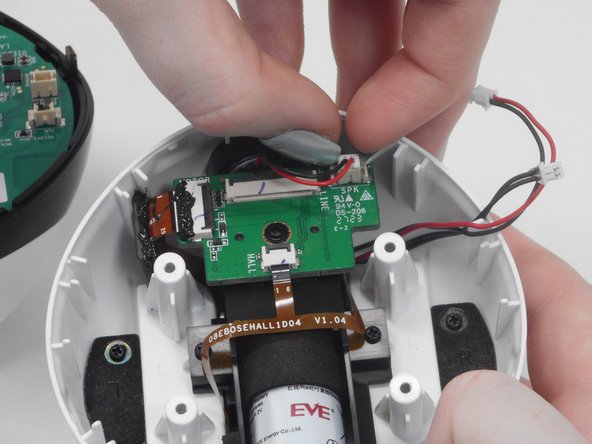
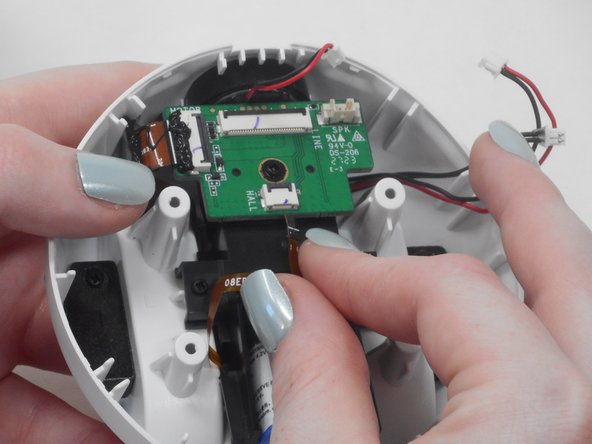
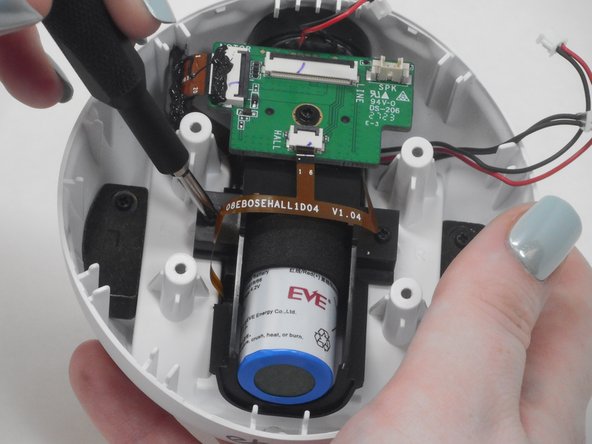
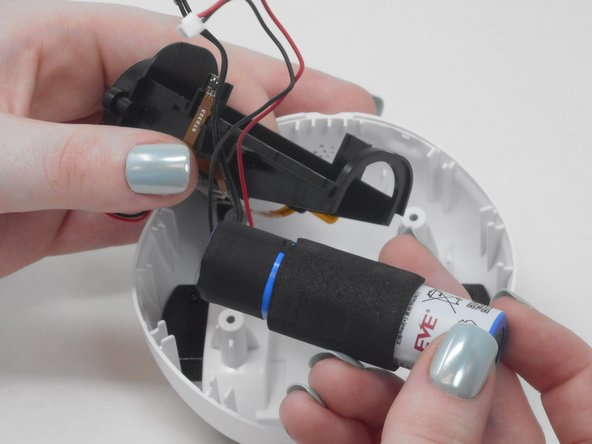
    • Use a Phillips #00 screwdriver to remove both 7.4 mm screws from the side of the battery's casing.

  11. Enabot EBO SE Battery Replacement: Schritt 11, Bild 1 von 2 Enabot EBO SE Battery Replacement: Schritt 11, Bild 2 von 2
    • Pull the battery casing upwards from the lower half of the assembly to remove it.

  12. Enabot EBO SE Battery Replacement: Schritt 12, Bild 1 von 2 Enabot EBO SE Battery Replacement: Schritt 12, Bild 2 von 2
    • Carefully remove the battery from the casing in order to replace.

Abschluss

To reassemble your device, follow these instructions in reverse order.

Eine weitere Person hat diese Anleitung absolviert.

Kevin H.

Mitglied seit: 02/15/24

656 Reputation

5 Anleitungen geschrieben

Team

University of Memphis, Team 4-5, Sneed Spring 2024 Mitglied von University of Memphis, Team 4-5, Sneed Spring 2024

UM-SNEED-S24S4G5

4 Mitglieder

6 Anleitungen geschrieben

0 Kommentare

Kommentar hinzufügen

Seitenaufrufe:

Letzte 24 Stunden: 4

Letzte 7 Tage: 41

Letzte 30 Tage: 86

Insgesamt: 176