Zum Hauptinhalt wechseln

Epson Home Cinema 2150 Exhaust Fan Replacement

Was du brauchst

  1. Epson Home Cinema 2150 Exhaust Fan Replacement, Projector Lamp: Schritt 1, Bild 1 von 3 Epson Home Cinema 2150 Exhaust Fan Replacement, Projector Lamp: Schritt 1, Bild 2 von 3 Epson Home Cinema 2150 Exhaust Fan Replacement, Projector Lamp: Schritt 1, Bild 3 von 3
    • Disconnect and cool the device to room temperature. Failure to do so may result in electric shock or minor burns.

    • Orient the Epson Home Cinema 2150 so that the large indented panel faces your direction.

    • Unscrew the single 6mm Phillips#2 holding screw from the access panel.

    • Slide the panel horizontally, then lift up to remove the access panel.

  2. Epson Home Cinema 2150 Exhaust Fan Replacement: Schritt 2, Bild 1 von 3 Epson Home Cinema 2150 Exhaust Fan Replacement: Schritt 2, Bild 2 von 3 Epson Home Cinema 2150 Exhaust Fan Replacement: Schritt 2, Bild 3 von 3
    • Loosen and remove the two screws holding the lamp.

    • Remove two 9 mm Phillips #2 screws.

  3. Epson Home Cinema 2150 Exhaust Fan Replacement: Schritt 3, Bild 1 von 3 Epson Home Cinema 2150 Exhaust Fan Replacement: Schritt 3, Bild 2 von 3 Epson Home Cinema 2150 Exhaust Fan Replacement: Schritt 3, Bild 3 von 3
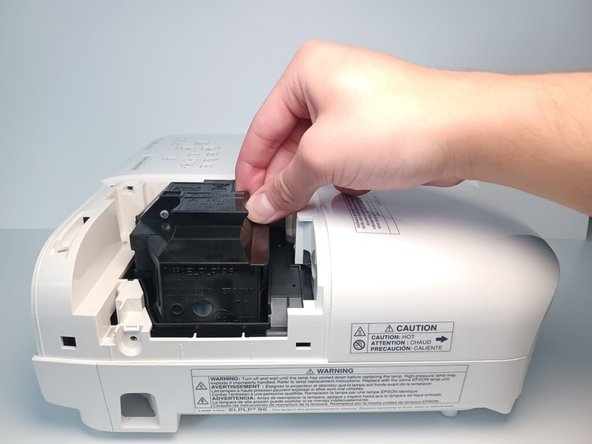
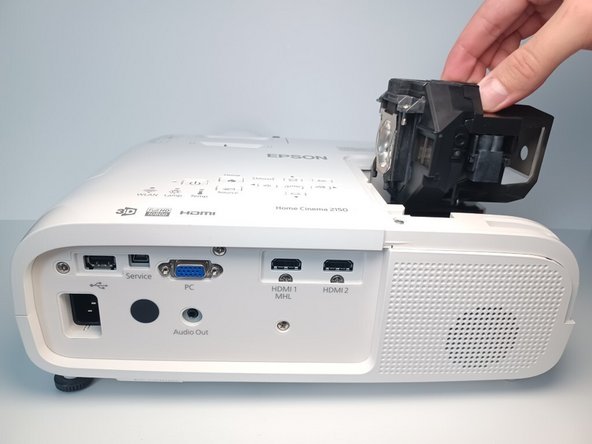
    • Using four fingers, pull upwards on the lamp's plastic casing.

    • You may feel some resistance when pulling the lamp.

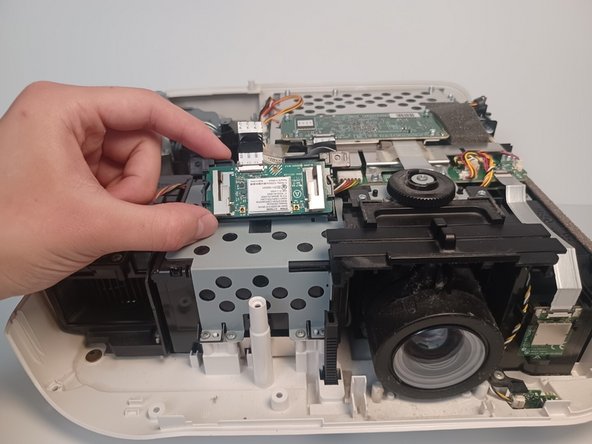
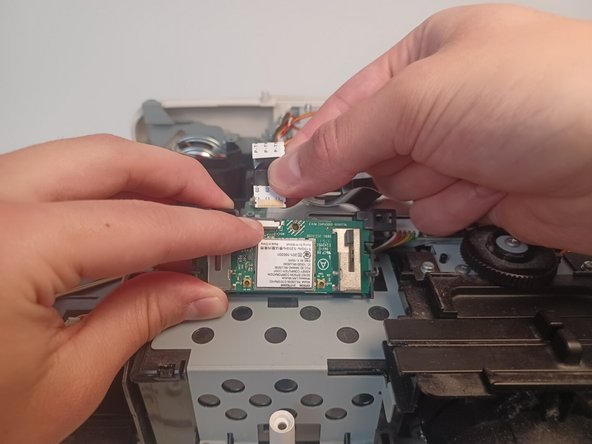
  4. Epson Home Cinema 2150 Exhaust Fan Replacement, Wireless connection board: Schritt 4, Bild 1 von 3 Epson Home Cinema 2150 Exhaust Fan Replacement, Wireless connection board: Schritt 4, Bild 2 von 3 Epson Home Cinema 2150 Exhaust Fan Replacement, Wireless connection board: Schritt 4, Bild 3 von 3
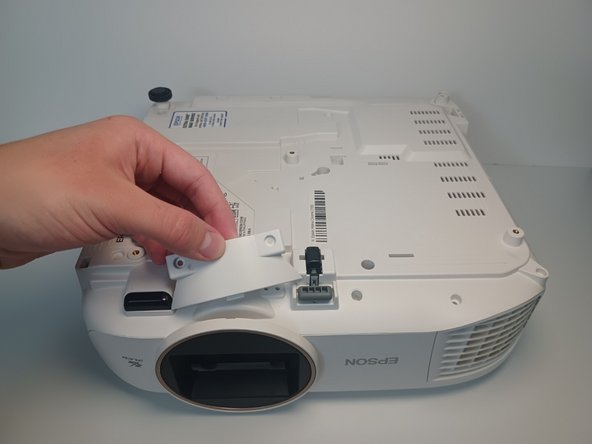
    • Remove the air filter cover. Grip the piece with two fingers above and below at the center.

    • Grab the air filter from the protruding tab and pull the filter out.

  5. Epson Home Cinema 2150 Exhaust Fan Replacement: Schritt 5, Bild 1 von 2 Epson Home Cinema 2150 Exhaust Fan Replacement: Schritt 5, Bild 2 von 2
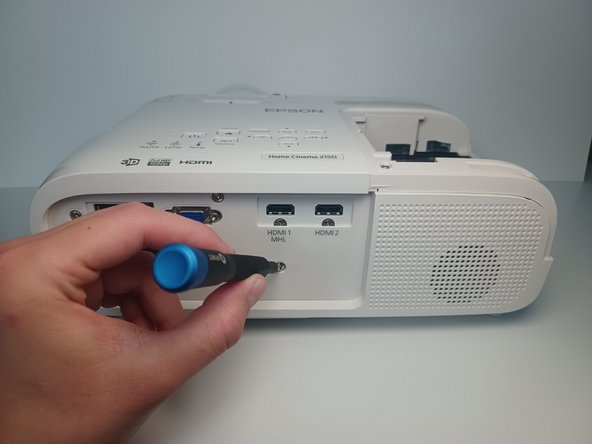
    • From the back of the projector remove three 6 mm Phillips #1 screws.

  6. Epson Home Cinema 2150 Exhaust Fan Replacement: Schritt 6, Bild 1 von 3 Epson Home Cinema 2150 Exhaust Fan Replacement: Schritt 6, Bild 2 von 3 Epson Home Cinema 2150 Exhaust Fan Replacement: Schritt 6, Bild 3 von 3
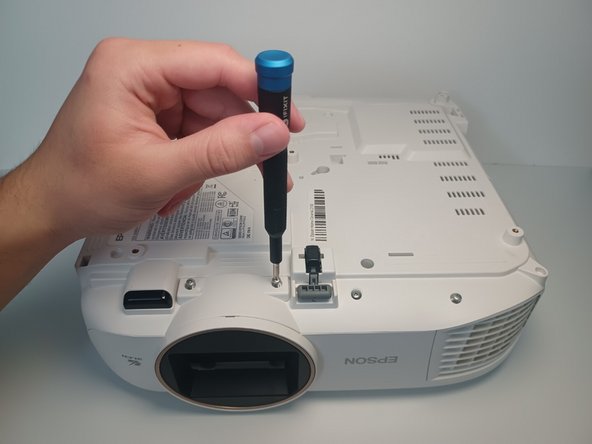
    • From the device's underside, remove eleven 9.5 mm Phillips #1 screws.

    • Remove two 6 mm Phillips #1 screws.

    • Pull off remaining plastic molding.

  7. Epson Home Cinema 2150 Exhaust Fan Replacement: Schritt 7, Bild 1 von 2 Epson Home Cinema 2150 Exhaust Fan Replacement: Schritt 7, Bild 2 von 2
    • From the lamp access slot, remove four 9.5 mm Philips #1 screws

  8. Epson Home Cinema 2150 Exhaust Fan Replacement: Schritt 8, Bild 1 von 3 Epson Home Cinema 2150 Exhaust Fan Replacement: Schritt 8, Bild 2 von 3 Epson Home Cinema 2150 Exhaust Fan Replacement: Schritt 8, Bild 3 von 3
    • From the filter slot, unscrew two 9.5 mm #1 screws.

  9. Epson Home Cinema 2150 Exhaust Fan Replacement: Schritt 9, Bild 1 von 3 Epson Home Cinema 2150 Exhaust Fan Replacement: Schritt 9, Bild 2 von 3 Epson Home Cinema 2150 Exhaust Fan Replacement: Schritt 9, Bild 3 von 3
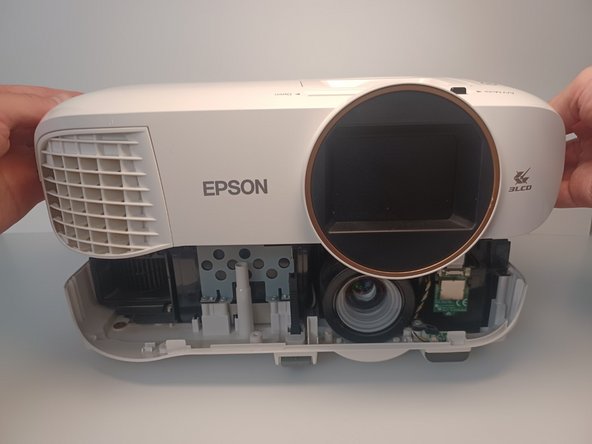
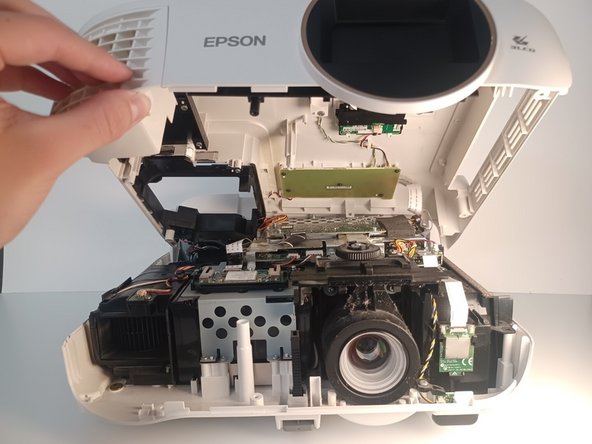
    • Partially lift the top portion of the device housing.

    • Lifting too far or too hard may damage any cables between the housing and the motherboard.

  10. Epson Home Cinema 2150 Exhaust Fan Replacement: Schritt 10, Bild 1 von 3 Epson Home Cinema 2150 Exhaust Fan Replacement: Schritt 10, Bild 2 von 3 Epson Home Cinema 2150 Exhaust Fan Replacement: Schritt 10, Bild 3 von 3
    • Disconnect the ribbon cable from the motherboard.

    • Ribbon cables are delicate. To avoid unnecessary stress to the cable, pull on the cable with the flat surface of two fingers.

  11. Epson Home Cinema 2150 Exhaust Fan Replacement: Schritt 11, Bild 1 von 3 Epson Home Cinema 2150 Exhaust Fan Replacement: Schritt 11, Bild 2 von 3 Epson Home Cinema 2150 Exhaust Fan Replacement: Schritt 11, Bild 3 von 3
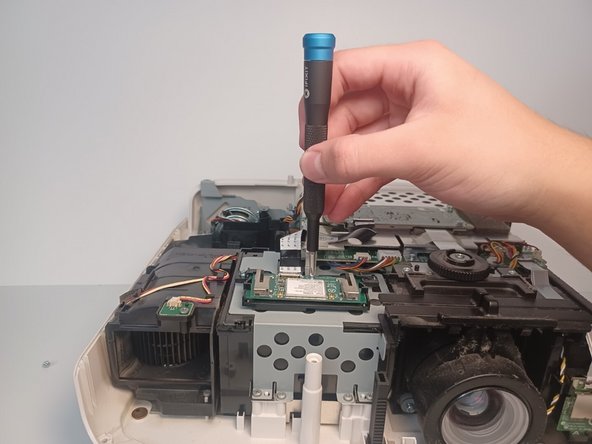
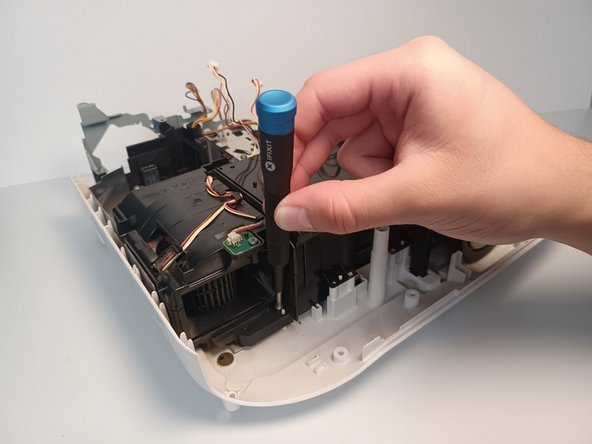
    • Remove three 5 mm Phillips #1 screws.

  12. Epson Home Cinema 2150 Exhaust Fan Replacement: Schritt 12, Bild 1 von 2 Epson Home Cinema 2150 Exhaust Fan Replacement: Schritt 12, Bild 2 von 2
    • Press on the metal connector and firmly pull on the remaining ribbon cable.

  13. Epson Home Cinema 2150 Exhaust Fan Replacement: Schritt 13, Bild 1 von 3 Epson Home Cinema 2150 Exhaust Fan Replacement: Schritt 13, Bild 2 von 3 Epson Home Cinema 2150 Exhaust Fan Replacement: Schritt 13, Bild 3 von 3
    • Pull the clips on the case with two fingers on opposite ends and remove the case.

  14. Epson Home Cinema 2150 Exhaust Fan Replacement, Speaker: Schritt 14, Bild 1 von 3 Epson Home Cinema 2150 Exhaust Fan Replacement, Speaker: Schritt 14, Bild 2 von 3 Epson Home Cinema 2150 Exhaust Fan Replacement, Speaker: Schritt 14, Bild 3 von 3
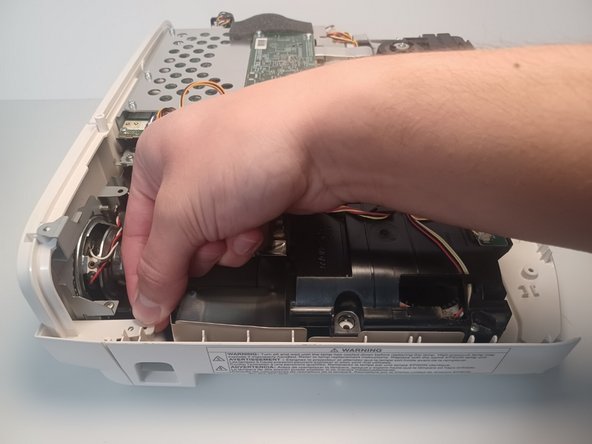
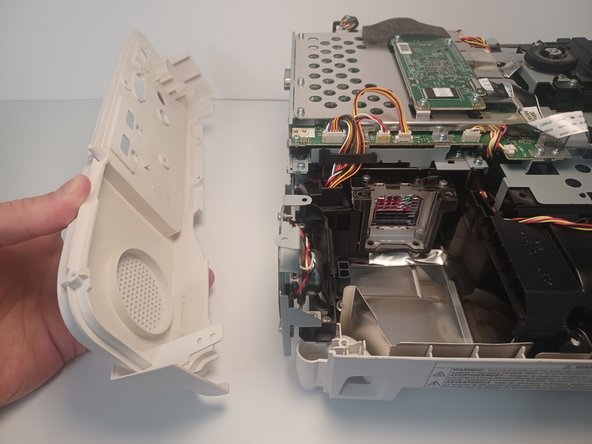
    • Pull up on the rear panel retaining clip.

    • Pull the rear panel away from the device to remove.

  15. Epson Home Cinema 2150 Exhaust Fan Replacement: Schritt 15, Bild 1 von 2 Epson Home Cinema 2150 Exhaust Fan Replacement: Schritt 15, Bild 2 von 2
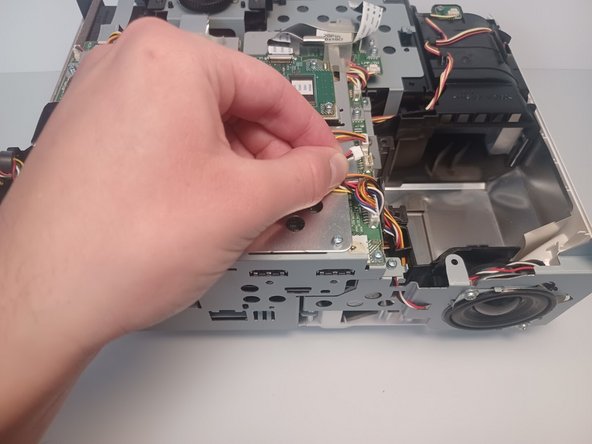
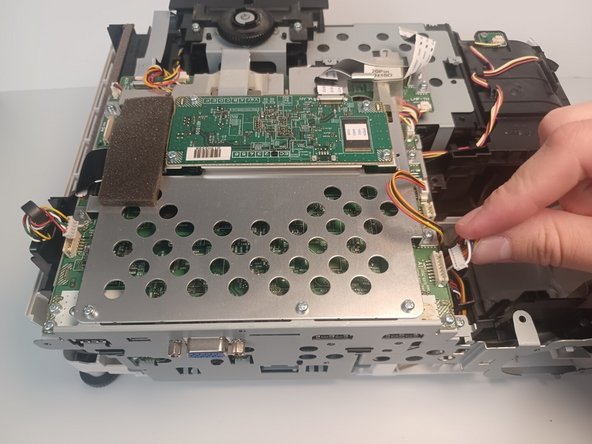
    • Disconnect the speaker wire from the motherboard.

    • Pull up at the end of the wire when removing the connector.

  16. Epson Home Cinema 2150 Exhaust Fan Replacement: Schritt 16, Bild 1 von 3 Epson Home Cinema 2150 Exhaust Fan Replacement: Schritt 16, Bild 2 von 3 Epson Home Cinema 2150 Exhaust Fan Replacement: Schritt 16, Bild 3 von 3
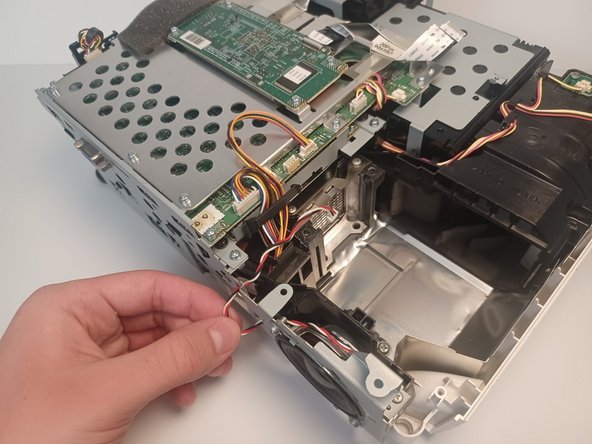
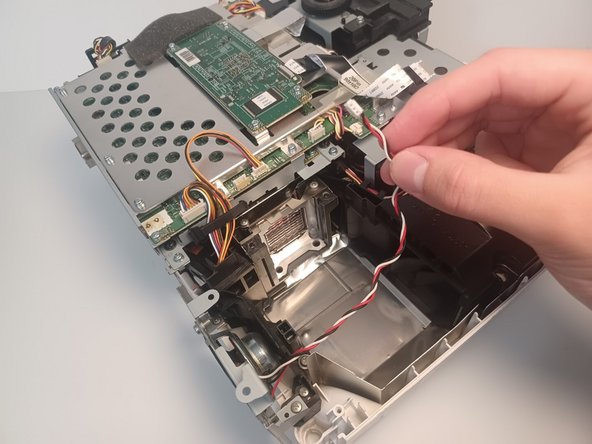
    • Unwind the speaker wire through the metal chassis.

  17. Epson Home Cinema 2150 Exhaust Fan Replacement: Schritt 17, Bild 1 von 3 Epson Home Cinema 2150 Exhaust Fan Replacement: Schritt 17, Bild 2 von 3 Epson Home Cinema 2150 Exhaust Fan Replacement: Schritt 17, Bild 3 von 3
    • Remove two 6mm Phillips #1 screws.

    • The speaker will fall out once screws are removed.

  18. Epson Home Cinema 2150 Exhaust Fan Replacement, Exhaust Fan: Schritt 18, Bild 1 von 3 Epson Home Cinema 2150 Exhaust Fan Replacement, Exhaust Fan: Schritt 18, Bild 2 von 3 Epson Home Cinema 2150 Exhaust Fan Replacement, Exhaust Fan: Schritt 18, Bild 3 von 3
    • Remove two 6 mm Phillips #1 screws.

    • Remove two 5 mm Phillips #1 screws.

  19. Epson Home Cinema 2150 Exhaust Fan Replacement: Schritt 19, Bild 1 von 3 Epson Home Cinema 2150 Exhaust Fan Replacement: Schritt 19, Bild 2 von 3 Epson Home Cinema 2150 Exhaust Fan Replacement: Schritt 19, Bild 3 von 3
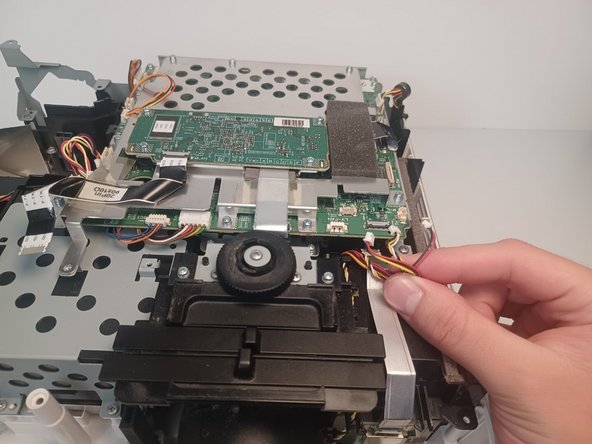
    • Disconnect a total of 10 motherboard connections.

    • Disconnect wires individually to avoid potential damage to the motherboard or the wires.

  20. Epson Home Cinema 2150 Exhaust Fan Replacement: Schritt 20, Bild 1 von 3 Epson Home Cinema 2150 Exhaust Fan Replacement: Schritt 20, Bild 2 von 3 Epson Home Cinema 2150 Exhaust Fan Replacement: Schritt 20, Bild 3 von 3
    • Press on the metal connector and firmly pull to remove the remaining ribbon cable.

    • Ribbon cables are delicate. To avoid unnecessary stress to the cable, pull on the cable with the flat surface of two fingers.

  21. Epson Home Cinema 2150 Exhaust Fan Replacement: Schritt 21, Bild 1 von 3 Epson Home Cinema 2150 Exhaust Fan Replacement: Schritt 21, Bild 2 von 3 Epson Home Cinema 2150 Exhaust Fan Replacement: Schritt 21, Bild 3 von 3
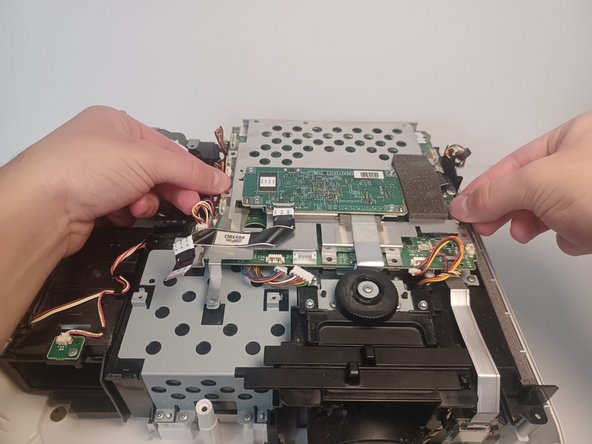
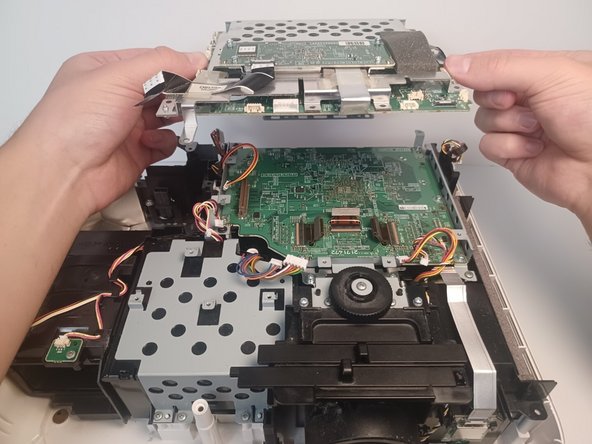
    • Remove twelve 5 mm Phillips #1 screws.

    • Using both hands, carefully lift the first half of the motherboard.

  22. Epson Home Cinema 2150 Exhaust Fan Replacement: Schritt 22, Bild 1 von 2 Epson Home Cinema 2150 Exhaust Fan Replacement: Schritt 22, Bild 2 von 2
    • Disconnect the three brown ribbon connectors from the board.

    • Ribbon cables are delicate. To avoid unnecessary stress to the cable, pull on the cable with the flat surface of a finger.

    • Remove four 5 mm Phillips #1 screws.

    • Remove two 3 mm Phillips #1 screws.

    • Pull upwards on the motherboard to remove it from the projector.

  23. Epson Home Cinema 2150 Exhaust Fan Replacement: Schritt 23, Bild 1 von 3 Epson Home Cinema 2150 Exhaust Fan Replacement: Schritt 23, Bild 2 von 3 Epson Home Cinema 2150 Exhaust Fan Replacement: Schritt 23, Bild 3 von 3
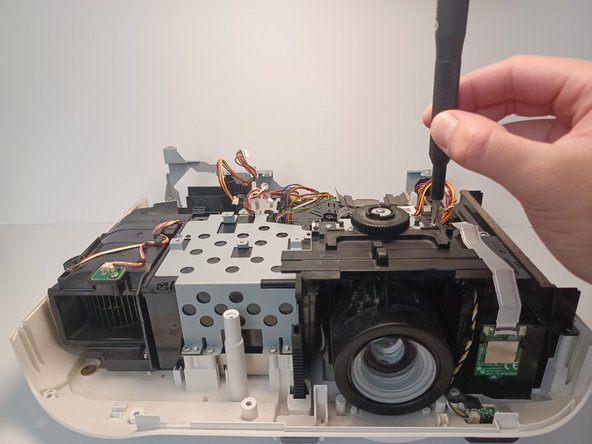
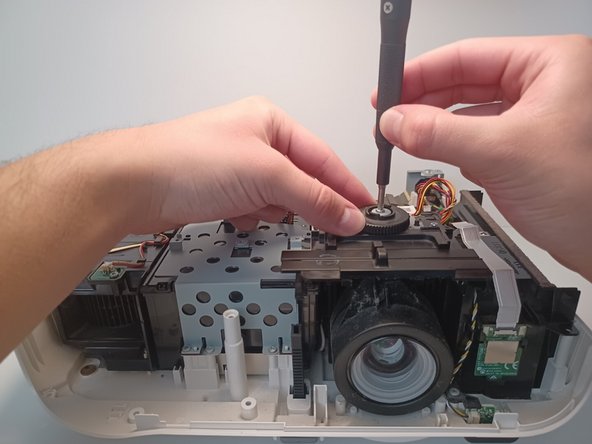
    • Remove the 7.5 mm Phillips #1 screw.

    • Remove two 6 mm Phillips #1 screws.

    • Set the black plastic lens sliders to the side.

  24. Epson Home Cinema 2150 Exhaust Fan Replacement: Schritt 24, Bild 1 von 3 Epson Home Cinema 2150 Exhaust Fan Replacement: Schritt 24, Bild 2 von 3 Epson Home Cinema 2150 Exhaust Fan Replacement: Schritt 24, Bild 3 von 3
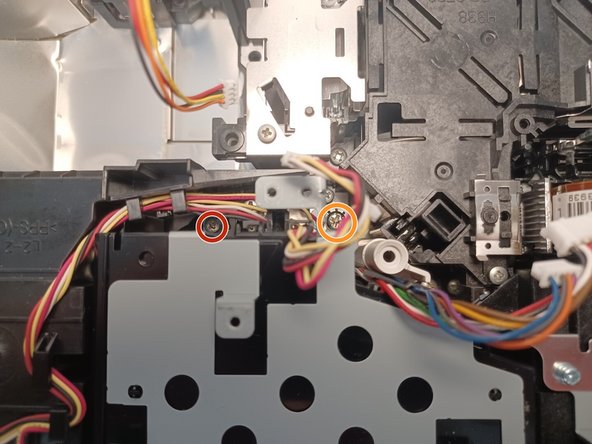
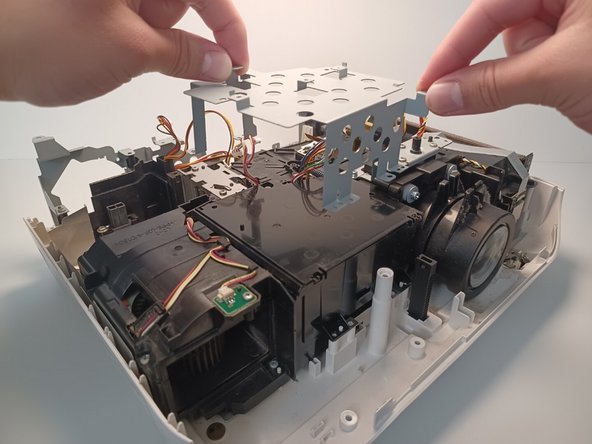
    • Remove five 9.5 mm Phillips #1 screws.

    • Remove one 6.0 mm Phillips #2 screw.

    • This screw is located to the right of the rear 9.5 mm screw.

    • Remove the metal bracket by pulling upwards on its sides.

  25. Epson Home Cinema 2150 Exhaust Fan Replacement: Schritt 25, Bild 1 von 3 Epson Home Cinema 2150 Exhaust Fan Replacement: Schritt 25, Bild 2 von 3 Epson Home Cinema 2150 Exhaust Fan Replacement: Schritt 25, Bild 3 von 3
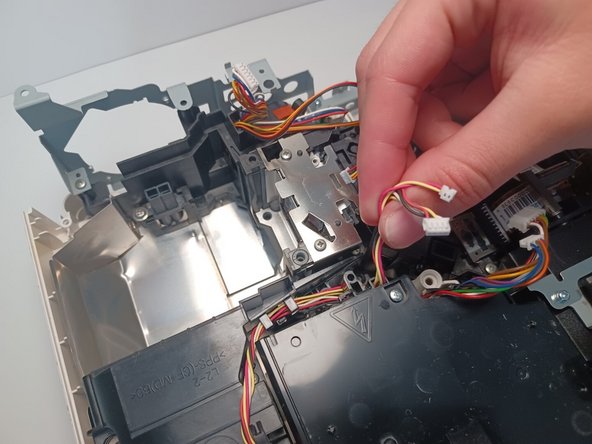
    • Remove the 9.5 mm Phillips #1 screw located behind the power supply.

    • Unwind the fan cable from the power supply for better access to the screw.

    • Remove the 10 mm Phillips #1 screw.

  26. Epson Home Cinema 2150 Exhaust Fan Replacement: Schritt 26, Bild 1 von 3 Epson Home Cinema 2150 Exhaust Fan Replacement: Schritt 26, Bild 2 von 3 Epson Home Cinema 2150 Exhaust Fan Replacement: Schritt 26, Bild 3 von 3
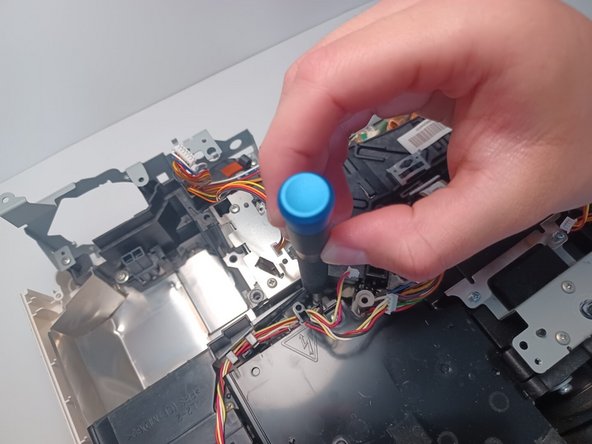
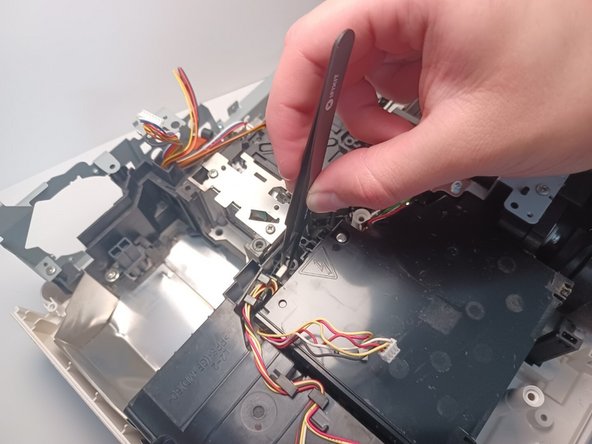
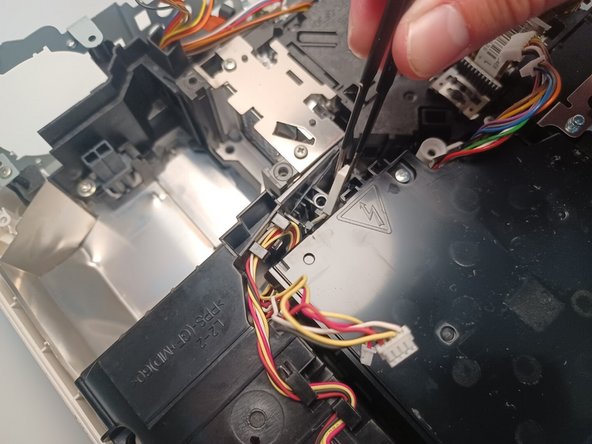
    • Move the fan cable to the side for clear access to the sensor below it.

    • Using pliers, pull upwards on the white sensor to remove it from the fan assembly.

  27. Epson Home Cinema 2150 Exhaust Fan Replacement: Schritt 27, Bild 1 von 3 Epson Home Cinema 2150 Exhaust Fan Replacement: Schritt 27, Bild 2 von 3 Epson Home Cinema 2150 Exhaust Fan Replacement: Schritt 27, Bild 3 von 3
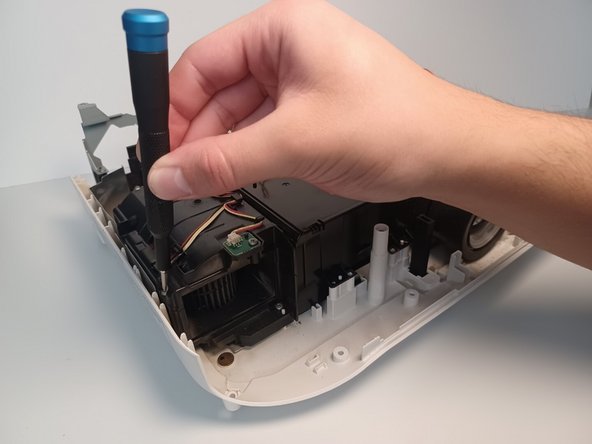
    • Remove two 9.5mm Phillips #1 screws.

  28. Epson Home Cinema 2150 Exhaust Fan Replacement: Schritt 28, Bild 1 von 3 Epson Home Cinema 2150 Exhaust Fan Replacement: Schritt 28, Bild 2 von 3 Epson Home Cinema 2150 Exhaust Fan Replacement: Schritt 28, Bild 3 von 3
    • Carefully lift upwards on the fan assembly to remove the fan from the projector.

Abschluss

To reassemble your device, follow these instructions in reverse order.

Luis Garcia

Mitglied seit: 09/26/22

577 Reputation

4 Anleitungen geschrieben

Team

CSU Los Angeles, Team 6-2, Adachi Fall 2022 Mitglied von CSU Los Angeles, Team 6-2, Adachi Fall 2022

CSULA-ADACHI-F22S6G2

4 Mitglieder

5 Anleitungen geschrieben

0 Kommentare

Kommentar hinzufügen

Seitenaufrufe:

Letzte 24 Stunden: 3

Letzte 7 Tage: 8

Letzte 30 Tage: 37

Insgesamt: 442