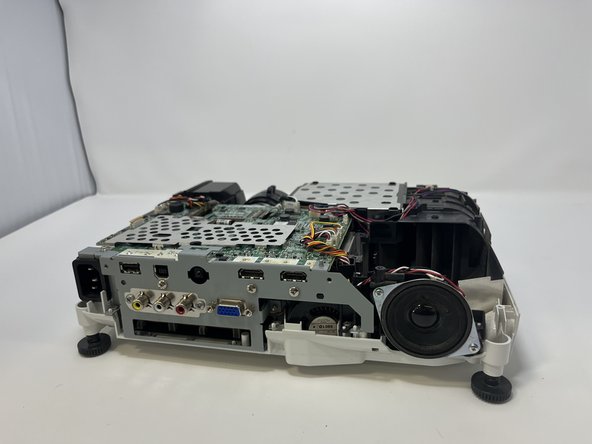
Zum Hauptinhalt wechseln

Epson PowerLite Home Cinema 1040 Temperature Sensor Replacement

Was du brauchst

  1. Epson PowerLite Home Cinema 1040 Temperature Sensor Replacement, Removing Housing: Schritt 1, Bild 1 von 1
    • Turn off the projector and unplug the power cord.

    • Allow the projector lamp to cool down for an hour or more to prevent injury.

  2. Epson PowerLite Home Cinema 1040 Temperature Sensor Replacement: Schritt 2, Bild 1 von 3 Epson PowerLite Home Cinema 1040 Temperature Sensor Replacement: Schritt 2, Bild 2 von 3 Epson PowerLite Home Cinema 1040 Temperature Sensor Replacement: Schritt 2, Bild 3 von 3
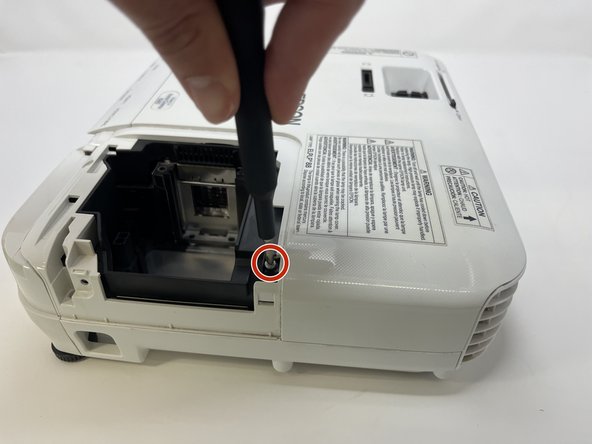
    • Use the Phillips #2 screwdriver to remove the 9 mm screw that secures the lamp cover.

    • Slide off the lamp cover and remove it from the projector.

    • If the lamp is broken, glass fragments may be found when removing the lamp cover. Be careful when removing the lamp cover and when removing the glass.

  3. Epson PowerLite Home Cinema 1040 Temperature Sensor Replacement: Schritt 3, Bild 1 von 3 Epson PowerLite Home Cinema 1040 Temperature Sensor Replacement: Schritt 3, Bild 2 von 3 Epson PowerLite Home Cinema 1040 Temperature Sensor Replacement: Schritt 3, Bild 3 von 3
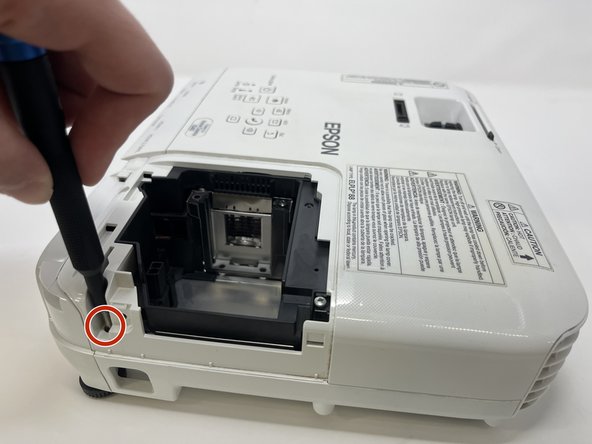
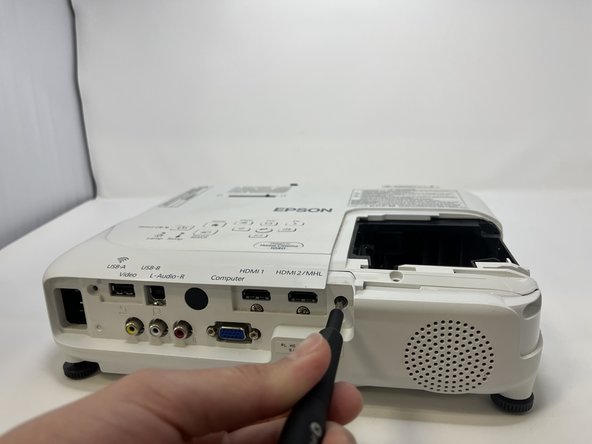
    • Use the Phillips #1 (PH1) screwdriver to remove the three 7 mm screws around the perimeter of the lens cover.

  4. Epson PowerLite Home Cinema 1040 Temperature Sensor Replacement: Schritt 4, Bild 1 von 3 Epson PowerLite Home Cinema 1040 Temperature Sensor Replacement: Schritt 4, Bild 2 von 3 Epson PowerLite Home Cinema 1040 Temperature Sensor Replacement: Schritt 4, Bild 3 von 3
    • Remove the air filter cover.

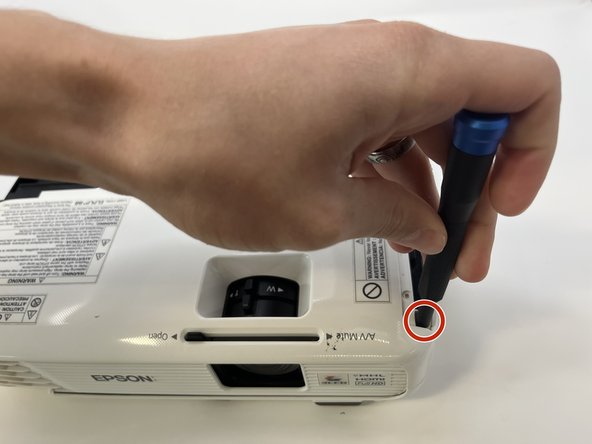
    • Remove the two PH1 7mm screws from under the air filter cover.

  5. Epson PowerLite Home Cinema 1040 Temperature Sensor Replacement: Schritt 5, Bild 1 von 3 Epson PowerLite Home Cinema 1040 Temperature Sensor Replacement: Schritt 5, Bild 2 von 3 Epson PowerLite Home Cinema 1040 Temperature Sensor Replacement: Schritt 5, Bild 3 von 3
    • Remove the two black, PH1, 6mm screws.

  6. Epson PowerLite Home Cinema 1040 Temperature Sensor Replacement: Schritt 6, Bild 1 von 3 Epson PowerLite Home Cinema 1040 Temperature Sensor Replacement: Schritt 6, Bild 2 von 3 Epson PowerLite Home Cinema 1040 Temperature Sensor Replacement: Schritt 6, Bild 3 von 3
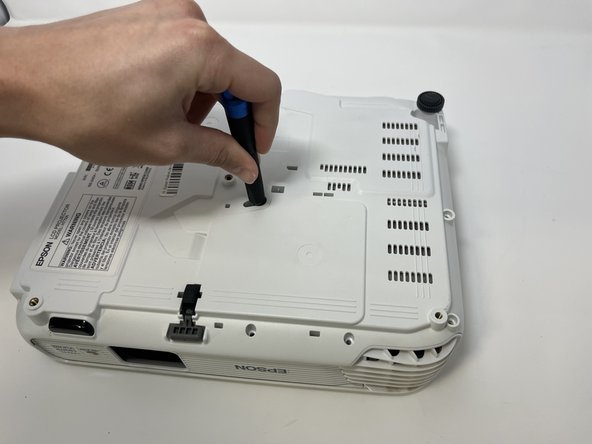
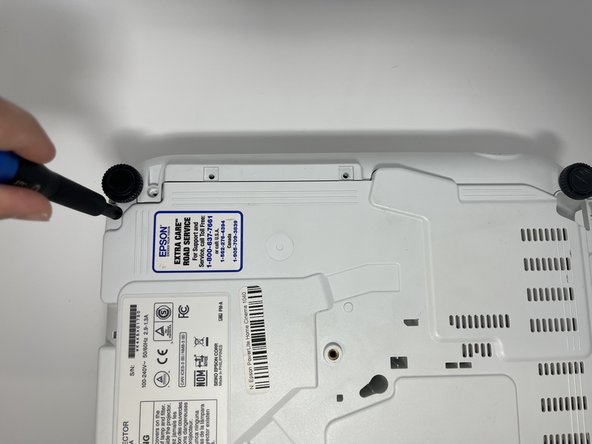
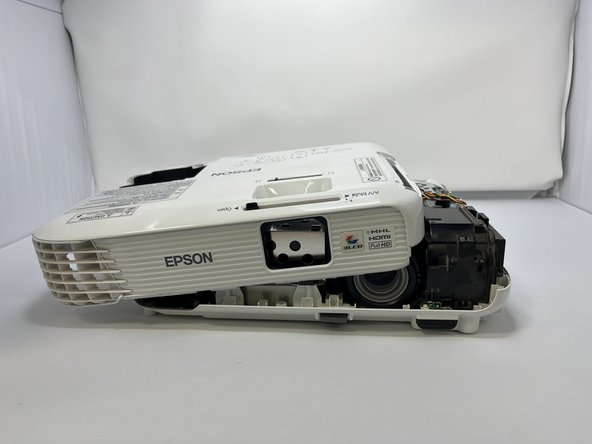
    • Flip the projector so the bottom is exposed.

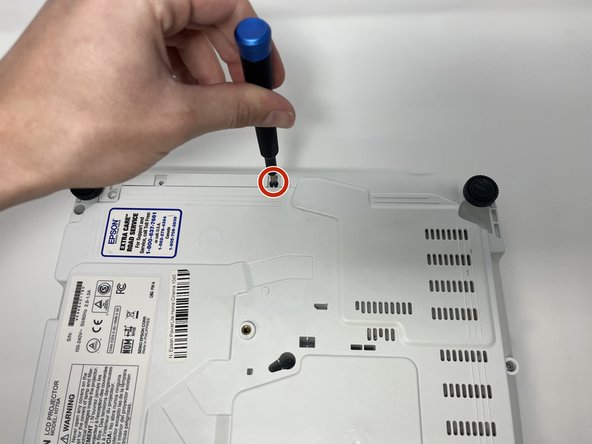
    • Remove seven PH1 7mm screws on the outer rim of the projector.

    • Some screws are located deeper in the housing and a bit extension or longer screwdriver may be required.

  7. Epson PowerLite Home Cinema 1040 Temperature Sensor Replacement: Schritt 7, Bild 1 von 2 Epson PowerLite Home Cinema 1040 Temperature Sensor Replacement: Schritt 7, Bild 2 von 2
    • Continuing on the bottom, remove the two black, PH1, 6mm screws.

  8. Epson PowerLite Home Cinema 1040 Temperature Sensor Replacement: Schritt 8, Bild 1 von 2 Epson PowerLite Home Cinema 1040 Temperature Sensor Replacement: Schritt 8, Bild 2 von 2
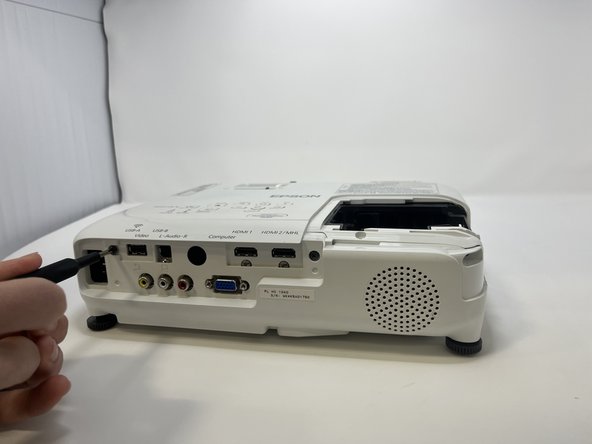
    • Remove the cover on the backside of the projector where the inputs are located.

  9. Epson PowerLite Home Cinema 1040 Temperature Sensor Replacement: Schritt 9, Bild 1 von 3 Epson PowerLite Home Cinema 1040 Temperature Sensor Replacement: Schritt 9, Bild 2 von 3 Epson PowerLite Home Cinema 1040 Temperature Sensor Replacement: Schritt 9, Bild 3 von 3
    • Pull the top half of the housing upwards and rest it on the side.

    • Be careful to not pull upwards too hard. The top is still connected by a thin electric strip.

  10. Epson PowerLite Home Cinema 1040 Temperature Sensor Replacement: Schritt 10, Bild 1 von 3 Epson PowerLite Home Cinema 1040 Temperature Sensor Replacement: Schritt 10, Bild 2 von 3 Epson PowerLite Home Cinema 1040 Temperature Sensor Replacement: Schritt 10, Bild 3 von 3
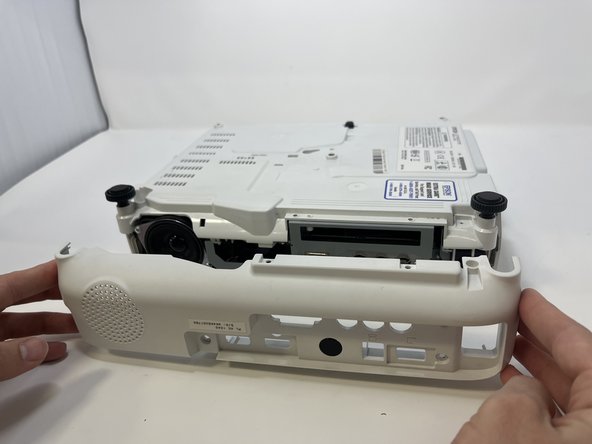
    • Using your fingernail or another thin wedging tool, disconnect the electronic strip from the motherboard.

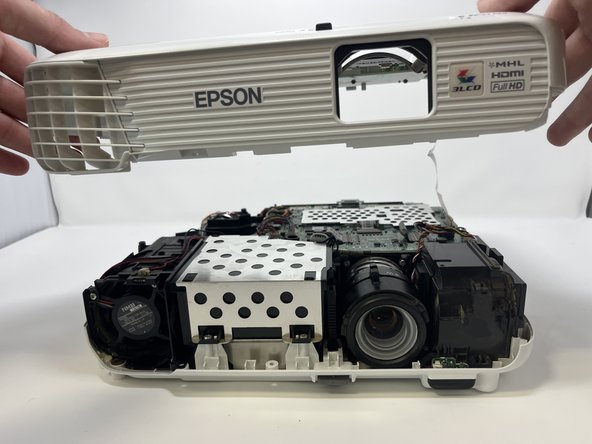
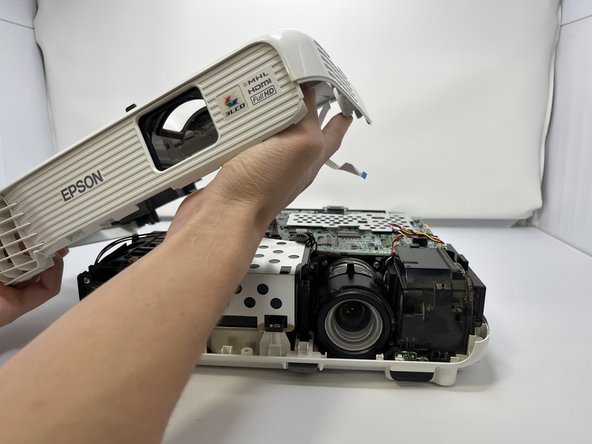
    • Remove the top half of the projector housing completely and set it to the side.

  11. Epson PowerLite Home Cinema 1040 Temperature Sensor Replacement, Temperature Sensor: Schritt 11, Bild 1 von 3 Epson PowerLite Home Cinema 1040 Temperature Sensor Replacement, Temperature Sensor: Schritt 11, Bild 2 von 3 Epson PowerLite Home Cinema 1040 Temperature Sensor Replacement, Temperature Sensor: Schritt 11, Bild 3 von 3
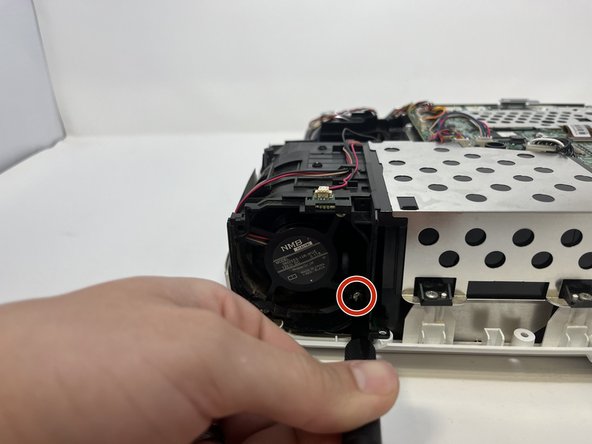
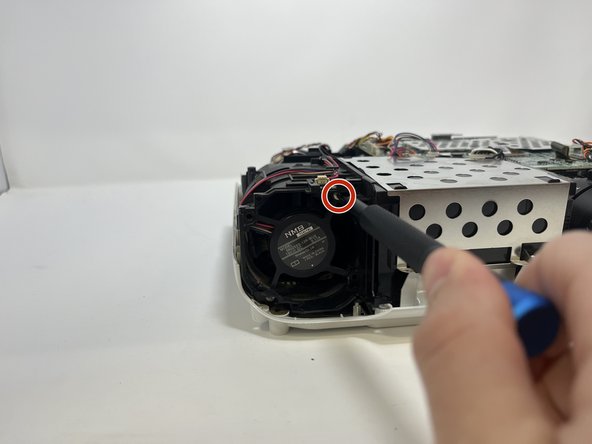
    • Use the Philips #1 to unscrew the 3 silver 7mm screws securing the fan frame in place.

  12. Epson PowerLite Home Cinema 1040 Temperature Sensor Replacement: Schritt 12, Bild 1 von 2 Epson PowerLite Home Cinema 1040 Temperature Sensor Replacement: Schritt 12, Bild 2 von 2
    • Remove the fan frame.

  13. Epson PowerLite Home Cinema 1040 Temperature Sensor Replacement: Schritt 13, Bild 1 von 2 Epson PowerLite Home Cinema 1040 Temperature Sensor Replacement: Schritt 13, Bild 2 von 2
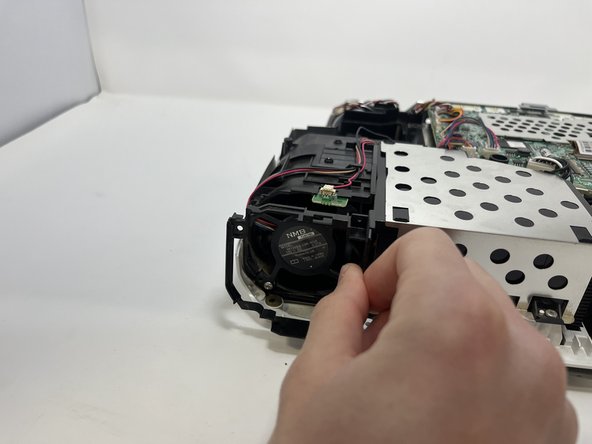
    • Locate the temperature sensor above the cooling fan.

    • Pull the green temperature sensor chip out of the plastic housing that keeps it in place.

  14. Epson PowerLite Home Cinema 1040 Temperature Sensor Replacement: Schritt 14, Bild 1 von 2 Epson PowerLite Home Cinema 1040 Temperature Sensor Replacement: Schritt 14, Bild 2 von 2
    • Unhook the red and black temperature sensor wires that lead to the motherboard.

    • Remove the temperature sensor from the projector.

    • These wires are small and removing them can be difficult.

Abschluss

To reassemble your device, follow these instructions in reverse order.

Team

Utah Tech University, Team 1-6, McMurrin Spring 2023 Mitglied von Utah Tech University, Team 1-6, McMurrin Spring 2023

UTAHTECH-MCMURRIN-S23S1G6

3 Mitglieder

6 Anleitungen geschrieben

Ein Kommentar

What happens when you just remove the part, will it never turn on? I’m trying to find a replacement sensor for my 1080 but I’ve had no luck so far.

AirAngel - Antwort

Kommentar hinzufügen

Seitenaufrufe:

Letzte 24 Stunden: 2

Letzte 7 Tage: 16

Letzte 30 Tage: 41

Insgesamt: 515