Einleitung
The roller can get worn out over time. Therefore, it’s important to know how to replace it. This guide will cover the steps necessary to successfully replace the roller. Make sure your vacuum is off before attempting to replace the roller.
Was du brauchst
-
-
Unscrew the two 18.1 mm PH2 Phillips head screws on the bottom of the vacuum.
-
-
-
-
Unscrew the 14mm PH2 Phillips head screw.
-
Pull the bottom cover off of the rest of the casing.
-
-
-
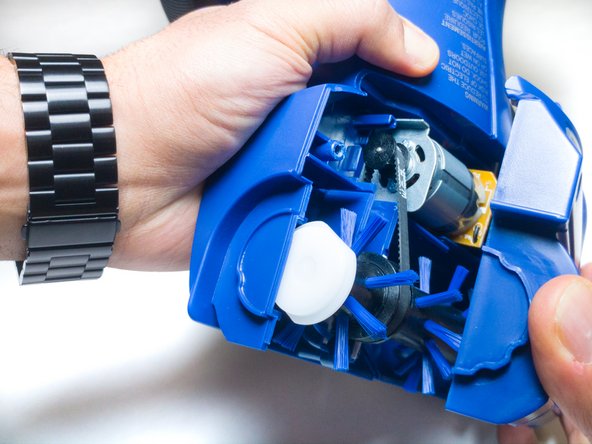
Pull the roller, motor, and belt out of the casing.
-
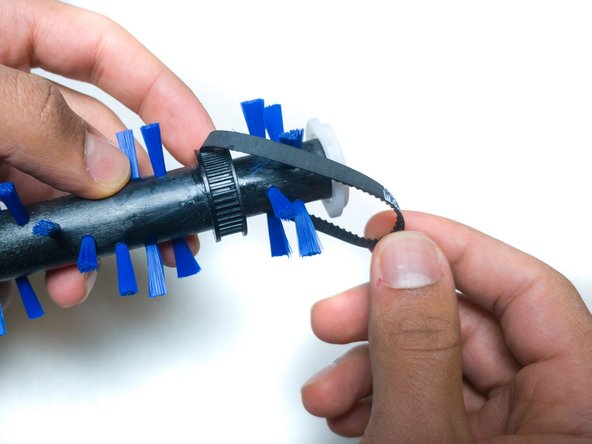
Separate the roller from the belt.
-


To reassemble your device, follow these instructions in reverse order.
To reassemble your device, follow these instructions in reverse order.
Team

IUPUI, Team S6-G4, Baechle Fall 2017 Mitglied von IUPUI, Team S6-G4, Baechle Fall 2017
IUPUI-BAECHLE-F17S6G4
3 Mitglieder
12 Anleitungen geschrieben