Einleitung
There are many things that can cause a paper jam error. First you must make sure that there is no debris stuck anywhere. If you have done this and there is still a paper jam, you could have this issue.
Was du brauchst
-
-
The symptoms of this fault are:
-
The printer displays a 'Paper Jam' error, and tells you to remove the rear duplexer, and says that you may need to open the front cover too. When you touch 'OK', nothing happens, unless you open and close the front door.
-
When you open and close the front door and then touch 'OK', the printer mechanism moves a little and then it displays the error again. Occasionally the printer may move through most of a full initialization before stopping again.
-
If you bypass the door close mechanism (place an opaque object in the rectangular slot on the left hand side), you will see that the paper feed rollers are moving a small distance back, the carriage moves to the left slightly, then the feed rollers move forward and stop.
-
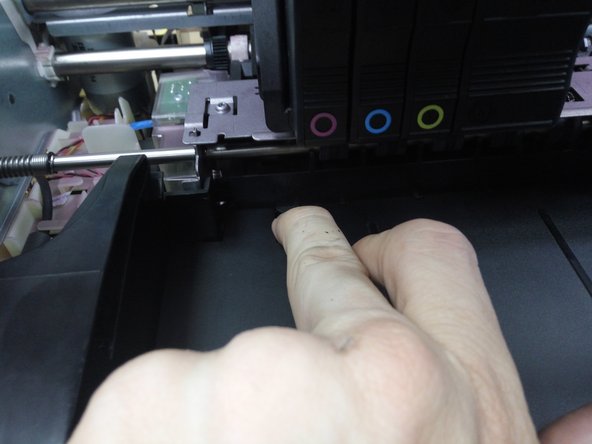
Shine a light into the printer, and check over on the far right for a small lever. This lever should slide to the right with gentle pressure, and spring back into position. If it doesn't slide back, try pulling it gently to the left.
-
If you can move the lever back and forth but it doesn't spring, then you need to disassemble your printer and replace this spring.
-
-
-
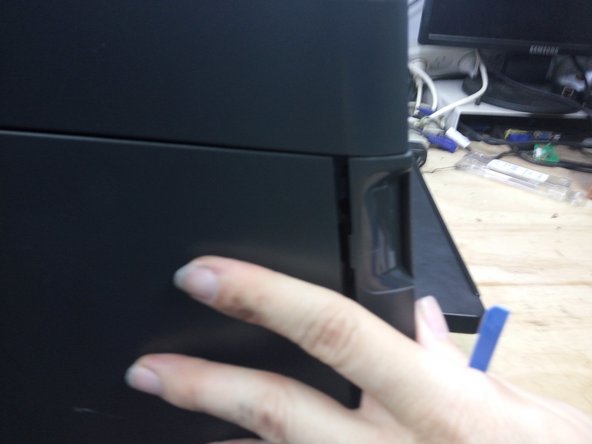
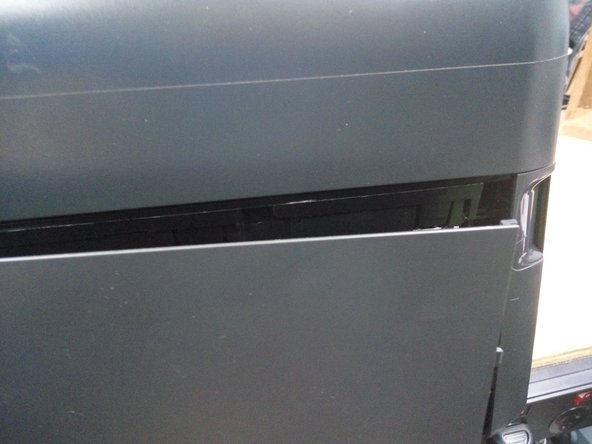
Remove the printer from the optional second paper tray.
-
Pull out the paper tray from the front, and the duplexer from the rear.
-
Removing the print head (see the HP user guide) may also reduce the chance of ink leakage while working on the printer.
-
-
-
Hold up the control panel with one hand, reach underneath it with the other, and pull firmly downward on the curved support to detach it from the display
-
Lifting the display further up, reach behind the brown plastic cover, and pull it forwards to release it
-
-
-
Rest the machine on it's rear panel, so you can access the cable.
-
Lift up the brown clamp, and pull out the cable
-
Using a T-10 Torx screwdriver, undo the two screws beneath the display (pictured)
-
-
-
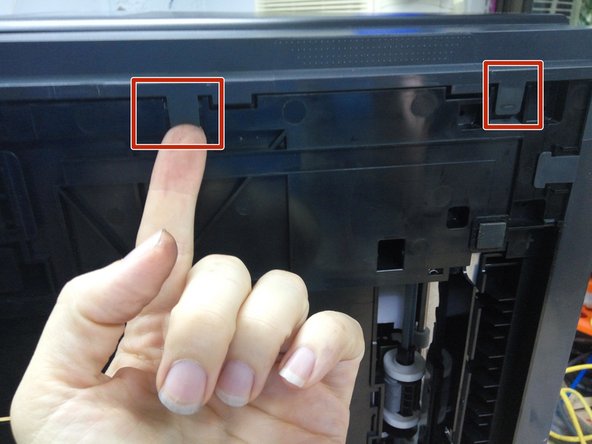
On the back of the printer, remove the two screws on the right hand side (left-hand when viewed from the front.
-
Open the door on the front of the computer, and remove the one screw on the lower left-hand side.
-
Using a spudger lever firmly outwards on the lower rear side of the panel.
-
With your other hand, push the panel backwards, It will slide half a centimeter backwards and come free.
-
-
-
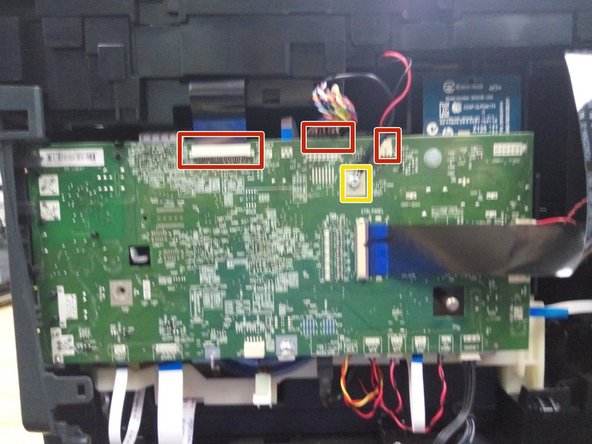
Disconnect the scanner flatfex, sheet feeder and LED cables (marked in red).
-
Remove the earth strap (marked in yellow).
-
-
-
Remove the remaining screws around the top of the printer.
-
Lift the scanner assembly away from the printer.
-
-
-
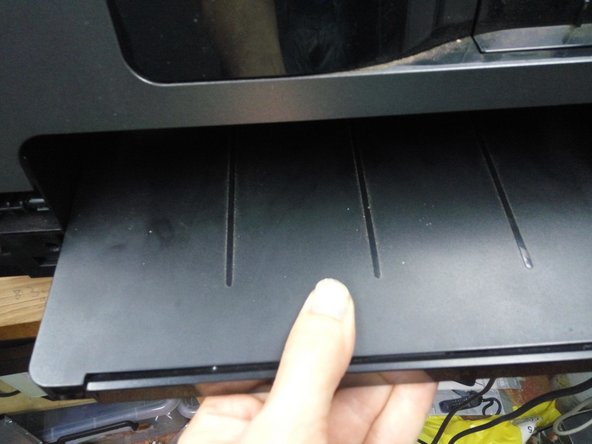
Depress the two clips at the rear of the output tray, and pull the tray forward.
-
Rest the printer on its rear panel, depress the two clips under the tray, and slide the white support clear of the tray.
-
Pull the output tray clear.
-
-
-
-
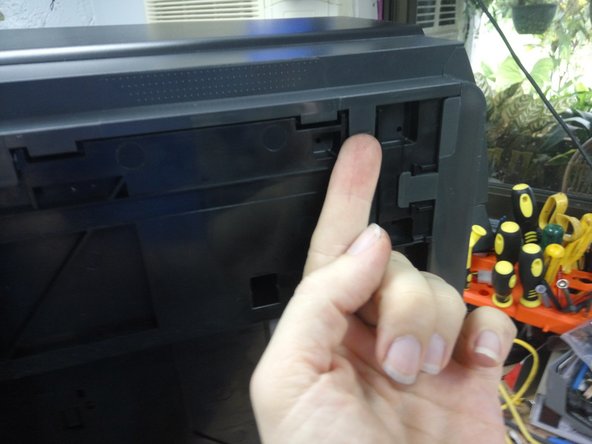
Remove the single silver screw (pictured)
-
Remove the two screws from the rear left-hand side (right hand when viewed from the front)
-
-
-
Release the one clip on the inside front of the panel.
-
Release the two clips on the underside of the printer.
-
-
-
Pull outwards on the front to release a hidden clip.
-
Rotate the panel outwards until the clips on the rear of the panel detach.
-
-
-
Remove the remaining screws on the rear of the printer.
-
Release the two clips on the underside of the printer.
-
Detach the rear panel.
-
-
-
Using multple tools and considerable force, unclip the power button cover from the bottom.
-
-
-
Release trims in the left-hadn quater panel
-
There are clips on the side, underneath, and two from the top.
-
-
-
Detach the NFC connector from the circuitboard, (Socket location marked in red) and pull the cable free from its restraints.
-
Bend the flexible flap attached to the front door upwards, then pull the studs free from the guides.
-
Pull the three hinges out of their clamps, and remove the front door.
-
-
-
Remove the power button, door sensor, and USB cables from the circuit board.
-
Slide back the catch on the Ctrl Panel socket, and remove the flat-flex.
-
Remove the 2 screws on the front left, and the one on the front right.
-
Release the clips in the paper output area
-
Release the two clips on the underside of the printer.
-
Pull the front panel free.
-
-
-
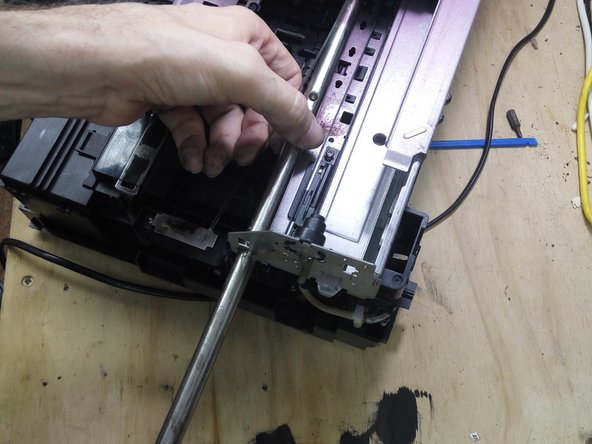
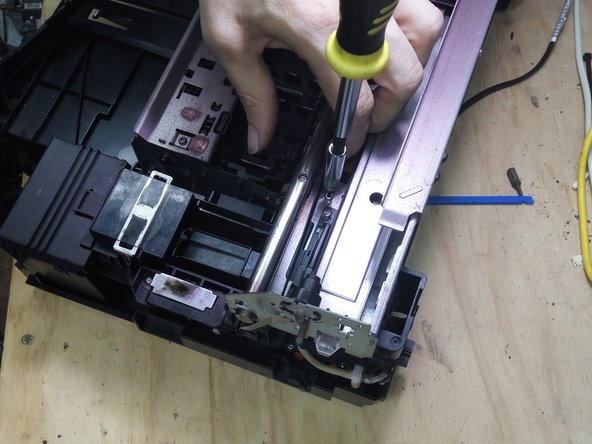
Remove the three screws from the bracket between the end of the carriage support and the case. Remove this bracket.
-
With clean hands or gloves, depress the sprung bracket on the right, and release the plastic sensor strip. Then undo it from the hook on the left side. Lay it over the print head, and secure it with a clean object.
-
Remove the two bolts holding the steel rod to the chassis, and slide it out of the printer.
-
Undo the two bolts holding the right side of the carriage support.
-
-
-
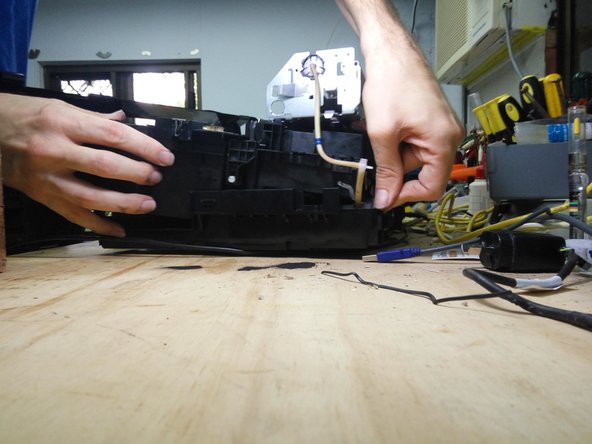
Undo the single screw attaching the cleaning station to the carriage support.
-
Release the air lines from the clips in the cleaning station.
-
Detach the smaller hose from the T joint.
-
Pull up on the carriage support. This should give you enough room to work the cleaning station out of the printer.
-
-
-
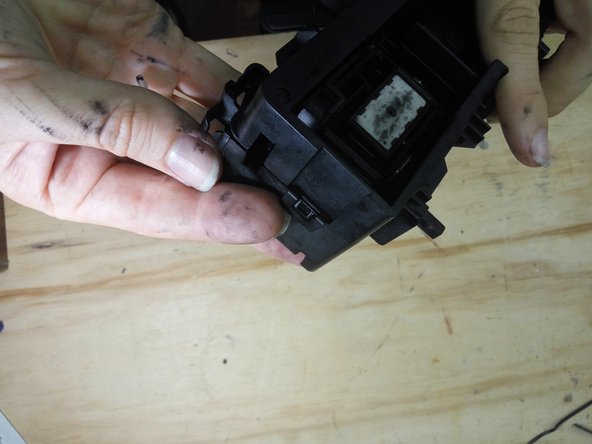
Release the clip on top of the station, and slide the front cover off
-
Undo the 4 screws on top, release the clip on the rear of the station, and lift off the top cover.
-
-
-
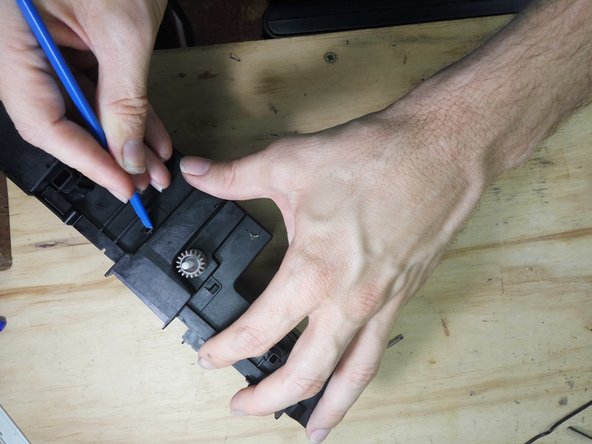
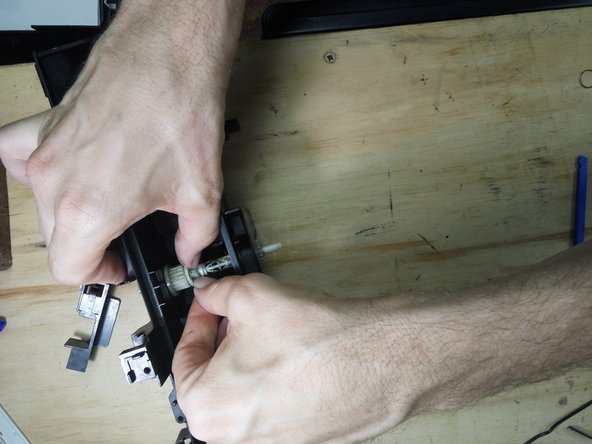
Lift out the wiper/cap assembly.
-
Release the clip on the left hand side, and remove the small moulding.
-
Carefully spring back the small black plastic blade retaining the lever, and lift it up out of the assembly.
-
-
-
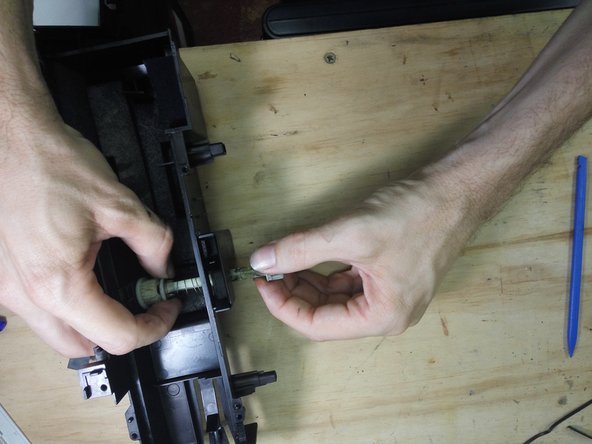
You should now be able to see, covered in lots of ink, the broken spring. My pictures were taken during reassembly, after I had given everything a thorough cleaning.
-
Open the clips on each side of the bar, allowing the spring retainer to move.
-
Slide the bar out the left hand side of the cleaning station, pulling the end cog and the spring retainer off the bar.
-
-
-
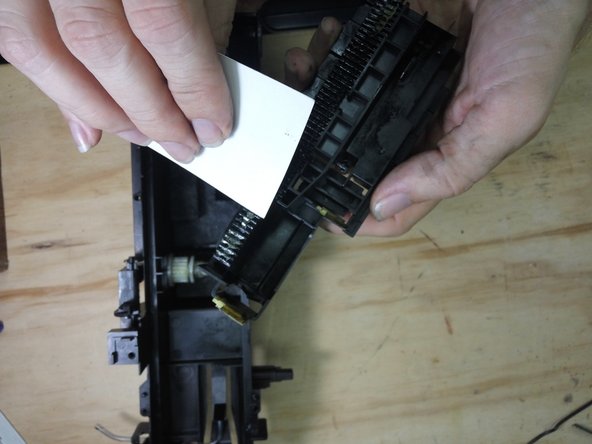
If you have not cleaned the entire station, at least wash the parts of the cog assembly, and mop up some of the ink in the station with paper towels or shop rags.
-
Poke the bar in through the left side, then place over it the replacement spring and the spring retainer. The clips of the retainer go towards the spring. Do not slide the retainer all the way home yet.
-
Place put the sliding cog over the bar, taking note of the direction. Slide the spring retainer home. The sliding cog will locate in the hole in the housing on the right.
-
-
-
Replace the small molding on the left side.
-
Apply grease to the cog, bar, the rack under the wiper assembly, and any other places where the parts slide against each other.
-
Replace the lever. Ensure it hooks into the end of the white sprung cog assembly. Ensure that the lever moves smoothly back, pushing the cog on the other side out, and then springs firmly back into position.
-
Replace the top cover and secure it with the 4 screws.
-
Replace the front cover.
-


Proceed to reassemble your printer, working back through the instructions in the reverse order. You can test your repair as soon as you have restored the carriage support, plastic encoder strip, and reconnected the cables connecting the front panel switches and control panel.
Proceed to reassemble your printer, working back through the instructions in the reverse order. You can test your repair as soon as you have restored the carriage support, plastic encoder strip, and reconnected the cables connecting the front panel switches and control panel.
Rückgängig: Ich habe diese Anleitung nicht absolviert.
11 weitere Personen haben diese Anleitung absolviert.
10 Kommentare
Hi Robert,
Thank you very much for the nice guid mate :)
How could I realise and slide left the cartridge to be able to reach screws on “Step 17 Release the carriage support”?
Regards :)
HI ROBERT
Thanks a lot from Guadeloupe West indies
Hi Mr.Robert Backhaus,
Thanks a million..for saving my printer.
I've contacted HP and they asked me to dispose of the printer as there is no service available for consumer printers.
I've not go the skill to go all out following your useful and detailed step by step guide..
What I did was I tried to move the lever you highlighted...it was jammed at first...then it snapped...I guess the spring broke...
Then I use a rubber band to hook it to the metal panel...to simulate the return spring function..
And it works.
Not a proper repair...
Just a Band It type of get it running solution.
Thank you so much for your generous sharing.
Else my OfficeJet Pro 8620 will never be able to function again because of a spring.
Leehanvoon@yahoo.com
Hi Robert, on my 8610 the little lever from Step 1 doesn’t move at all. There’s no play, whatsoever, in it. Is that an indication of the spring problem?