Zum Hauptinhalt wechseln

Floor Pump Gauge Replacement

Was du brauchst

  1. Floor Pump Gauge Replacement, Removing the Gauge Cover: Schritt 1, Bild 1 von 2 Floor Pump Gauge Replacement, Removing the Gauge Cover: Schritt 1, Bild 2 von 2
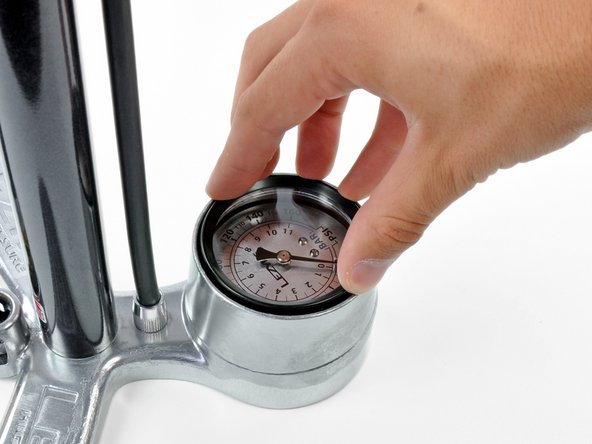
    • Using a flat head screwdriver, pry up an edge of the gauge cover.

    • Remove the gauge cover.

  2. Floor Pump Gauge Replacement, Removing the Gauge Face Plate and Internals: Schritt 2, Bild 1 von 3 Floor Pump Gauge Replacement, Removing the Gauge Face Plate and Internals: Schritt 2, Bild 2 von 3 Floor Pump Gauge Replacement, Removing the Gauge Face Plate and Internals: Schritt 2, Bild 3 von 3
    • No parts from the old gauge will be re-used, so there is no need to attempt to preserve the parts. However, be careful not to damage the gauge housing.

    • Pry up a corner of the gauge face plate.

    • Use pliers to pull off the gauge face plate.

    • Be careful not to cut yourself when prying off the face plate, as the edges are sharp.

    • Use pliers to pry out the internal gauge mechanics.

  3. Floor Pump Gauge Replacement, Removing the Old Gauge: Schritt 3, Bild 1 von 2 Floor Pump Gauge Replacement, Removing the Old Gauge: Schritt 3, Bild 2 von 2
    • Using pliers, grip the exposed brass piece and unthread the gauge by rotating it counter-clockwise.

    • Pull the gauge out of its housing.

  4. Floor Pump Gauge Replacement, Replacing the Gauge O-rings: Schritt 4, Bild 1 von 2 Floor Pump Gauge Replacement, Replacing the Gauge O-rings: Schritt 4, Bild 2 von 2
    • Remove the O-ring at the bottom of the threaded hole.

    • Place a new O-ring into the hole.

  5. Floor Pump Gauge Replacement, Applying Threadlocker: Schritt 5, Bild 1 von 1
    • Apply medium-strength Loctite (green, 290) to the threads on the new gauge.

    • Apply a thin layer, but make sure it covers all the threads.

  6. Floor Pump Gauge Replacement, Installing the New Gauge: Schritt 6, Bild 1 von 3 Floor Pump Gauge Replacement, Installing the New Gauge: Schritt 6, Bild 2 von 3 Floor Pump Gauge Replacement, Installing the New Gauge: Schritt 6, Bild 3 von 3
    • Thread the new gauge into the floor pump by turning it clockwise in its housing.

    • Thread the gauge until it is snug and the BAR/psi markings are aligned with the pump body.

    • Gauge performance will not be affected by its position, so long as it is snug.

    • Allow at least 30 minutes for the thread locker to set.

    • Test the pump to its highest rated pressure and listen for leaks. If you can hear leaks from the gauge, tighten it.

Ziellinie

iRobot

Mitglied seit: 09/24/09

1 Reputation

636 Anleitungen geschrieben

0 Kommentare

Kommentar hinzufügen

Seitenaufrufe:

Letzte 24 Stunden: 0

Letzte 7 Tage: 1

Letzte 30 Tage: 5

Insgesamt: 2,867