Zum Hauptinhalt wechseln

Fugoo Style XL Midwoofer Replacement

Was du brauchst

  1. Fugoo Style XL Midwoofer Replacement, Fabric Case: Schritt 1, Bild 1 von 2 Fugoo Style XL Midwoofer Replacement, Fabric Case: Schritt 1, Bild 2 von 2
    • Using your hand, unscrew the large screws underneath the speaker.

  2. Fugoo Style XL Midwoofer Replacement: Schritt 2, Bild 1 von 3 Fugoo Style XL Midwoofer Replacement: Schritt 2, Bild 2 von 3 Fugoo Style XL Midwoofer Replacement: Schritt 2, Bild 3 von 3
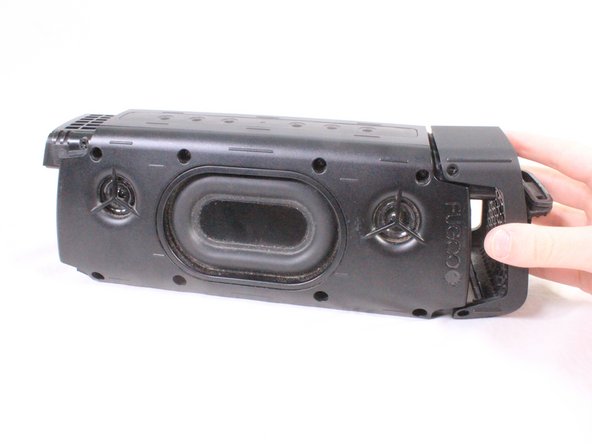
    • Using your hand, gently lift the large plastic tab secured to the rubber holding.

    • After lifting the tab, slide the speaker out of its case.

    • Ensure the tab is lifted only slightly above the rubber holding. Bending the plastic tab too far could result in damage to the case.

  3. Fugoo Style XL Midwoofer Replacement, Midwoofer: Schritt 3, Bild 1 von 2 Fugoo Style XL Midwoofer Replacement, Midwoofer: Schritt 3, Bild 2 von 2
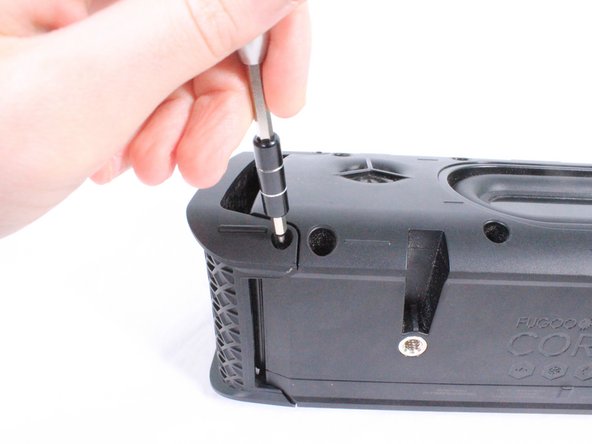
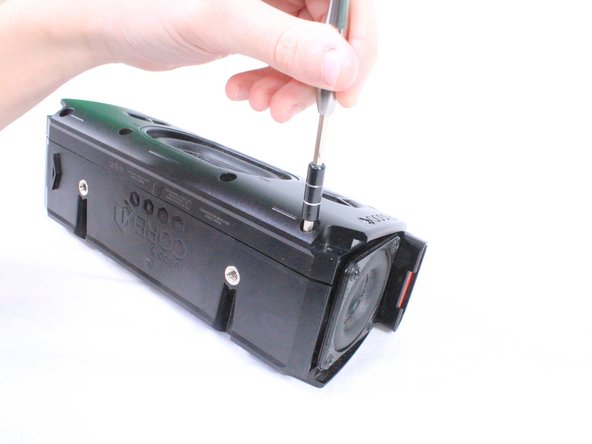
    • There are 8 screws (4 on each side) holding covers that conceal the bass speakers. Remove these 3mm screws using a #2.0 Hex screwdriver.

  4. Fugoo Style XL Midwoofer Replacement: Schritt 4, Bild 1 von 2 Fugoo Style XL Midwoofer Replacement: Schritt 4, Bild 2 von 2
    • Using your hand, pull the covers away from the speaker.

  5. Fugoo Style XL Midwoofer Replacement: Schritt 5, Bild 1 von 2 Fugoo Style XL Midwoofer Replacement: Schritt 5, Bild 2 von 2
    • Using a #2.0 Hex screwdriver to unscrew the 8 12mm screws depicted.

  6. Fugoo Style XL Midwoofer Replacement: Schritt 6, Bild 1 von 2 Fugoo Style XL Midwoofer Replacement: Schritt 6, Bild 2 von 2
    • Gently pull apart the front casing from the back casing.

    • Speakers on the front casing have wires directly connected to the motherboard. Pulling off the casing with force will result in damage.

  7. Fugoo Style XL Midwoofer Replacement: Schritt 7, Bild 1 von 2 Fugoo Style XL Midwoofer Replacement: Schritt 7, Bild 2 von 2
    In diesem Schritt verwendetes Werkzeug:
    Tweezers
    $4.99
    Kaufen
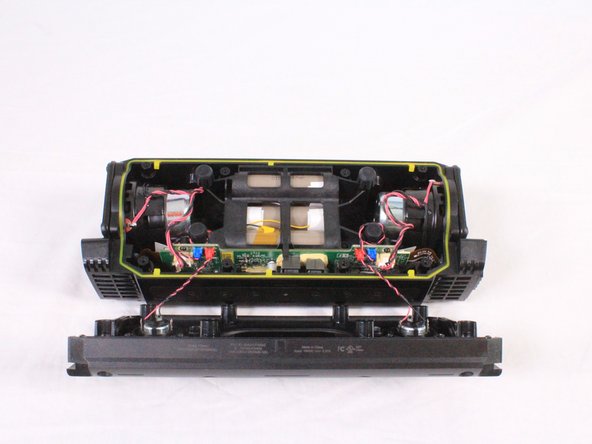
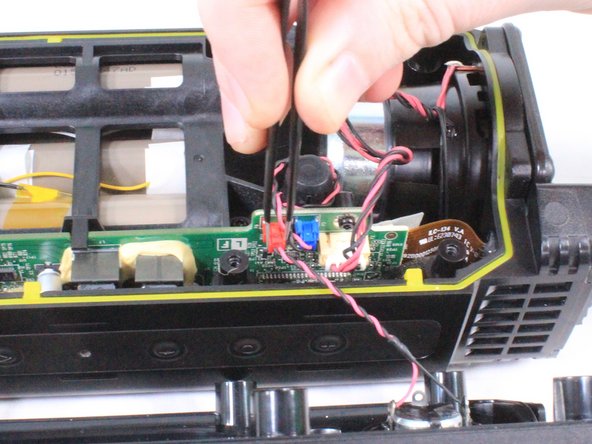
    • Using a pair of tweezers or your hand, carefully remove the red bundled cable connectors from the motherboard.

    • When the red bundled cable connectors are disconnected, set the outer casing aside.

  8. Fugoo Style XL Midwoofer Replacement: Schritt 8, Bild 1 von 2 Fugoo Style XL Midwoofer Replacement: Schritt 8, Bild 2 von 2
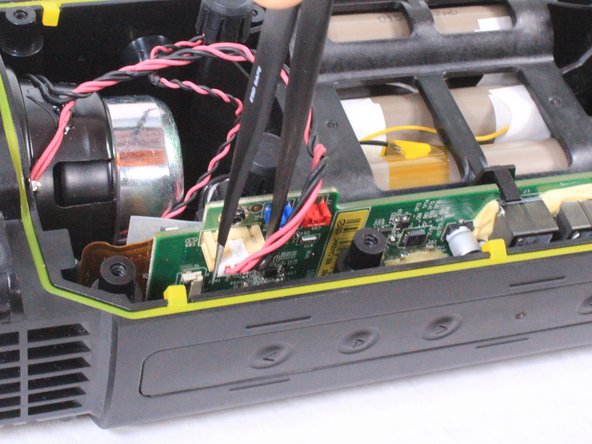
    • Carefully untangle and remove the white bundled cable connectors from the motherboard.

  9. Fugoo Style XL Midwoofer Replacement: Schritt 9, Bild 1 von 2 Fugoo Style XL Midwoofer Replacement: Schritt 9, Bild 2 von 2
    • Using a T9 screwdriver, remove the 8 screws (4 on each speaker) surrounding the midwoofers.

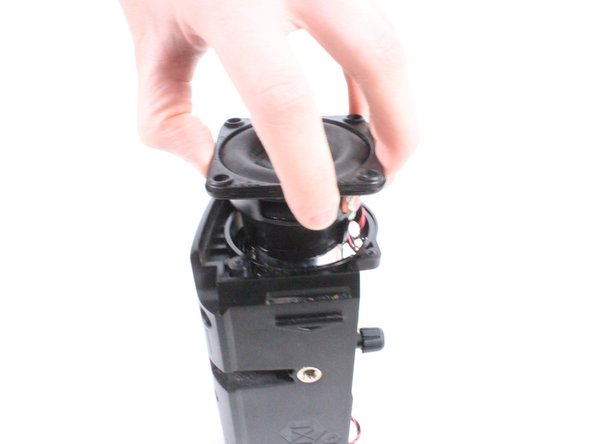
    • Using your hand, carefully remove the midwoofers.

Abschluss

To reassemble your device, follow these instructions in reverse order.

James Gifford

Mitglied seit: 09/25/17

573 Reputation

5 Anleitungen geschrieben

Team

USF Tampa, Team S3-G4, Cannon Fall 2017 Mitglied von USF Tampa, Team S3-G4, Cannon Fall 2017

USFT-CANNON-F17S3G4

4 Mitglieder

5 Anleitungen geschrieben

Ein Kommentar

can anyone tell me where I can buy the replacement speaker

Michael Johnsson - Antwort

Kommentar hinzufügen

Seitenaufrufe:

Letzte 24 Stunden: 0

Letzte 7 Tage: 1

Letzte 30 Tage: 2

Insgesamt: 400