Einleitung
This guides serves to help the user replace the LCD Screen.
Warning: The replacement of the screen requires great care, as any force could damage the frame or any internal cables/wires that may be essential to the camera's function. To avoid damage, treat the frame with care when prying it off, and treat and wires or cables with care as well.
Was du brauchst
-
-
Flip the camera so that the bottom is facing upwards.
-
With the Phillips #00 screwdriver, remove all four screws.
-
-
-
Flip the camera so that it is now on the right side.
-
With the Phillips #00 screwdriver, remove all four screws.
-
-
-
Flip the camera so that it is now on the left side.
-
Move or remove the flap hiding the camera ports.
-
With the Phillips #00 screwdriver, remove all screws.
-
-
-
Flip the camera so that it is now on the top side.
-
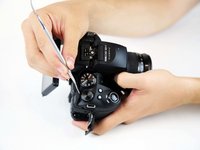
With a spudger, pry off the highlighted metal piece of the camera.
-
-
-
-
Pull the LCD screen up and out of the way.
-
With the Phillips #00 screwdriver, remove the screws.
-
-
-
Slowly and carefully pull the frame away to have a better view of the inside.
-
-
-
Peel back (or off) the black tape to expose more of the inside of the camera.
-
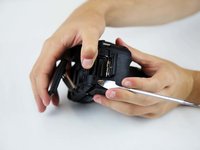
Flip the white switch of the highlighted chamber up, and that should unlock the ribbon cable from its compartment.
-
To see if this worked, gently pull the ribbon cable out of the compartment. It should come out without force.
-
-
-
Flip the frame component so that the inside is now accessible.
-
With a screwdriver, unscrew all highlighted screws.
-
-
-
Flip the LCD Screen component so that the bottom half is now accessible.
-
With a screwdriver, unscrew all highlighted screws.
-
-
-
Remove the LCD Screen component from its mount.
-
Turn the LCD Screen component so that the right side is now accessible.
-
With a screwdriver, unscrew all highlighted screws.
-
-
-
The LCD Screen can now be removed from the LCD Screen Mount.
-
Carefully remove the LCD Screen, as it is attached by another ribbon cable.
-
-
-
To remove the LCD Screen, flip the switch on the ribbon cable's container that is closest to the ribbon cable (highlighted by the red circle).
-
Carefully remove the ribbon cable from its compartment, and remove the LCD Screen.
-


To reassemble your device, follow these instructions in reverse order.
To reassemble your device, follow these instructions in reverse order.
Rückgängig: Ich habe diese Anleitung nicht absolviert.
4 weitere Personen haben diese Anleitung absolviert.
Team

Baylor, Team S1-G2, Williams Fall 2018 Mitglied von Baylor, Team S1-G2, Williams Fall 2018
BU-WILLIAMS-F18S1G2
4 Mitglieder
12 Anleitungen geschrieben
2 Kommentare
Ecran de rechange trouvé chez elecok.
Tuto testé, fonctionne aussi pour le Fuji HS20 EXR.
Bravo et Merci à Andrew et aux contributeurs
Thanks I have fixed the screen on my camera now it works perfect