Diese Version enthält möglicherweise inkorrekte Änderungen. Wechsle zur letzten geprüften Version.
Was du brauchst
-
Dieser Schritt ist noch nicht übersetzt. Hilf mit, ihn zu übersetzen!
-
Remove the screws from the bottom of the camera using the tri-wing screwdriver.
-
Three 5.4 mm tri-head screws.
-
-
Dieser Schritt ist noch nicht übersetzt. Hilf mit, ihn zu übersetzen!
-
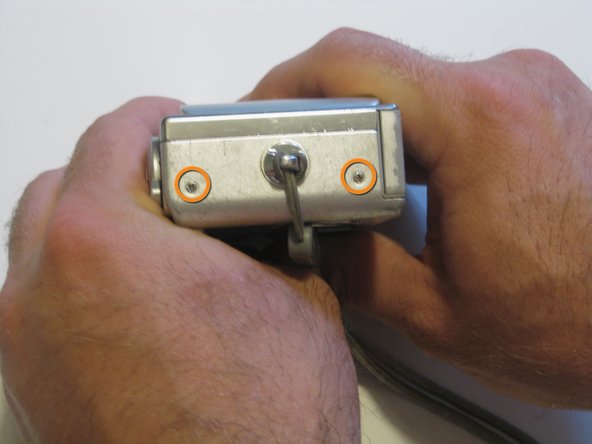
Remove screws from charger side of camera using the Phillips 00 screwdriver.
-
Two 3.3 mm Phillips #00 screws.
-
-
Dieser Schritt ist noch nicht übersetzt. Hilf mit, ihn zu übersetzen!
-
Remove screws from wrist-strap side of camera using the Phillips 00 screwdriver.
-
Two 3.3 mm Phillips #00 screws.
-
-
-
Dieser Schritt ist noch nicht übersetzt. Hilf mit, ihn zu übersetzen!
-
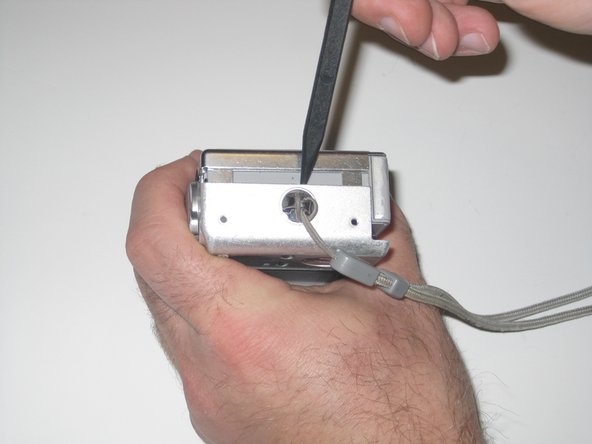
Separate the front and back casing using the spudger.
-
Gently pull apart the two casings.
-
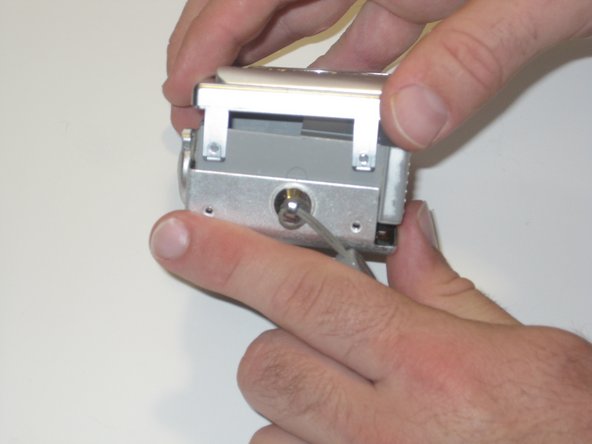
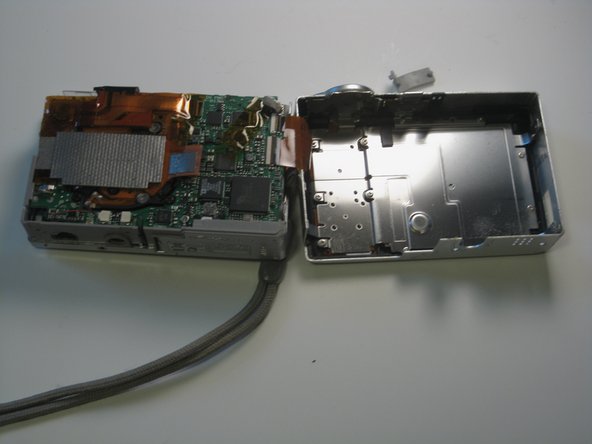
Pull the back casing away from the camera.
-
-
Dieser Schritt ist noch nicht übersetzt. Hilf mit, ihn zu übersetzen!
-
Remove screws from the casing covering the LCD using the Phillips 00 screwdriver.
-
Remove the fifteen 2.9 mm Phillips #00 screws.
-
-
Dieser Schritt ist noch nicht übersetzt. Hilf mit, ihn zu übersetzen!
-
Slide casing out using the spudger.
-
-
Dieser Schritt ist noch nicht übersetzt. Hilf mit, ihn zu übersetzen!
-
Gently remove the LCD display data cable by gripping the end that is connected to the motherboard and pulling out.
-


Rückgängig: Ich habe diese Anleitung nicht absolviert.
Ein:e weitere:r Nutzer:in hat diese Anleitung absolviert.
Team

Clemson, Team 13-4, Benson Spring 2013 Mitglied von Clemson, Team 13-4, Benson Spring 2013
CLEM-BENSON-S13S13G4
2 Mitglieder
16 Anleitungen geschrieben
3 Kommentare
Awesome guide! BEST WORK I'VE EVER SEEN ON A REPAIR GUIDE
Shutter button replacement was great too!
Daniel -