Einleitung
The main purpose of this page is to assure the owner of a Fujifilm Instax Mini 8 is capable of disassembling the camera in order to remove and replace the flash unit, if there was to ever be any problems with the flash. Before attempting repairs, please take note of certain risks of receiving shock from the camera's flash capacitor. Also make sure to ground yourself before operating on the camera's motherboard or you might discharge static to crucial components.
Was du brauchst
-
-
Remove the two Phillips #00 screws from the bottom of the camera.
-
Remove the two screws on the side of the camera.
-
Additionally, there are two screws in the battery compartment which also need to be removed.
-
-
-
-
Once all screws are removed, gently pry open the front casing with your hands or a prying tool.
-
-
-
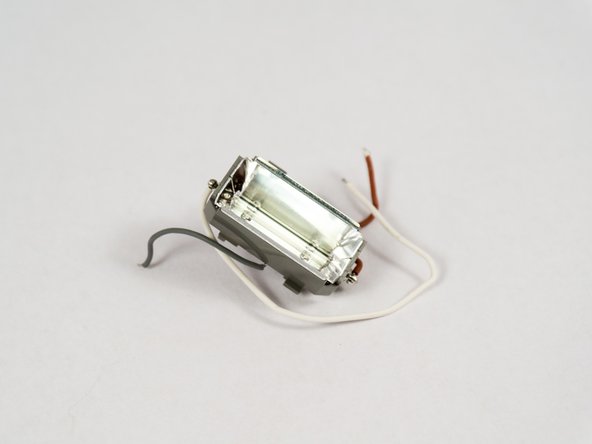
Unscrew the two screws attaching the flash to the main circuit board. The flash unit will detach away from the motherboard, now leaving just the connecting wires to remove next.
-
-
-
With a solder kit, heat the connecting solder points to open the connection, thus removing the connecting wires. There are many ways to do this, depending on the available tools on hand.
-


To reassemble your device, follow these instructions in reverse order.
To reassemble your device, follow these instructions in reverse order.
Rückgängig: Ich habe diese Anleitung nicht absolviert.
4 weitere Nutzer:innen haben diese Anleitung absolviert.

Team

USF Tampa, Team 4-1, Meier Fall 2015 Mitglied von USF Tampa, Team 4-1, Meier Fall 2015
USFT-MEIER-F15S4G1
4 Mitglieder
24 Anleitungen geschrieben
10 Kommentare
Where can I purchase the flash unit?
Hi, did you ever find out where to replace the flash light unit?