Einleitung
The quality of air in our homes can directly and significantly impact our overall health. Keeping a functioning air purifier can help to pull any pollutants that might be causing you harm, out of the air. In this guide, you will learn how to disassemble and replace the ionizer wires in a Fulminare H13 True HEPA Air Purifier.
The ionizer wire is what removes small particles from the air and "clean" the air using negative ions. If the wire isn't working, the air going through won't be cleaned. If the ionizer wires in your Fulminare H13 True HEPA Air Purifier fail, follow this guide to replace them.
Before starting this repair, turn off your unit and unplug it from the power outlet.
Was du brauchst
-
-
Make sure that the air purifier is fully powered off and unplugged from the outlet. This ensures that we can prevent any accidents from happening.
-
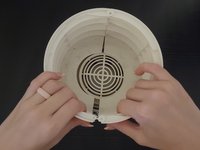
Hold the lid and twist it counterclockwise to unlock the lid. Once you have unlocked the lid, lift it so that you see the inner black filter. Make sure to keep the lid in a safely stored area.
-
-
-
Find the two small screws that are holding the filter in place, as shown in the picture.
-
Next, use a Phillips-head screwdriver that will properly fit into the screws. Gently unscrew the screws ( 2 mm ). Once unscrewed, make sure to keep the screws in a safe place where they won’t get lost.
-
After, the screws are in a safe place, carefully pull the filter out of its place. Be careful when taking out the filter so that it doesn’t get damaged.
-
-
-
-
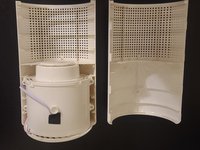
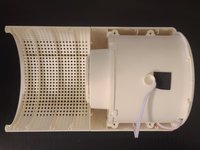
We now have the outer shell of the filter. In order to separate it, we need to find the clips that hold the halves of the air purifiers shell together.
-
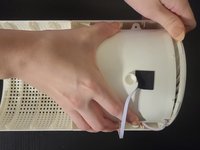
Carefully pull apart the clips by placing your hands on both sides of the shell, and gently take it apart. You can apply a controlled amount of pressure due to the fact that the clips may be tight. It is okay to take a longer time on this part to avoid damage to the outer shell.
-
-
-
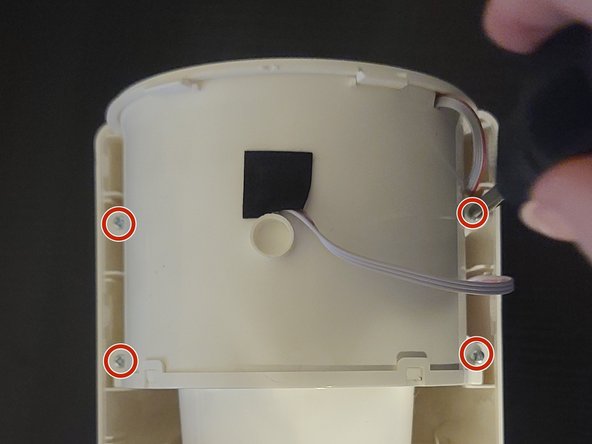
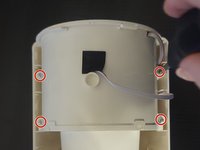
Next, you will see a fan. Locate the four screws that hold the fan together as shown on the left. The screws are 3.2 mm in size.
-
Use the same screwdriver as before-Phillips-head screwdriver- and unscrew all the screws, and then place them in a secure area. Make sure not to get them mixed up with the other screws!
-
Lastly, we are going to detach the fan. Once the screws are removed, gently lift the fan from its place. Along with that, if clips are holding the fan, undo them before pulling the fan out.
-
-
-
Now we are going to unscrew the motherboard. Find the screws that are securing the motherboard. There are two 1.25 mm screws holding it in the casing.
-
Use a Phillips screwdriver to unscrew the screws. Once they’re unscrewed, set them aside in a secure area.
-
Double check that the motherboard isn't connected to other clips and wires before doing anything else.
-
-
-
Make sure that the cables are attached to the motherboard.
-
When removing the cables safely, pull the cables in the same direction in which the wires are running so that it doesn’t damage the motherboard.
-


To reassemble your device, follow these instructions in reverse order.
To reassemble your device, follow these instructions in reverse order.

Team

University of North Texas, Team 2-18, Kilpatrick Summer 2023 Mitglied von University of North Texas, Team 2-18, Kilpatrick Summer 2023
UNT-KILPATRICK-SU23S2G18
1 Mitglied
1 Anleitung geschrieben