Zum Hauptinhalt wechseln

GATEWAY ML6720 Hard Drive Replacement

Was du brauchst

  1. GATEWAY ML6720 Hard Drive Replacement, Hard Drive: Schritt 1, Bild 1 von 1
    • Flip the laptop on to its backside.

  2. GATEWAY ML6720 Hard Drive Replacement: Schritt 2, Bild 1 von 1
    • Locate the hard drive at the bottom left corner of the laptop's backside.

  3. GATEWAY ML6720 Hard Drive Replacement: Schritt 3, Bild 1 von 2 GATEWAY ML6720 Hard Drive Replacement: Schritt 3, Bild 2 von 2
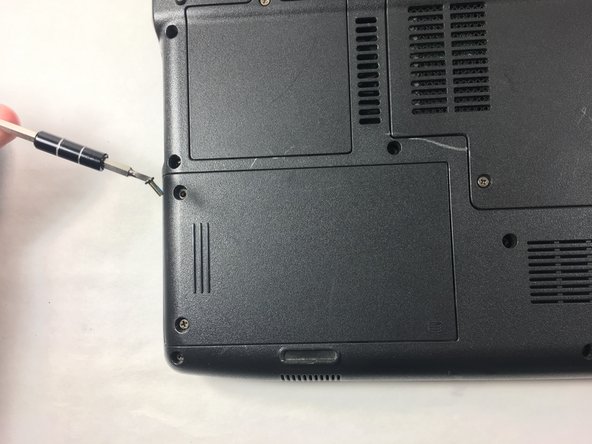
    • Insert the correct screwdriver mentioned in this guide.

    • Fully loosen and remove each of the two screws located at the top left and bottom left corners of the hard drive's cover plate.

  4. GATEWAY ML6720 Hard Drive Replacement: Schritt 4, Bild 1 von 1
    • Slide the hard drive's cover plate out to the left and take it off.

  5. GATEWAY ML6720 Hard Drive Replacement: Schritt 5, Bild 1 von 1
    • Pop the hard drive out of the compartment.

Abschluss

To reassemble your device, follow these instructions in reverse order.

Nathan Da Silva

Mitglied seit: 10/19/16

401 Reputation

4 Anleitungen geschrieben

Team

UMass Dartmouth, Team 2-3, Isaacson Fall 2016 Mitglied von UMass Dartmouth, Team 2-3, Isaacson Fall 2016

UMASSD-ISAACSON-F16S2G3

2 Mitglieder

10 Anleitungen geschrieben

0 Kommentare

Kommentar hinzufügen

Seitenaufrufe:

Letzte 24 Stunden: 0

Letzte 7 Tage: 3

Letzte 30 Tage: 8

Insgesamt: 341