Zum Hauptinhalt wechseln

Galaxy Tab S 10.5 Camera Replacement

Was du brauchst

  1. Galaxy Tab S 10.5 Camera Replacement, Disassembling Galaxy Tab S 10.5 Back Cover: Schritt 1, Bild 1 von 2 Galaxy Tab S 10.5 Camera Replacement, Disassembling Galaxy Tab S 10.5 Back Cover: Schritt 1, Bild 2 von 2
    • Place the plastic opening tool into the SD card slot or charge port.

    • Try in an upward motion until you see a separation between the tablet and back cover.

  2. Galaxy Tab S 10.5 Camera Replacement: Schritt 2, Bild 1 von 1
    • Work around the entire device by sliding the plastic opening tool around the rim.

    • If this is the first time, it will be hard to separate the back cover from the tablet.

    • The clips are approximately 5 cm apart. While working around the device, the clips will make a dislocating sound when disconnected.

  3. Galaxy Tab S 10.5 Camera Replacement: Schritt 3, Bild 1 von 1
    • Remove the back cover once all links have been separated.

    • Be careful when touching any of the internal components of the tablet.

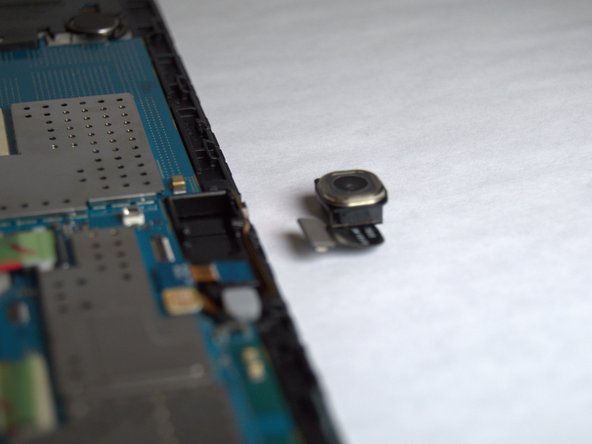
  4. Galaxy Tab S 10.5 Camera Replacement, Camera: Schritt 4, Bild 1 von 3 Galaxy Tab S 10.5 Camera Replacement, Camera: Schritt 4, Bild 2 von 3 Galaxy Tab S 10.5 Camera Replacement, Camera: Schritt 4, Bild 3 von 3
    • Use a spudger to disconnect the camera from the motherboard and then remove the camera.

Abschluss

To reassemble your device, follow these instructions in reverse order.

Ein:e weitere:r Nutzer:in hat diese Anleitung absolviert.

Jordan Soto

Mitglied seit: 08/26/15

3.249 Reputation

6 Anleitungen geschrieben

Team

USF Tampa, Team 3-2, Eyestone Fall 2015 Mitglied von USF Tampa, Team 3-2, Eyestone Fall 2015

USFT-EYESTONE-F15S3G2

3 Mitglieder

20 Anleitungen geschrieben

0 Kommentare

Kommentar hinzufügen

Seitenaufrufe:

Letzte 24 Stunden: 1

Letzte 7 Tage: 1

Letzte 30 Tage: 1

Insgesamt: 2,522