Einleitung
Hier wird der Austausch der Lautsprecher gezeigt.
Was du brauchst
-
-
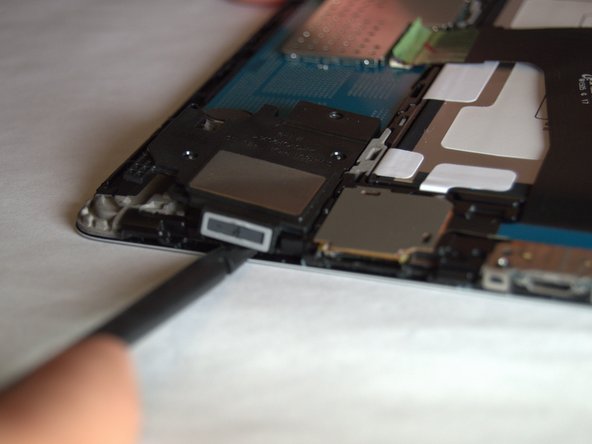
Setze ein Plastiköffnungswekzeug in den Spalt am SD Kartenleser oder der Ladebuchse.
-
Hebe nach oben, bis sich Rückteil und Tablet trennen.
-
-
-
Schiebe das Werkzeug rings um das Tablet.
Both plastic tools broke within the first two minutes of use. Had to resort to a narrow conventional flat screwdriver.
-
-
-
Wenn alle Rasten geöffnet sind kannst du das Rückteil abnehmen.
I’ve taken the back cover off my Samsung tablet, and in the process I have torn one of the little orange plastic connectors that are attached to the back cover. The connector I’ve damaged is the second one in on top left in the picture above. Can you please tell me if I need to replace this before I can get the tablet to work?
Thanks.
If you remove just the back cover - which to the uninitiated does look less scary than trying to get between the bezel and the display - you will destroy the tiny plastic rivets that lock the cover onto the bezel. More importantly, you will then find that getting to the parts you need to replace is rendered impossible because they will be hidden under the bezel, which of course will still be in place. So the correct way to take this tablet apart is the more challenging way i.e. separate the front display from the bezel and rear. But with care and the right tools this is still not too difficult. And if you are in any doubt about this, it is worth pointing out that in all of the photos below from Step 4 onwards, the work shown is taking place with the bezel removed. There is nothing written in this guide to indicate that this had to be done.
Have just gone through this process, successfully having read this and other guides and I totally agree with PhilipHN that the most reliable is the slightly scarier approach of removing the front display from the bezel and rear. It is easier overall, you just have to attack it confidently (but gently!).
-
-
-
-
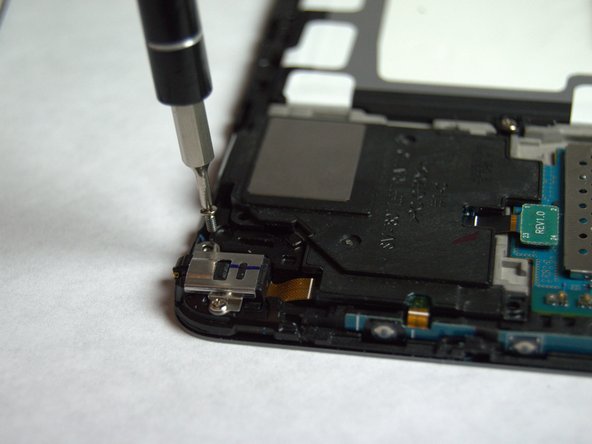
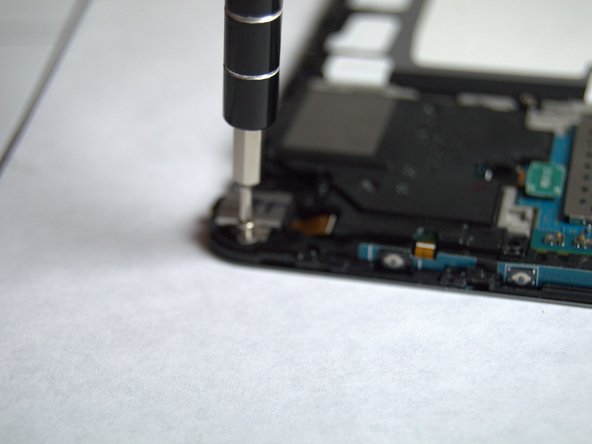
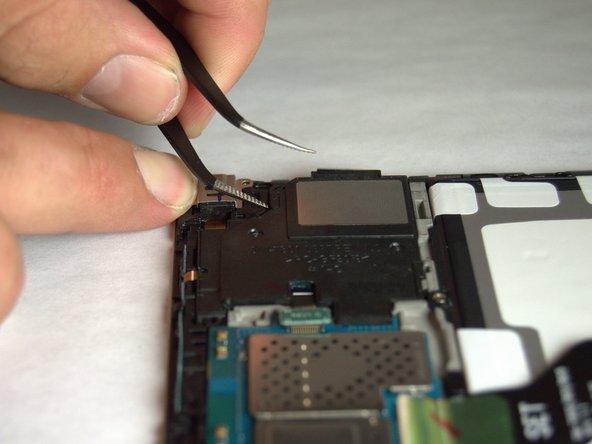
Fange am rechten Lautsprecher an und entfrene die 10 mm Kreuzschlitzschraube #000.
-
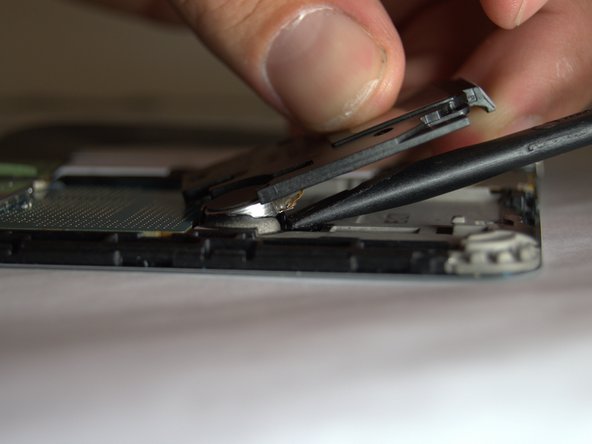
Löse den Lautsprecher mit einem Spudger.
-
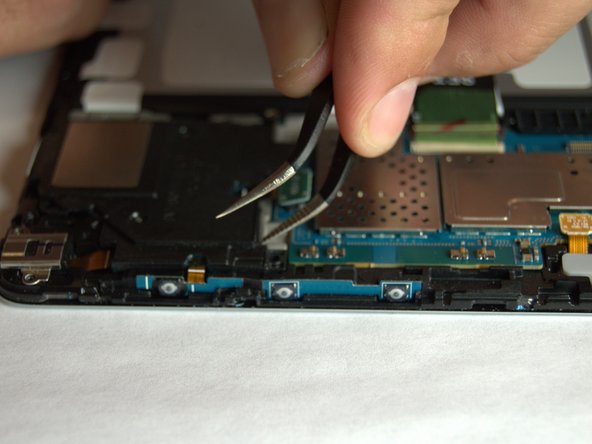
Zwänge den Spudger neben dem Verstärker ein und löse ihn aus der Klebeverbindung.
-
-
-
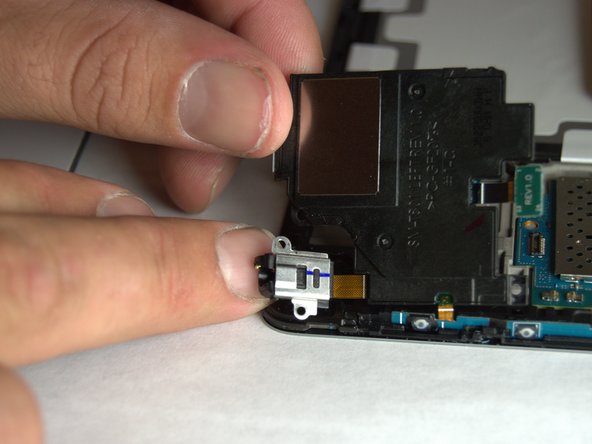
Ziehe den Lautsprecher heraus und lege ihn zur Seite um die restlichen Verbindungen zu lösen.
-
-
-
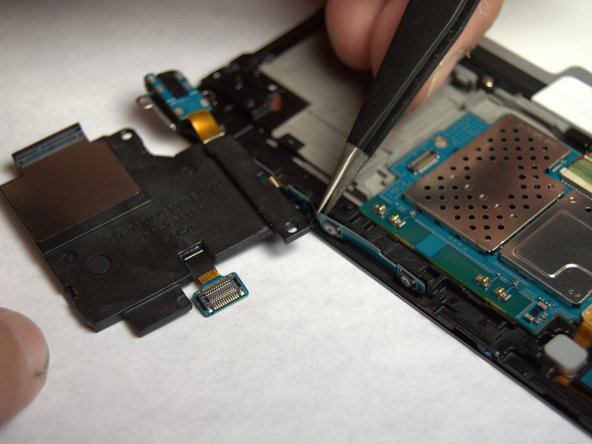
Es gibt vier Vertiefungen am Rand, die du benutzen kannst um den Streifen der an der Seite festgeklebt ist, zu lösen.
-
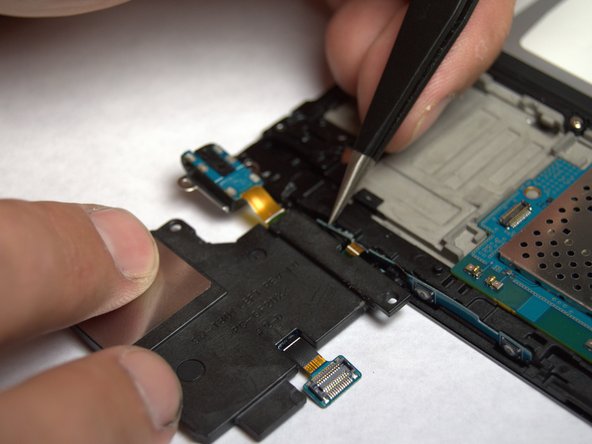
Setze die Pinzette in jede der Vertiefungen um sorgfältig den Streifen zu entfernen.
-


Um dein Gerät wieder zusammen zu setzen folge den Schritten in umgekehrter Reihenfolge.
Um dein Gerät wieder zusammen zu setzen folge den Schritten in umgekehrter Reihenfolge.
Rückgängig: Ich habe diese Anleitung nicht absolviert.
4 weitere Nutzer:innen haben diese Anleitung absolviert.
Besonderer Dank geht an diese Übersetzer:innen:
100%
VauWeh hilft uns, die Welt in Ordnung zu bringen! Wie kann ich mithelfen?
Hier starten ›
Team

USF Tampa, Team 3-2, Eyestone Fall 2015 Mitglied von USF Tampa, Team 3-2, Eyestone Fall 2015
USFT-EYESTONE-F15S3G2
3 Mitglieder
20 Anleitungen geschrieben
3 Kommentare
Absolutely right. See my comment above. Carefully prising with the right tools between the display and the frame - the bezel - and working around the outside of the display will eventually cause the bezel to come away from the display with the back cover attached. You can then access the parts you need to get to.
Suggestion….add the necessary step of removing the frame that covers the left speaker. If you follow the instructions in this guide, you will not be able to access and remove the left speaker, which is critical considering the on off and volume switches are integral to the speaker.