Zum Hauptinhalt wechseln

Game Boy Micro Battery Cover Replacement

Was du brauchst

  1. Game Boy Micro Battery Cover Replacement, Battery Cover: Schritt 1, Bild 1 von 3 Game Boy Micro Battery Cover Replacement, Battery Cover: Schritt 1, Bild 2 von 3 Game Boy Micro Battery Cover Replacement, Battery Cover: Schritt 1, Bild 3 von 3
    • Remove the Phillips #00 screw on the side of the Game Boy closest to the directional pad.

    • Once the screw has been loosened, lift the cover off the back of the device.

  2. Game Boy Micro Battery Cover Replacement: Schritt 2, Bild 1 von 3 Game Boy Micro Battery Cover Replacement: Schritt 2, Bild 2 von 3 Game Boy Micro Battery Cover Replacement: Schritt 2, Bild 3 von 3
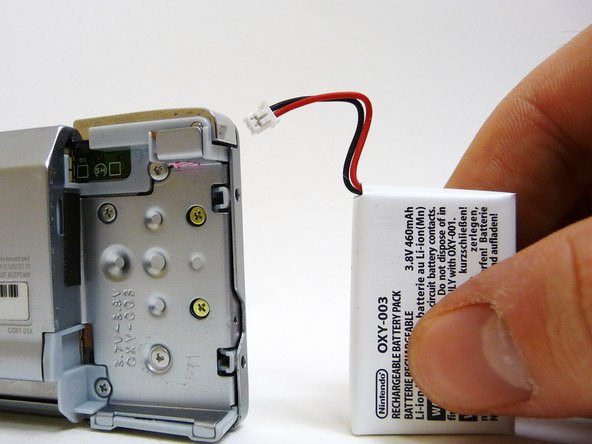
    • Once the back cover is removed, you should see that the battery is connected to the device by two wires and a plastic connector.

    • Gently grab the wires.

  3. Game Boy Micro Battery Cover Replacement: Schritt 3, Bild 1 von 2 Game Boy Micro Battery Cover Replacement: Schritt 3, Bild 2 von 2
    • Carefully pull the wires until the connector comes out of the device.

    • Be careful! Don't pull too hard, or you may rip the wires out from the connector.

    • When putting the battery back into the device, make sure the connector is put in exactly the way it came out.

Abschluss

To reassemble your device, follow these instructions in reverse order.

12 weitere Nutzer:innen haben diese Anleitung absolviert.

Jack

Mitglied seit: 01/21/10

396 Reputation

3 Anleitungen geschrieben

Team

Cal Poly, Team 8-46, Regan Winter 2010 Mitglied von Cal Poly, Team 8-46, Regan Winter 2010

CPSU-REGAN-W10S8G46

5 Mitglieder

25 Anleitungen geschrieben

0 Kommentare

Kommentar hinzufügen

Seitenaufrufe:

Letzte 24 Stunden: 2

Letzte 7 Tage: 24

Letzte 30 Tage: 82

Insgesamt: 15,483